


The White & Gold Look

Soft Festive Luxury Styling
Follow our simple step-by-step guide to style the timeless look with foliage, baubles and texture. Watch the video below for the full look.
Watch The look
Come to life
Come to life
Discover how to style white and gold decorations in ourvideo, creating a beautifully layered Christmas look with soft texture, warmth and elegant festive detail.

Step-by-step
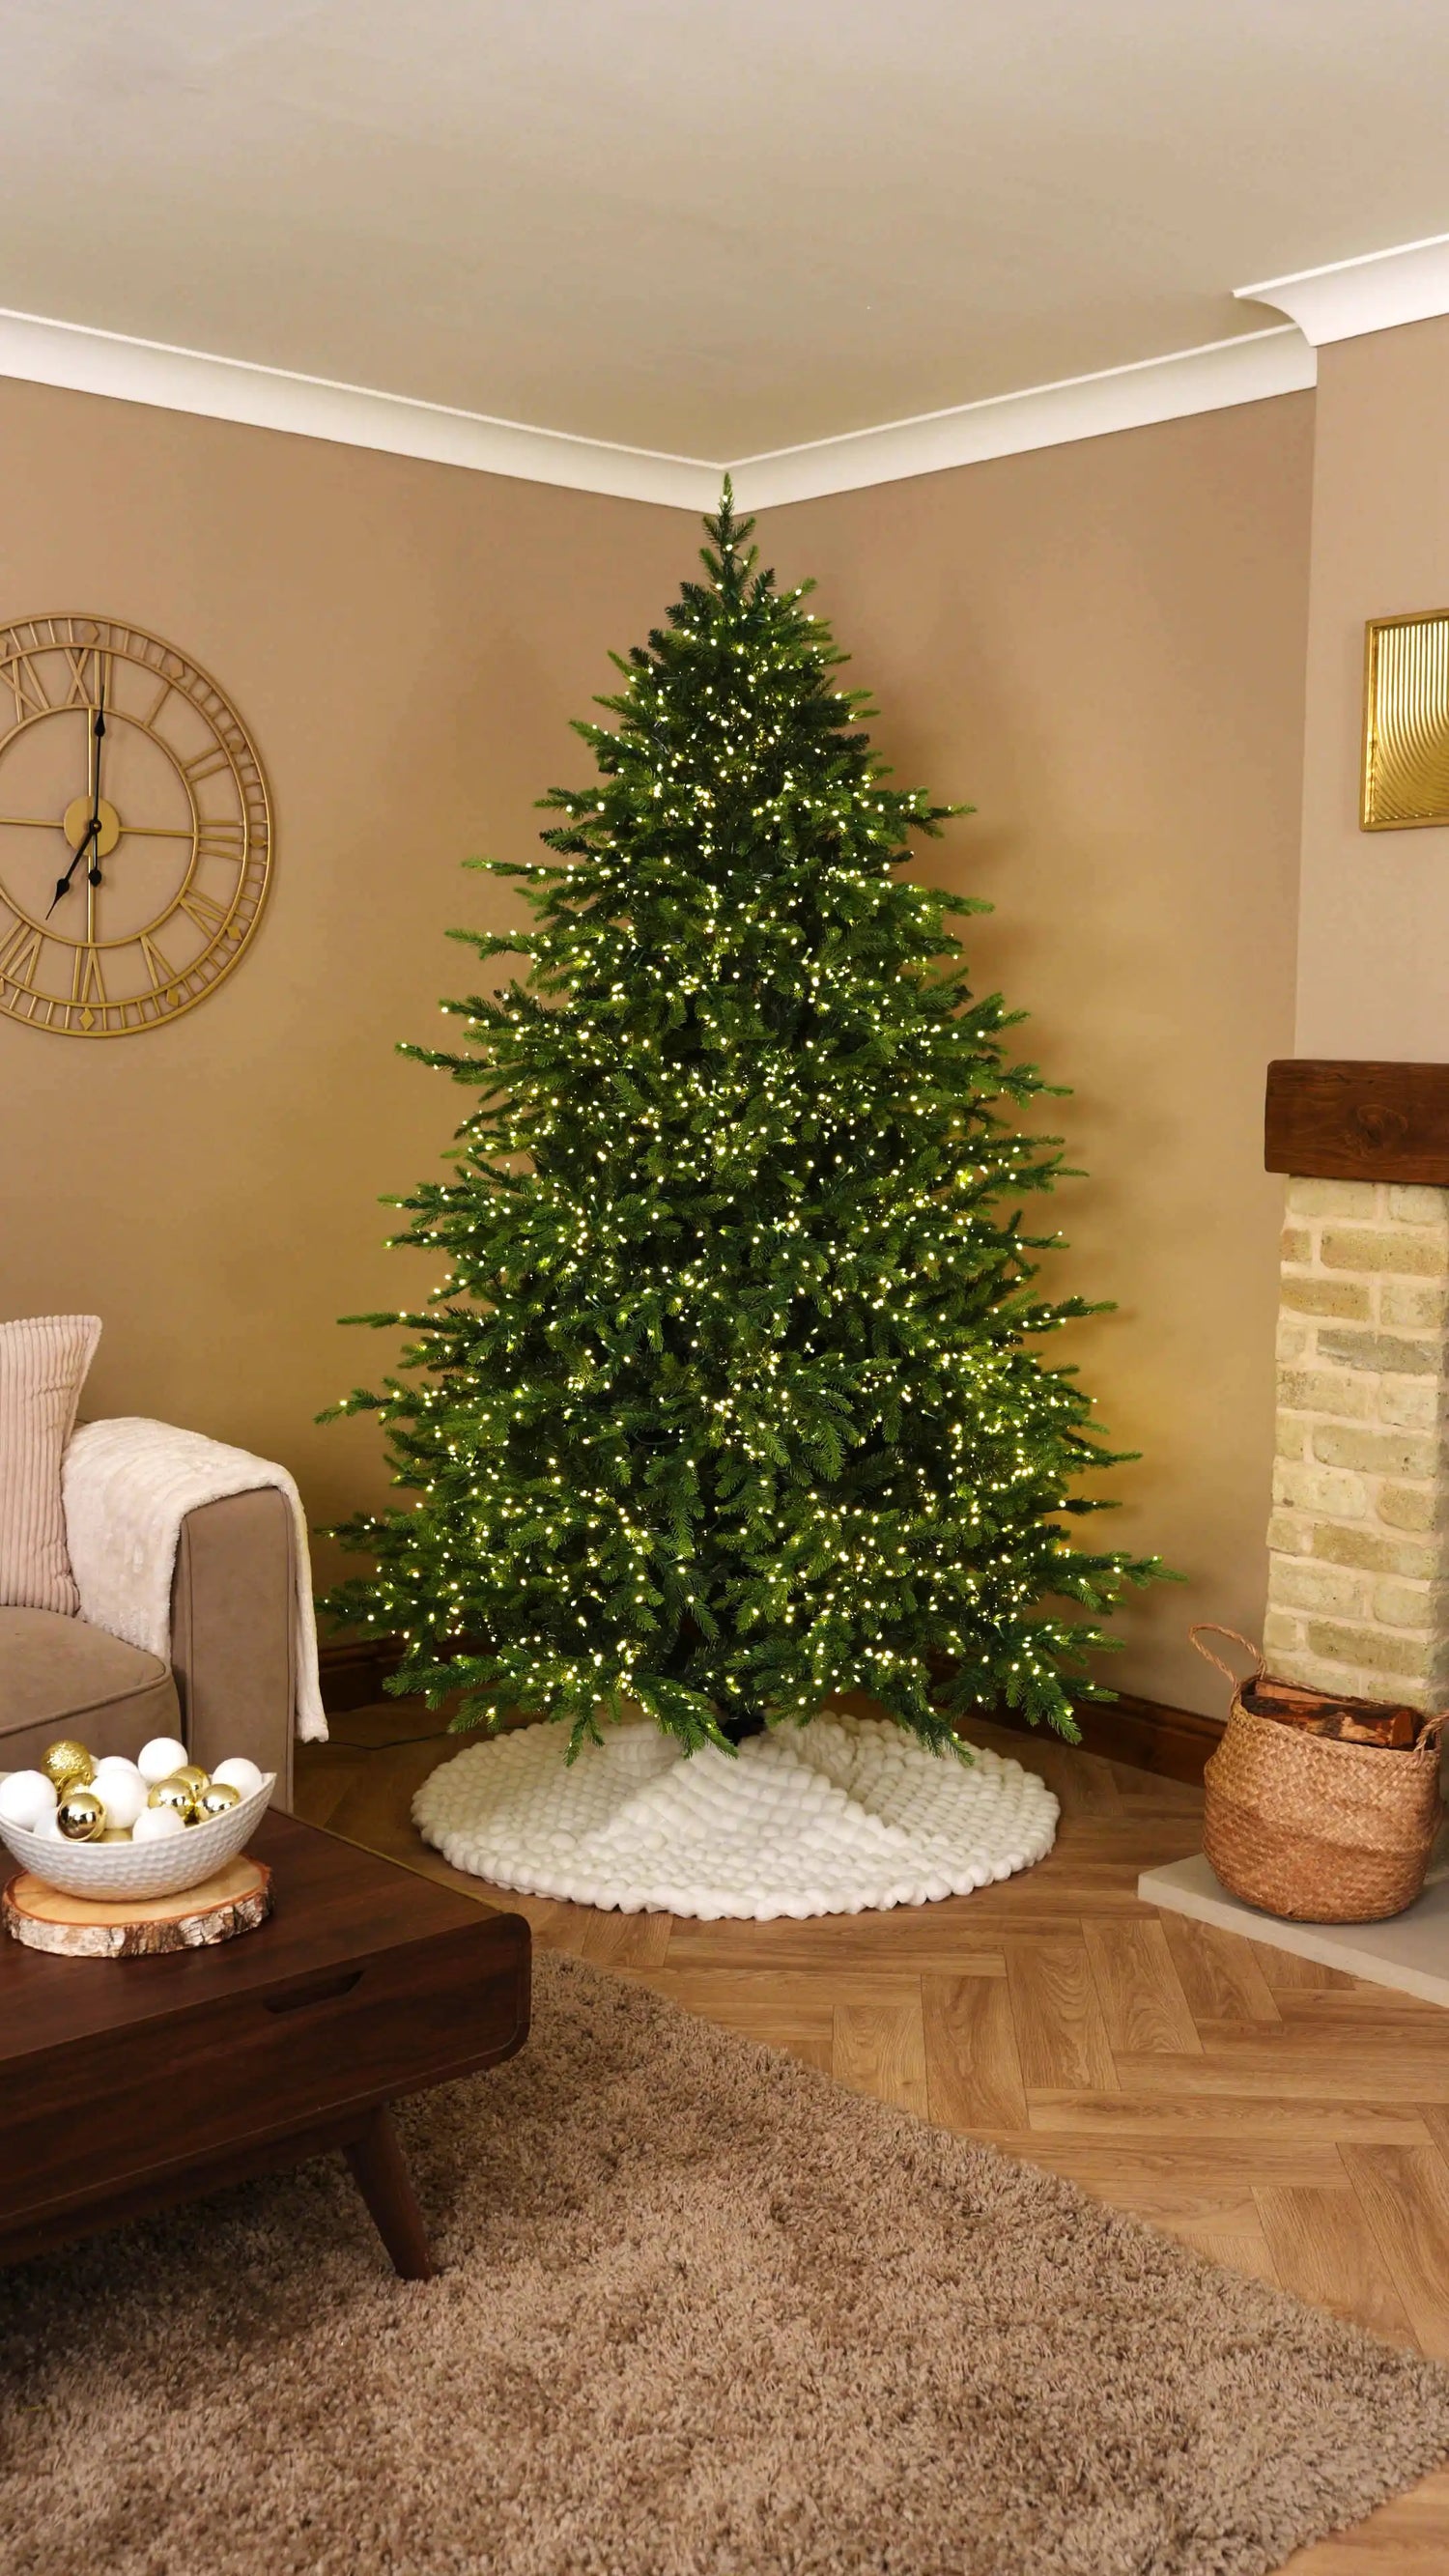
Make sure every branch has been carefully fluffed before you begin adding any decorations. Properly shaping your tree at the beginning creates a fuller silhouette and gives the bauble garlands, mesh and sprays somewhere to sit naturally.
To help, you can stand back every few minutes while fluffing to check how the tree is looking from a distance. This makes it much easier to spot any uneven areas that remain.
Once you’re happy with the shape, position your White Faux Fur Diamond Tree Skirt around the base before the rest of the decorating. Adding your tree skirt first makes it much easier to place neatly around the stand, while creating a soft foundation that complements the white and gold colour palette.
For this design, create five DIY bauble garlands across three layers. Before threading any baubles, use floral wire to measure each section directly against the tree so you know how long each garland needs to be.
For the top layer, measure two smaller garlands, leaving a gap between them for a larger bauble cluster positioned slightly off-centre to the right.
For the middle layer, measure one longer garland, leaving space for a larger bauble cluster at either end.
For the bottom layer, measure two medium-sized garlands, leaving a gap in the centre for another larger bauble cluster.
Leave a little extra floral wire on each length so there is enough to create loops at the ends and secure the garlands to the tree.

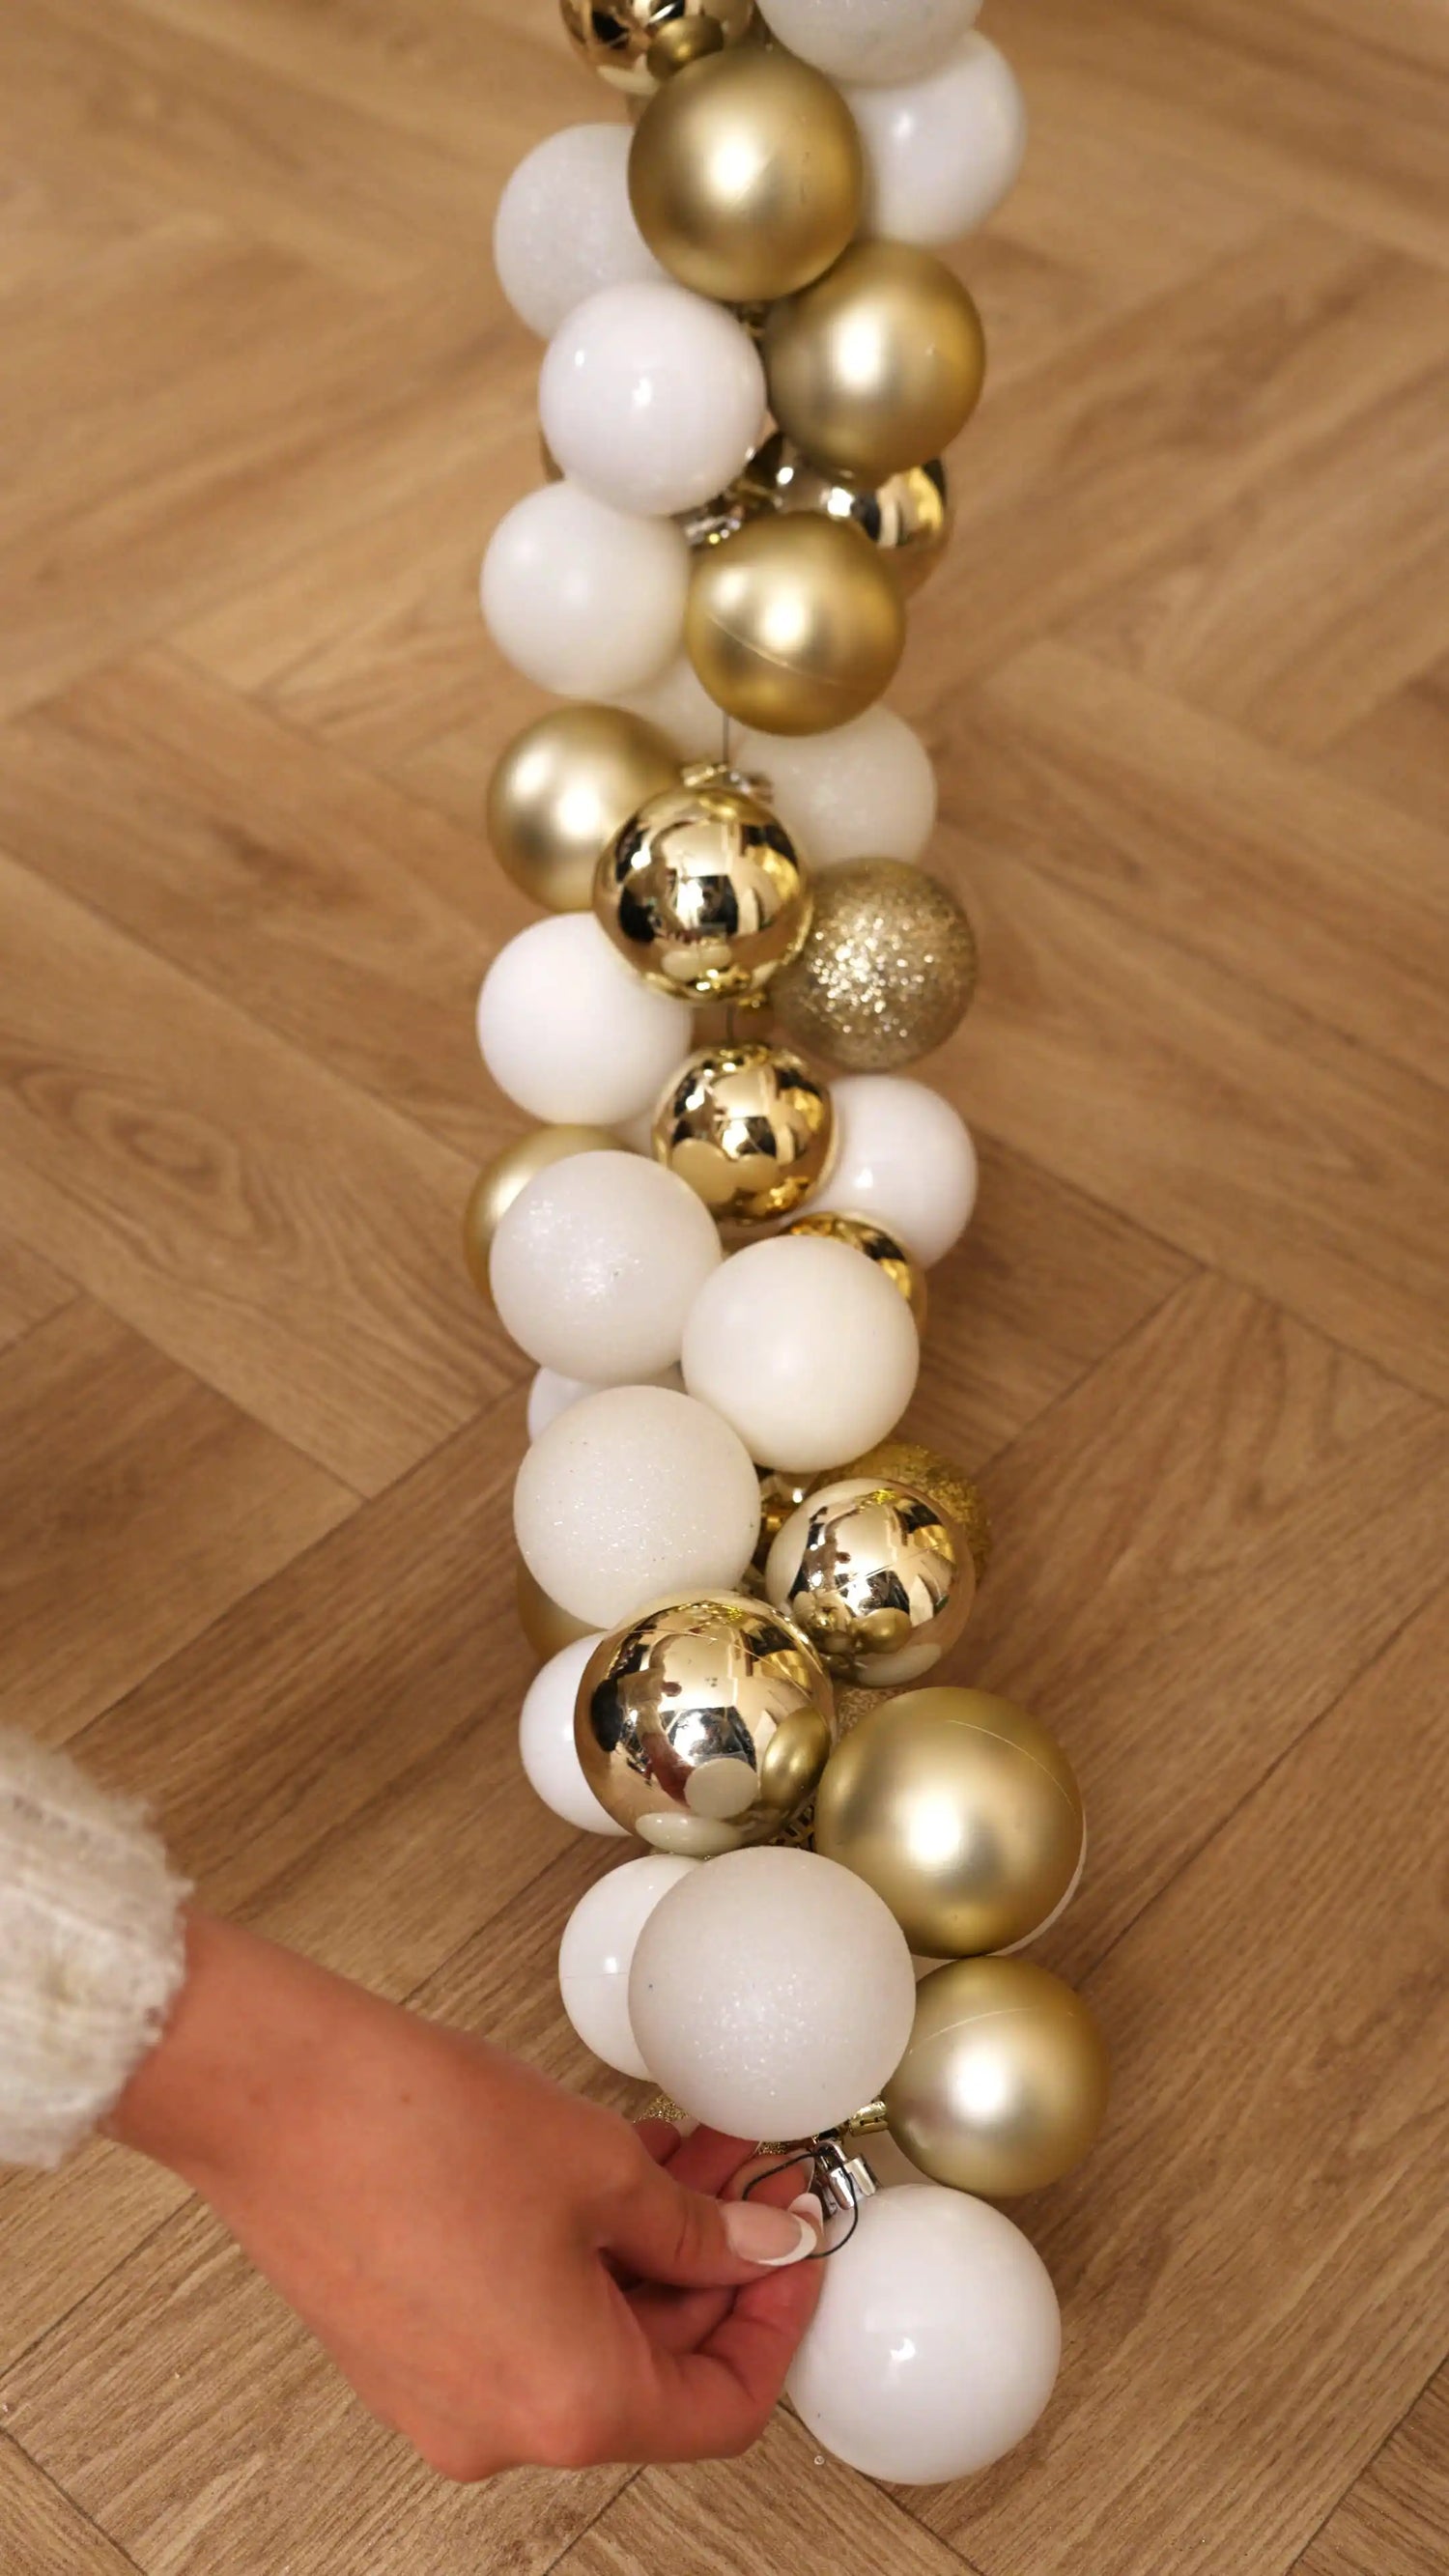
Thread your floral wire with 5cm and 6cm baubles in white and gold, mixing shiny, matt and glitter finishes as you work.
Alternate the colours, sizes and finishes rather than following a strict pattern. This creates a fuller, more clustered effect and helps the garlands feel balanced without looking too uniform.
Create all five garlands using the lengths measured in Step 2, making a loop at each end of the floral wire to keep the baubles secure and give yourself an easy way to attach them to the tree.
Next, create the larger bauble clusters using pipe cleaners. For the top layer, thread three 10cm baubles in a mixture of white and gold tones onto one pipe cleaner. For the remaining layers, create three clusters using three 15cm baubles per cluster, again mixing white and gold colours with different finishes.
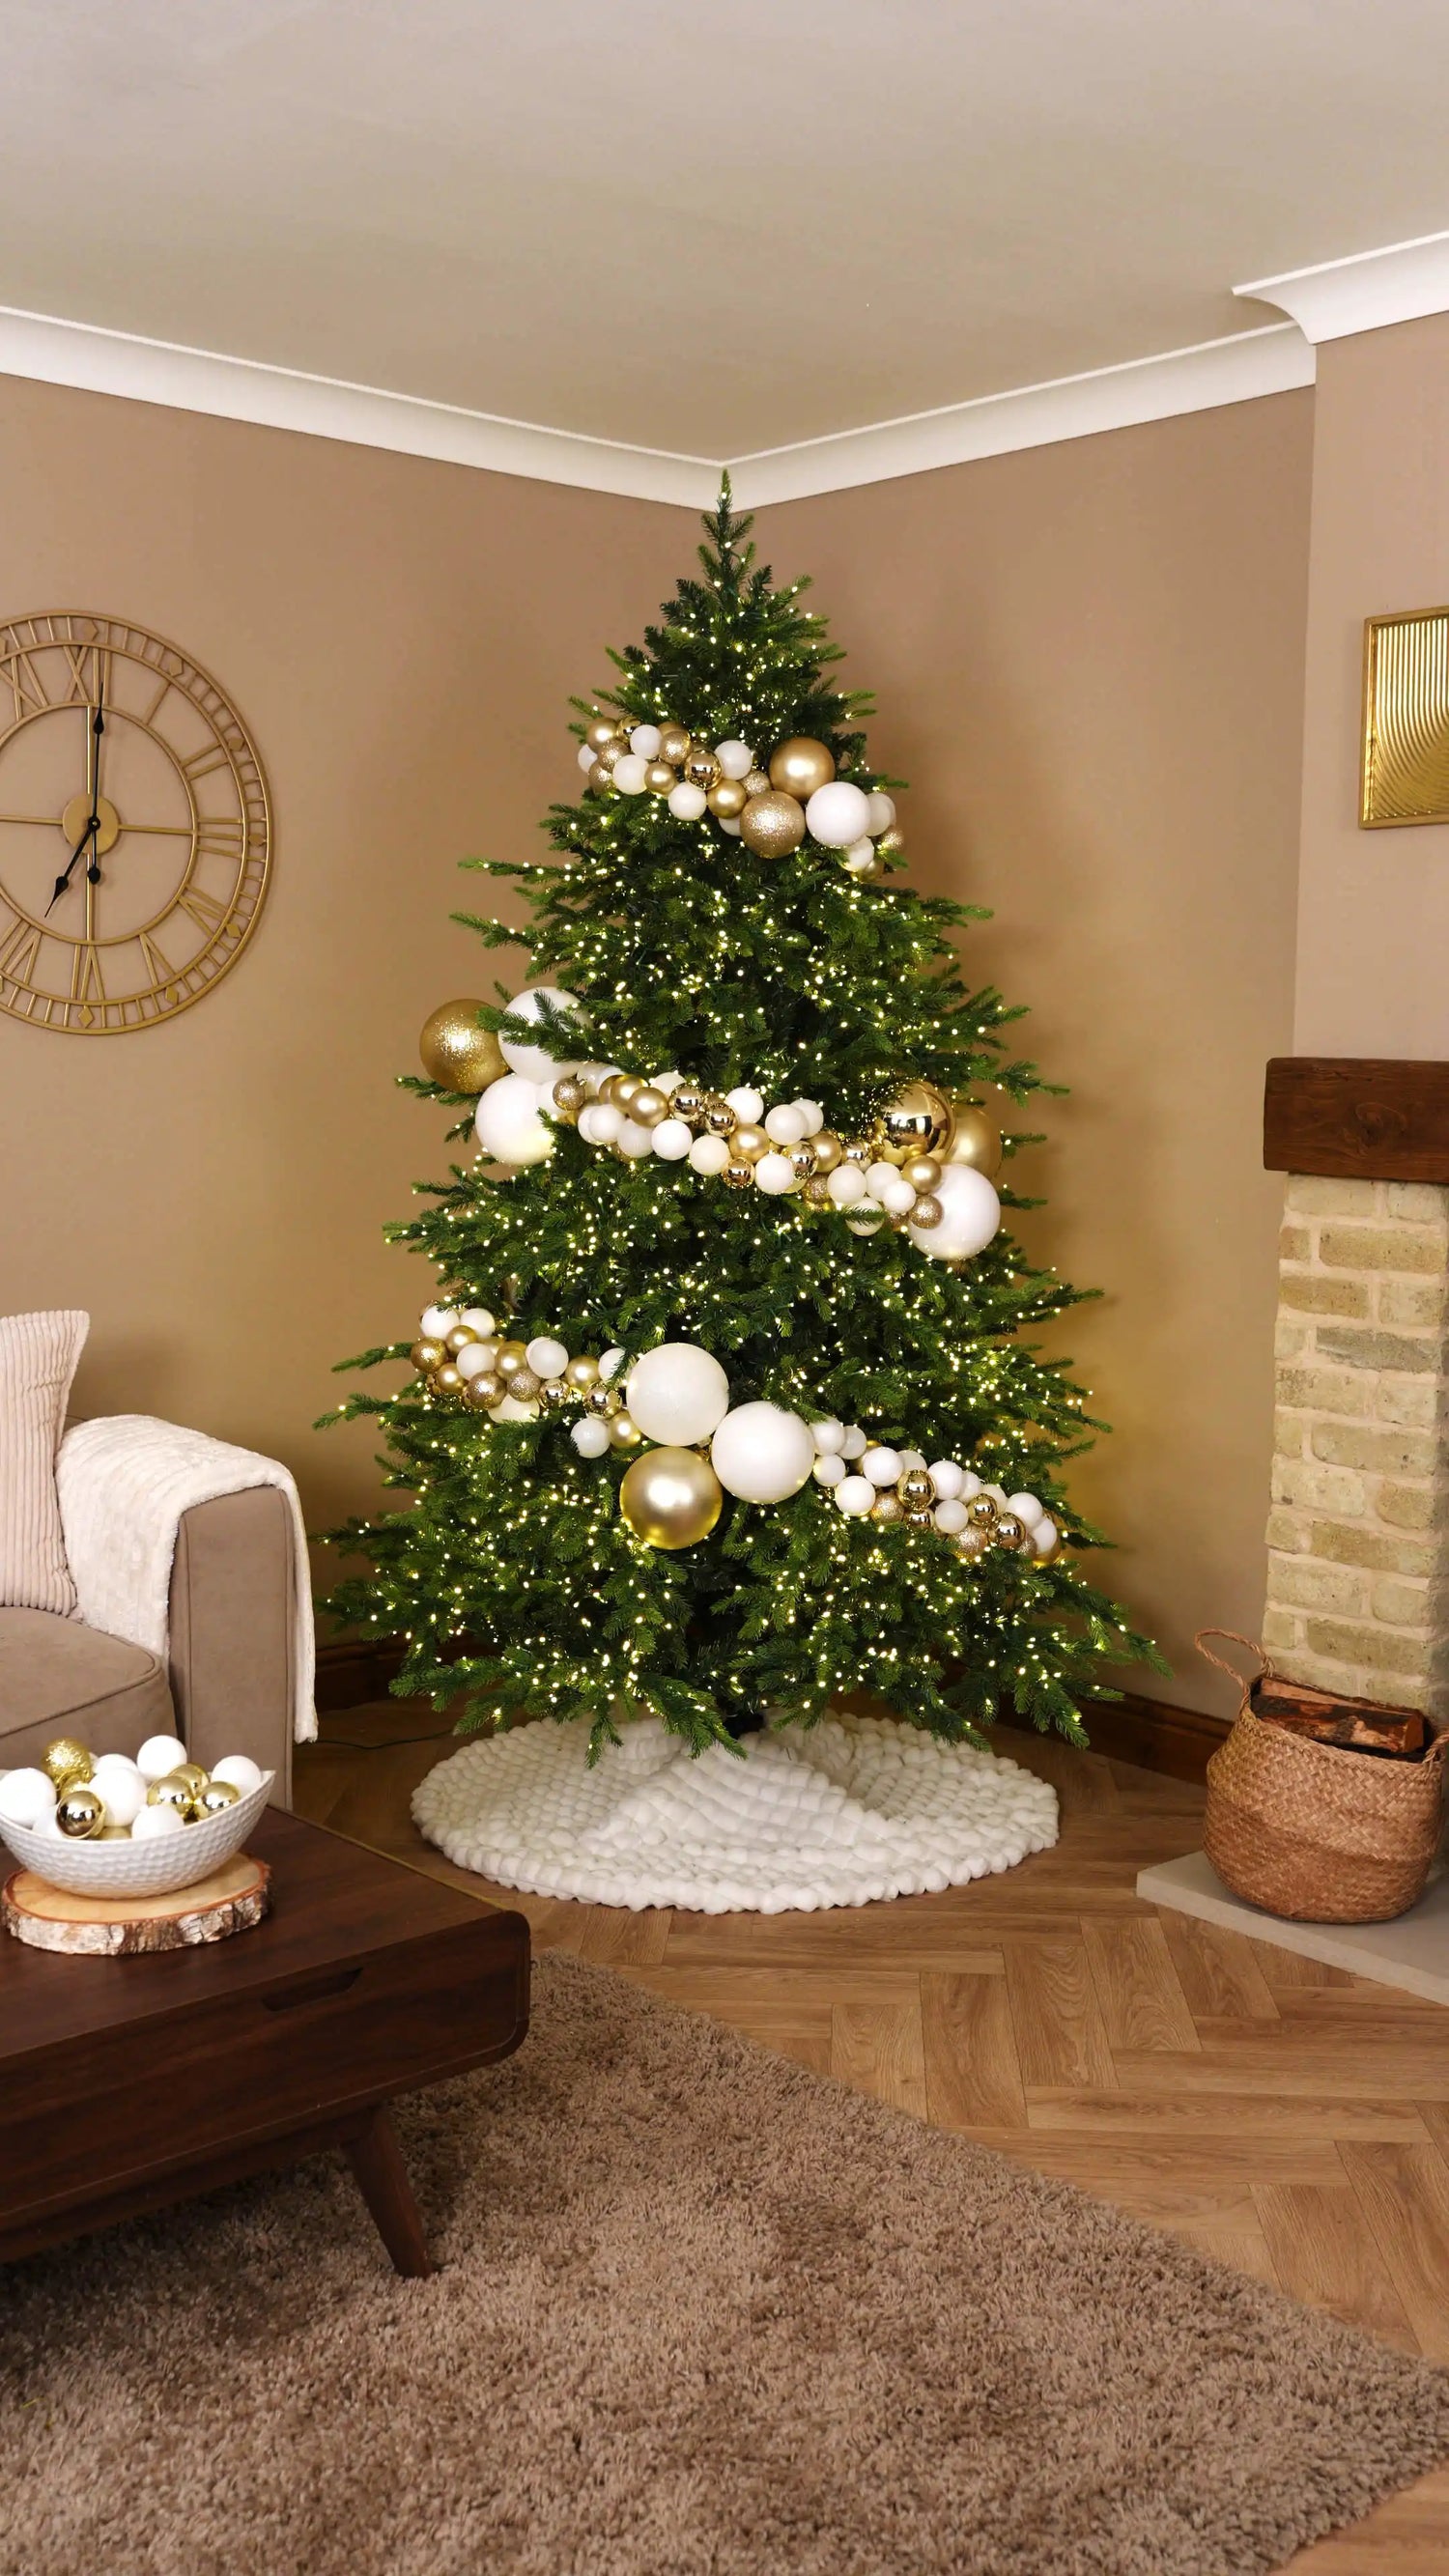
Start with the top layer of the tree. Secure the first smaller garland to the tree, then add the 10cm bauble cluster slightly off-centre to the right. Attach the second smaller garland to continue the line across the tree.
Once everything is attached, adjust the garlands and cluster until they sit together as one continuous arrangement. Nestle the baubles slightly into the branches so the layer feels integrated into the tree rather than sitting flat on the surface.

Move down to the middle layer and attach the longer bauble garland through the centre of the tree, then secure one 15cm bauble cluster at either end.
For the bottom layer, attach the first medium garland on the left, secure the remaining 15cm cluster in the centre, then add the second medium garland on the right.
Take a moment to look at all three layers together and adjust the positioning where needed. The garlands should create a flowing structure through the tree while still leaving enough space for the mesh, sprays and decorative picks.
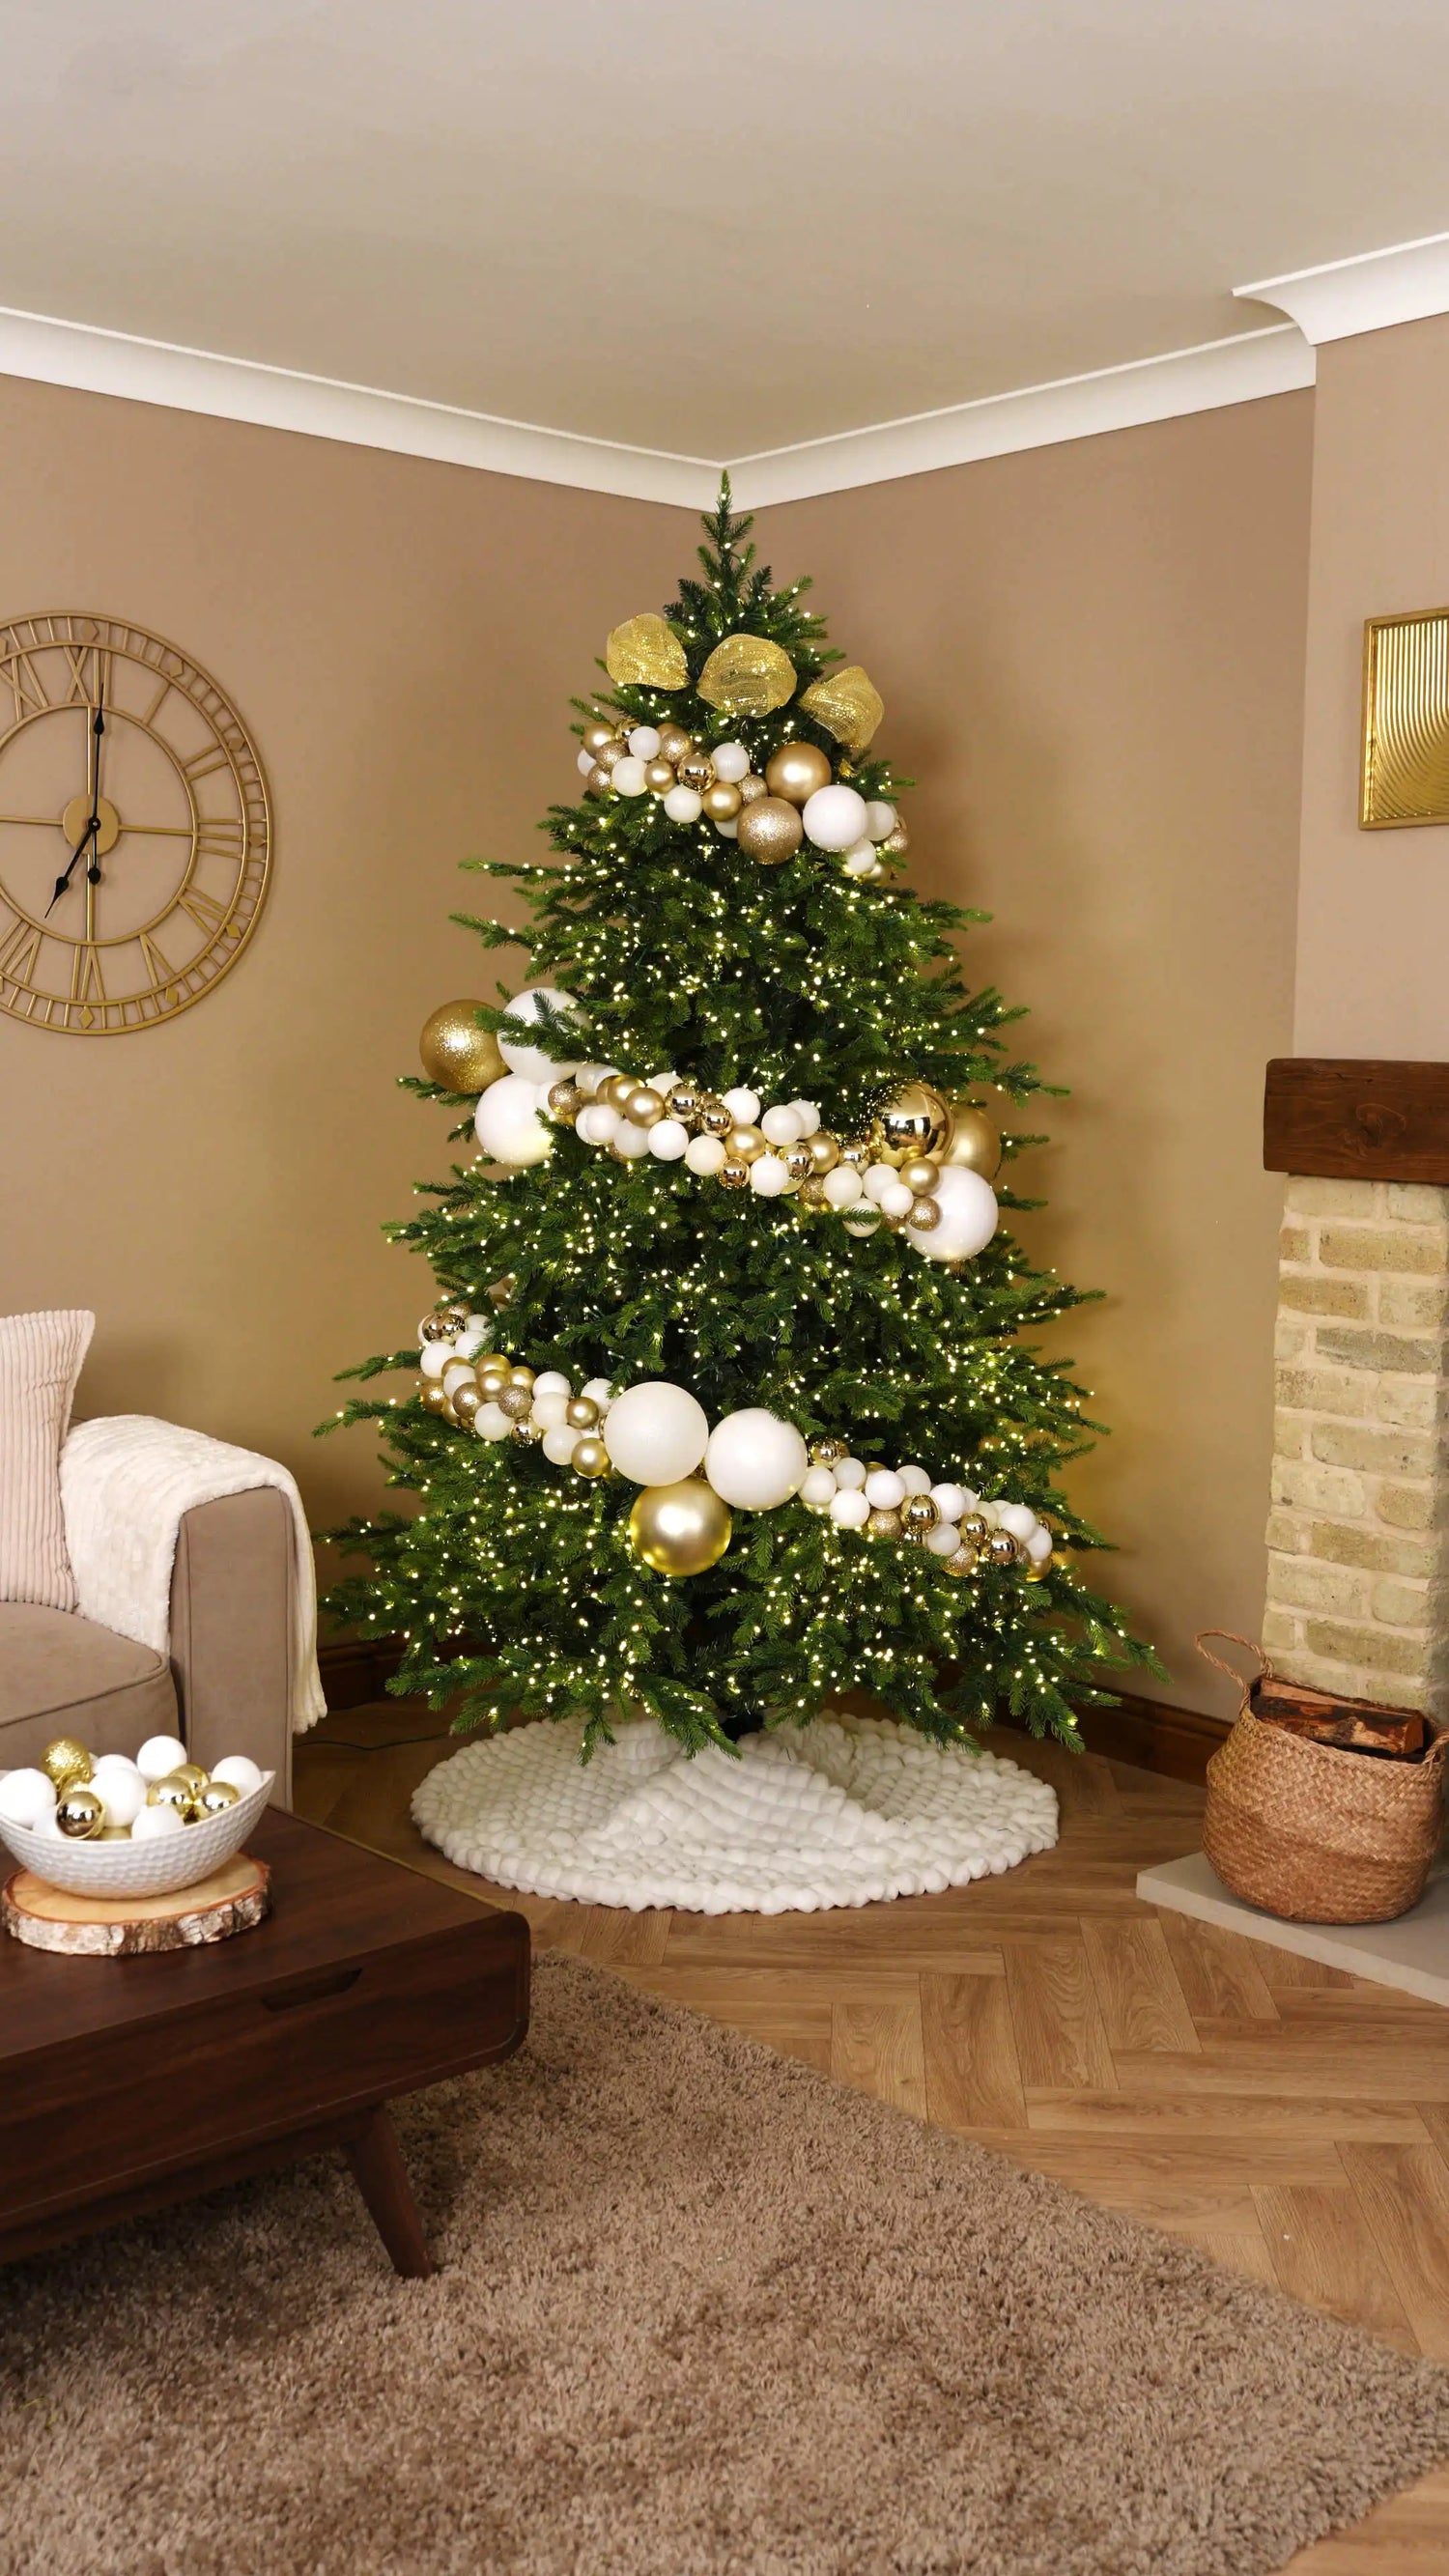
With the bauble garlands in place, begin filling the spaces between the layers with gold and white mesh.
Start with the gold mesh above the top bauble garland. Before cutting the mesh, hold the roll against the tree to measure the length needed for the section. Always leave a little extra, as creating the bunches uses more fabric than you might expect.
Secure one end of the mesh into the tree, then decide where you would like the first bunch to finish. Wrap a branch around the end of that section to hold it in place, allowing the fabric between each securing point to naturally gather.
Continue this process across the row, creating soft, even bunches as you work.
Continue adding mesh into the open spaces between the bauble garland layers, alternating between white and gold as you move down the tree.
Use the same bunching technique for every section, securing the end of each bunch with a branch before moving on to the next. This helps the mesh sit naturally within the tree and creates a soft, flowing effect around the bauble garlands.
Keep stepping back as you work so you can check the spacing and make sure the mesh flows evenly across the tree.
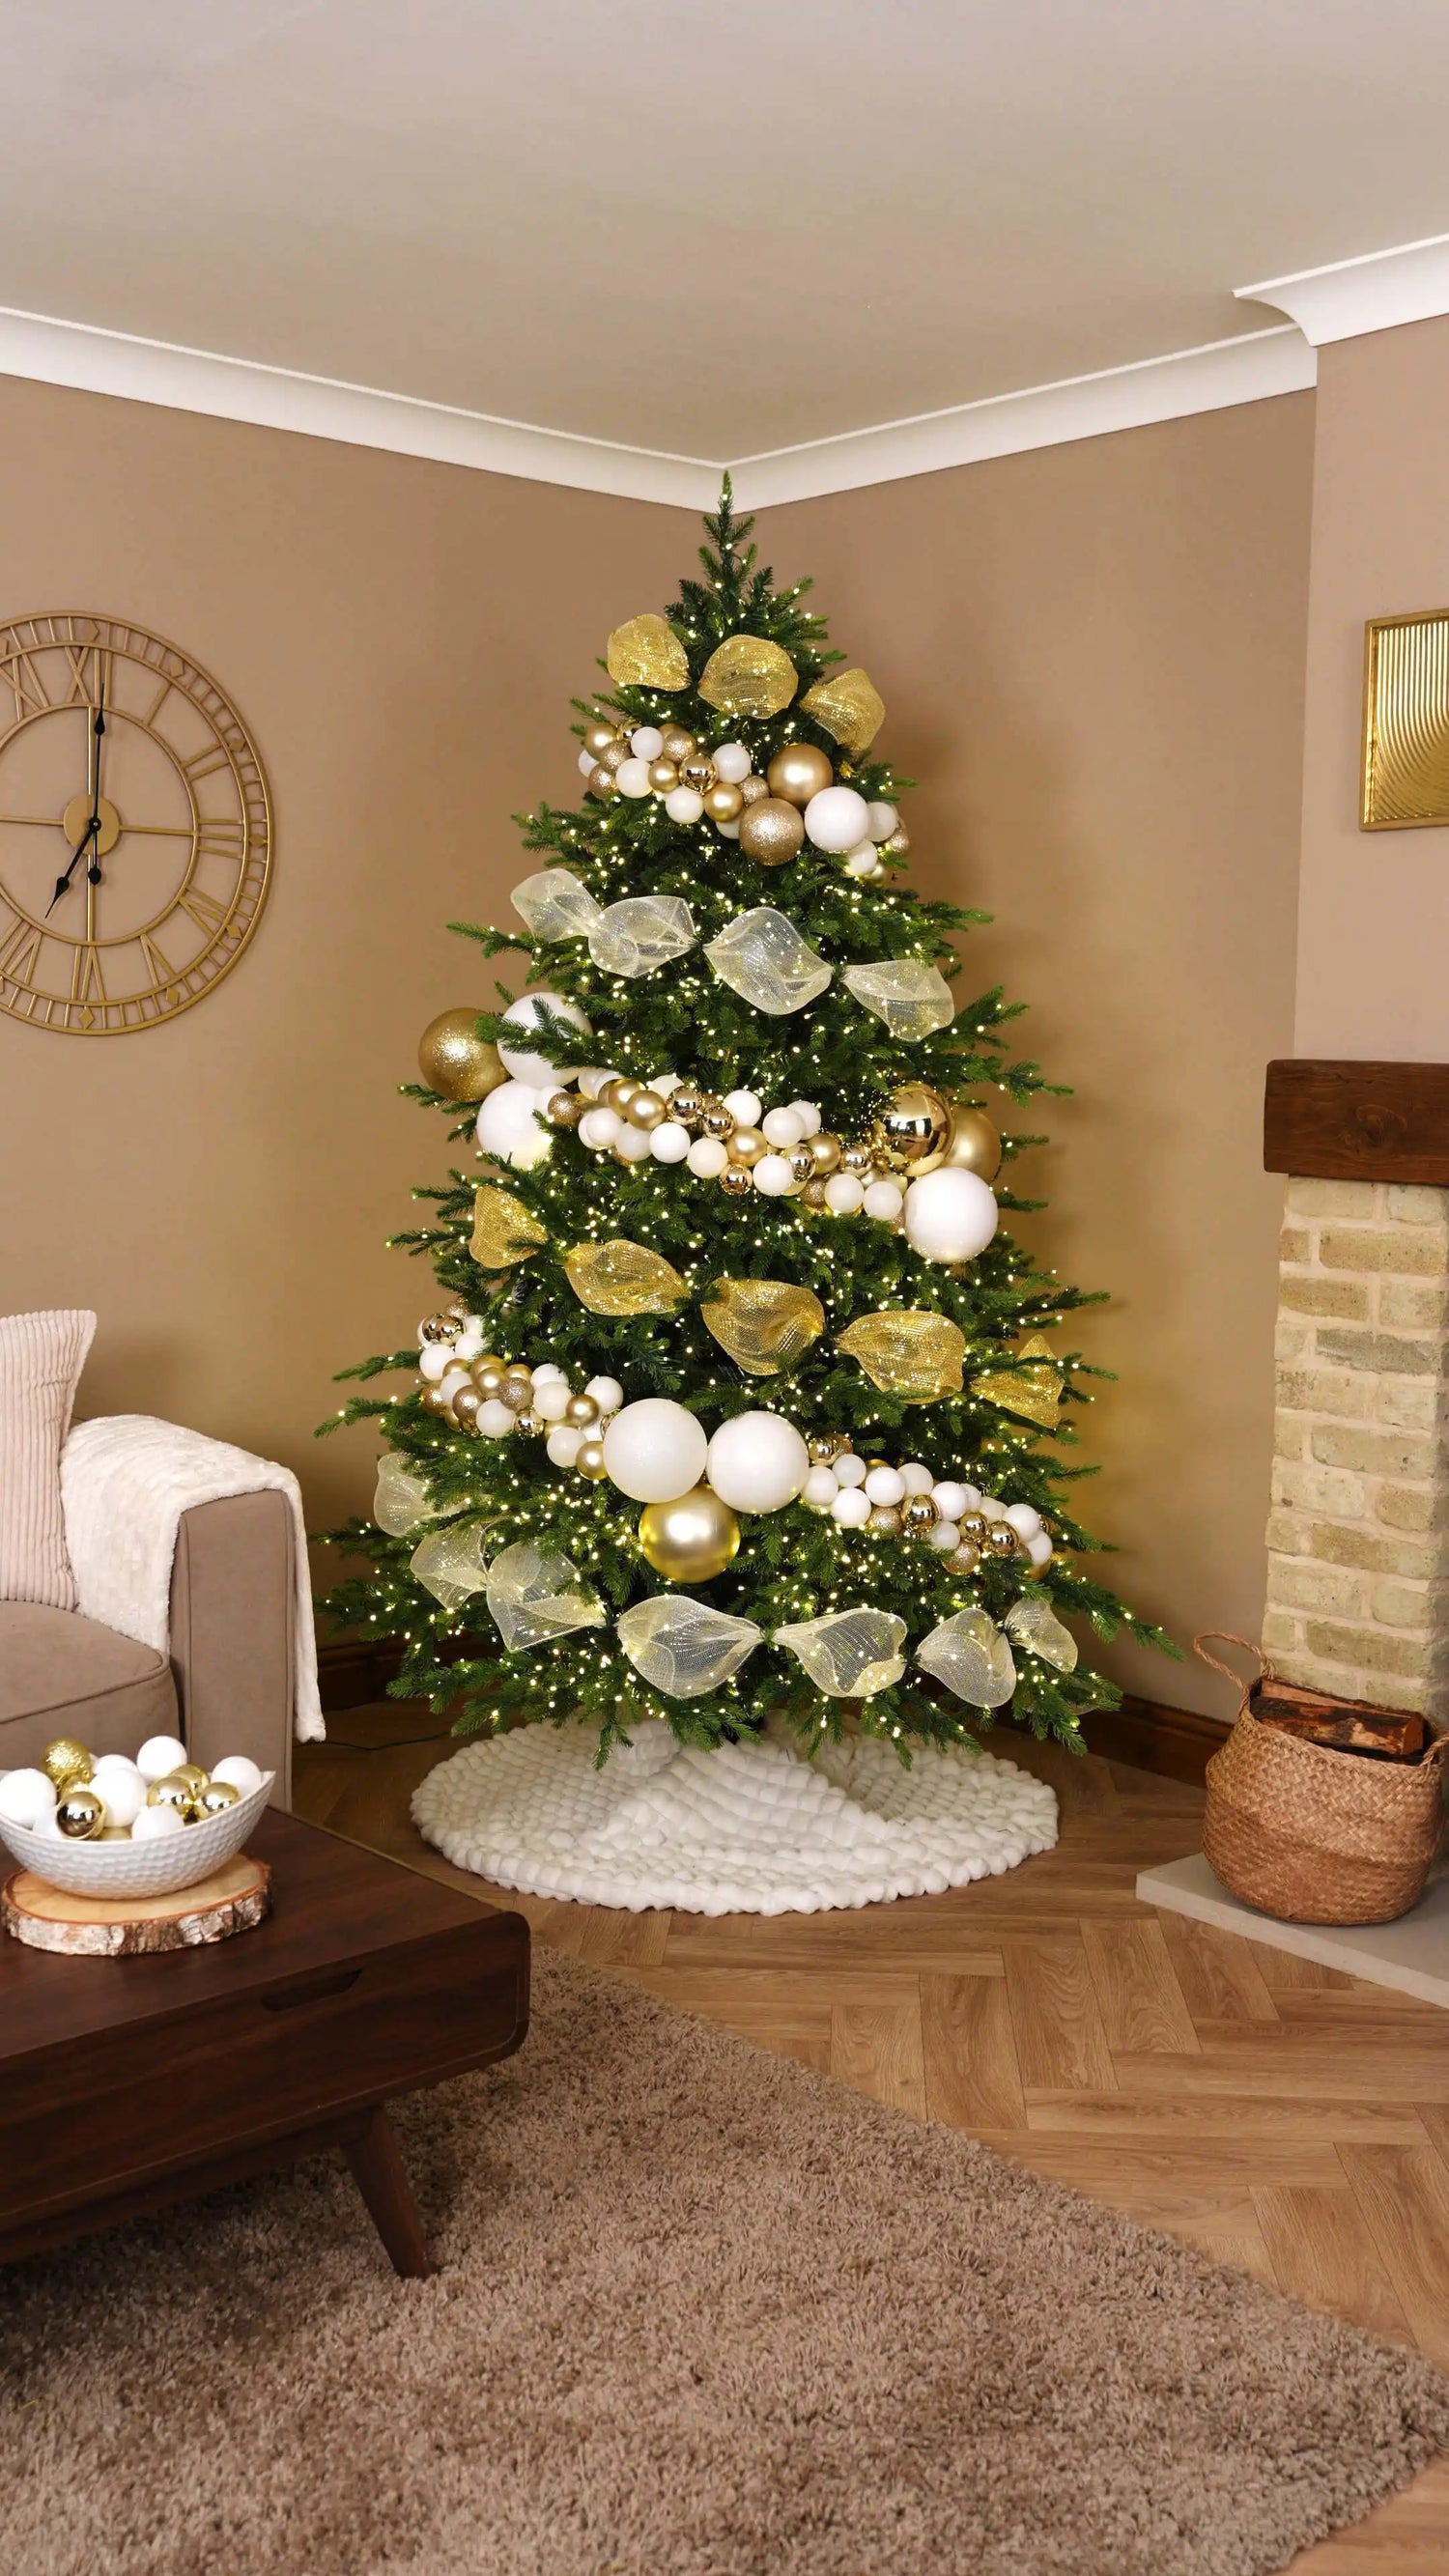
With the bauble garlands and mesh in place, add Gold Glitter Berry Sprays into the areas where greenery is still visible.
Position the sprays between the mesh and bauble garland layers, working the stems slightly into the branches so they feel like part of the tree itself. Spread them throughout the design rather than concentrating them in one area.
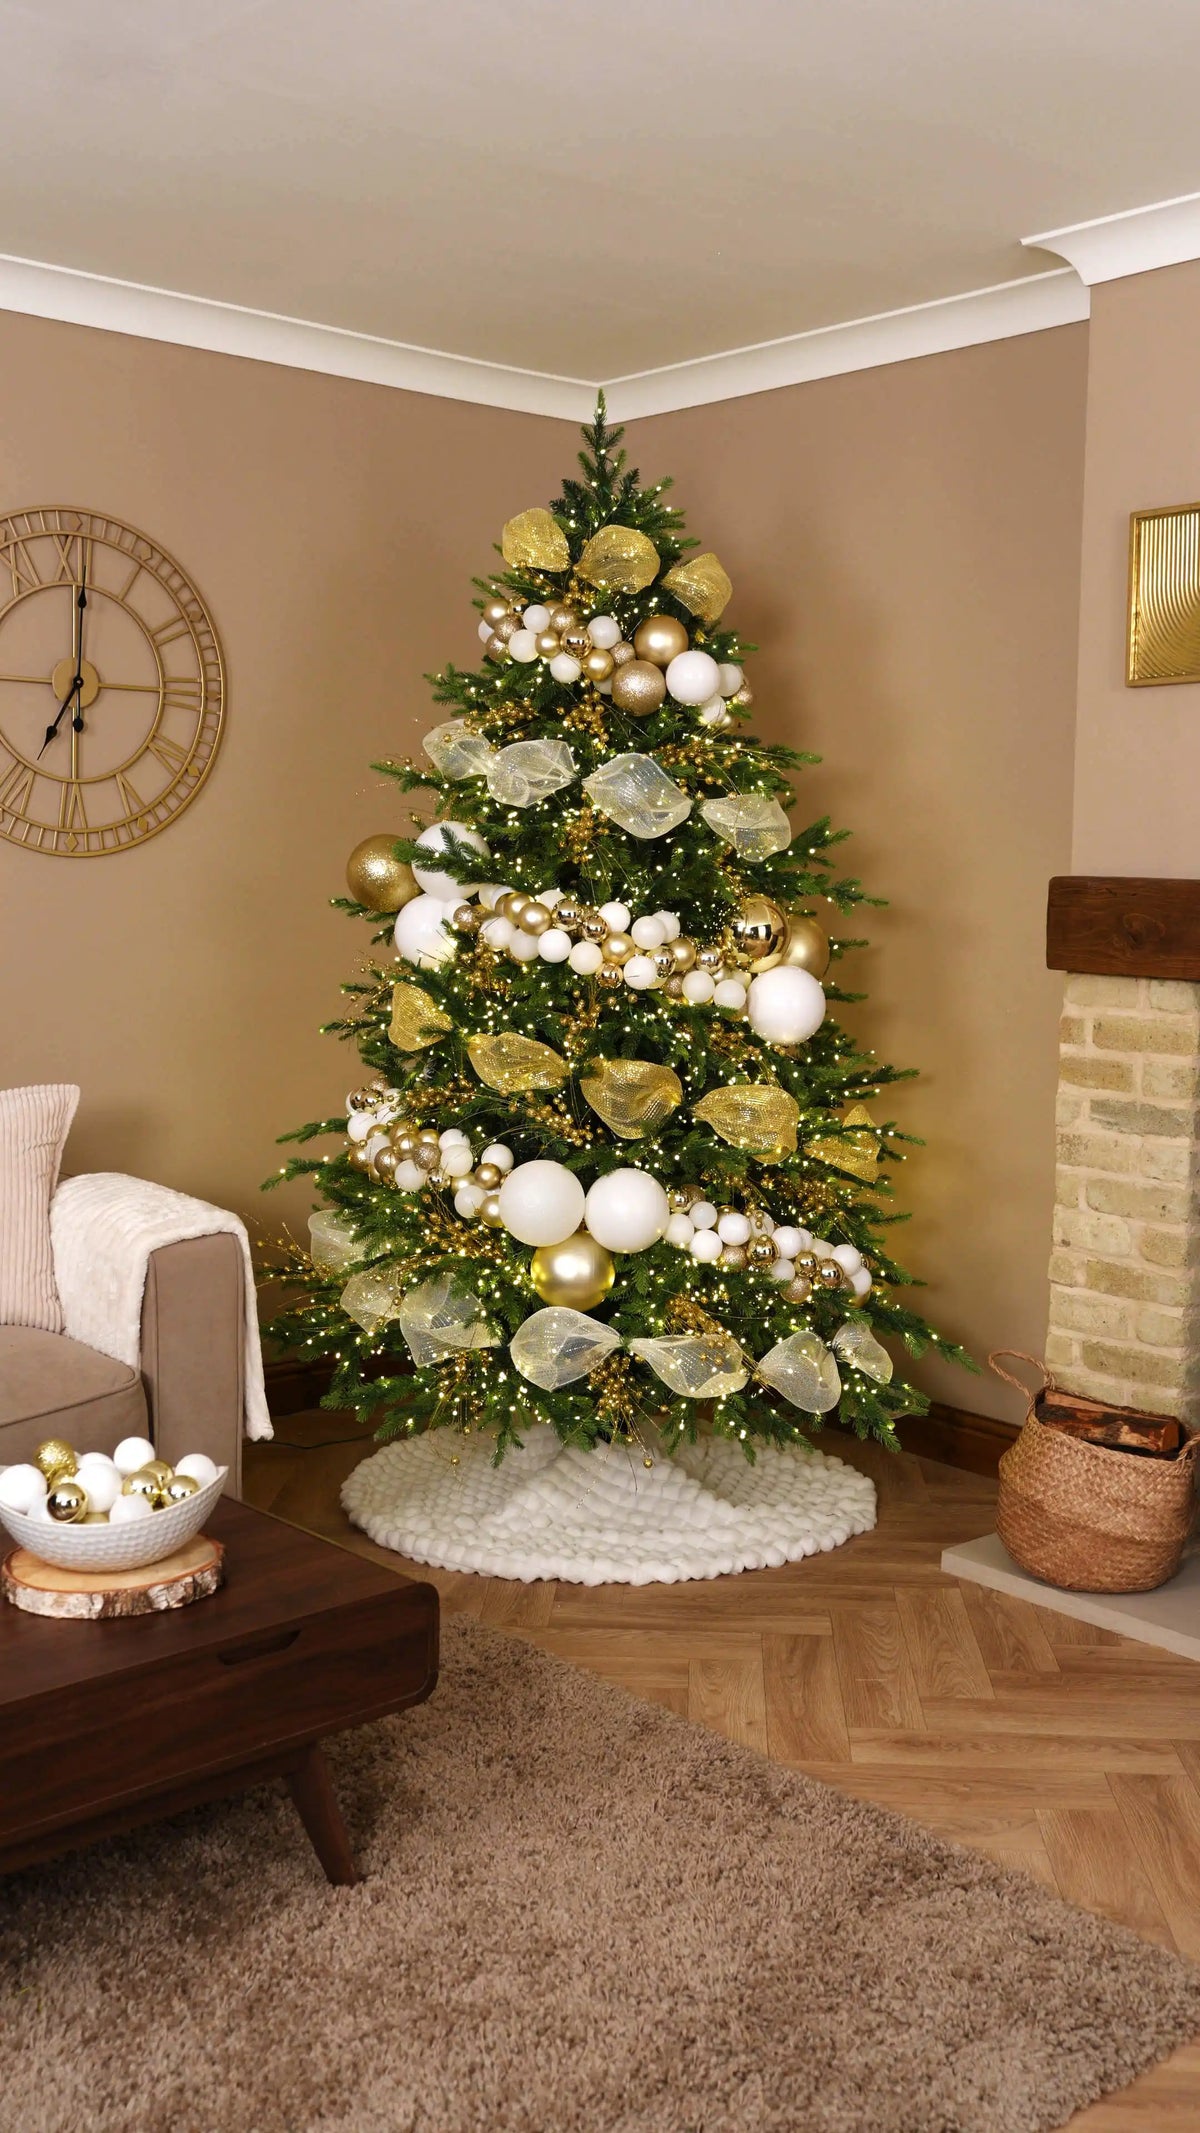
Next, add Pearl and Bead Christmas Tree Picks throughout the tree to introduce another layer of detail.
Work them into the remaining greenery and around the existing decorations, varying the direction of each pick so the design does not feel too uniform.
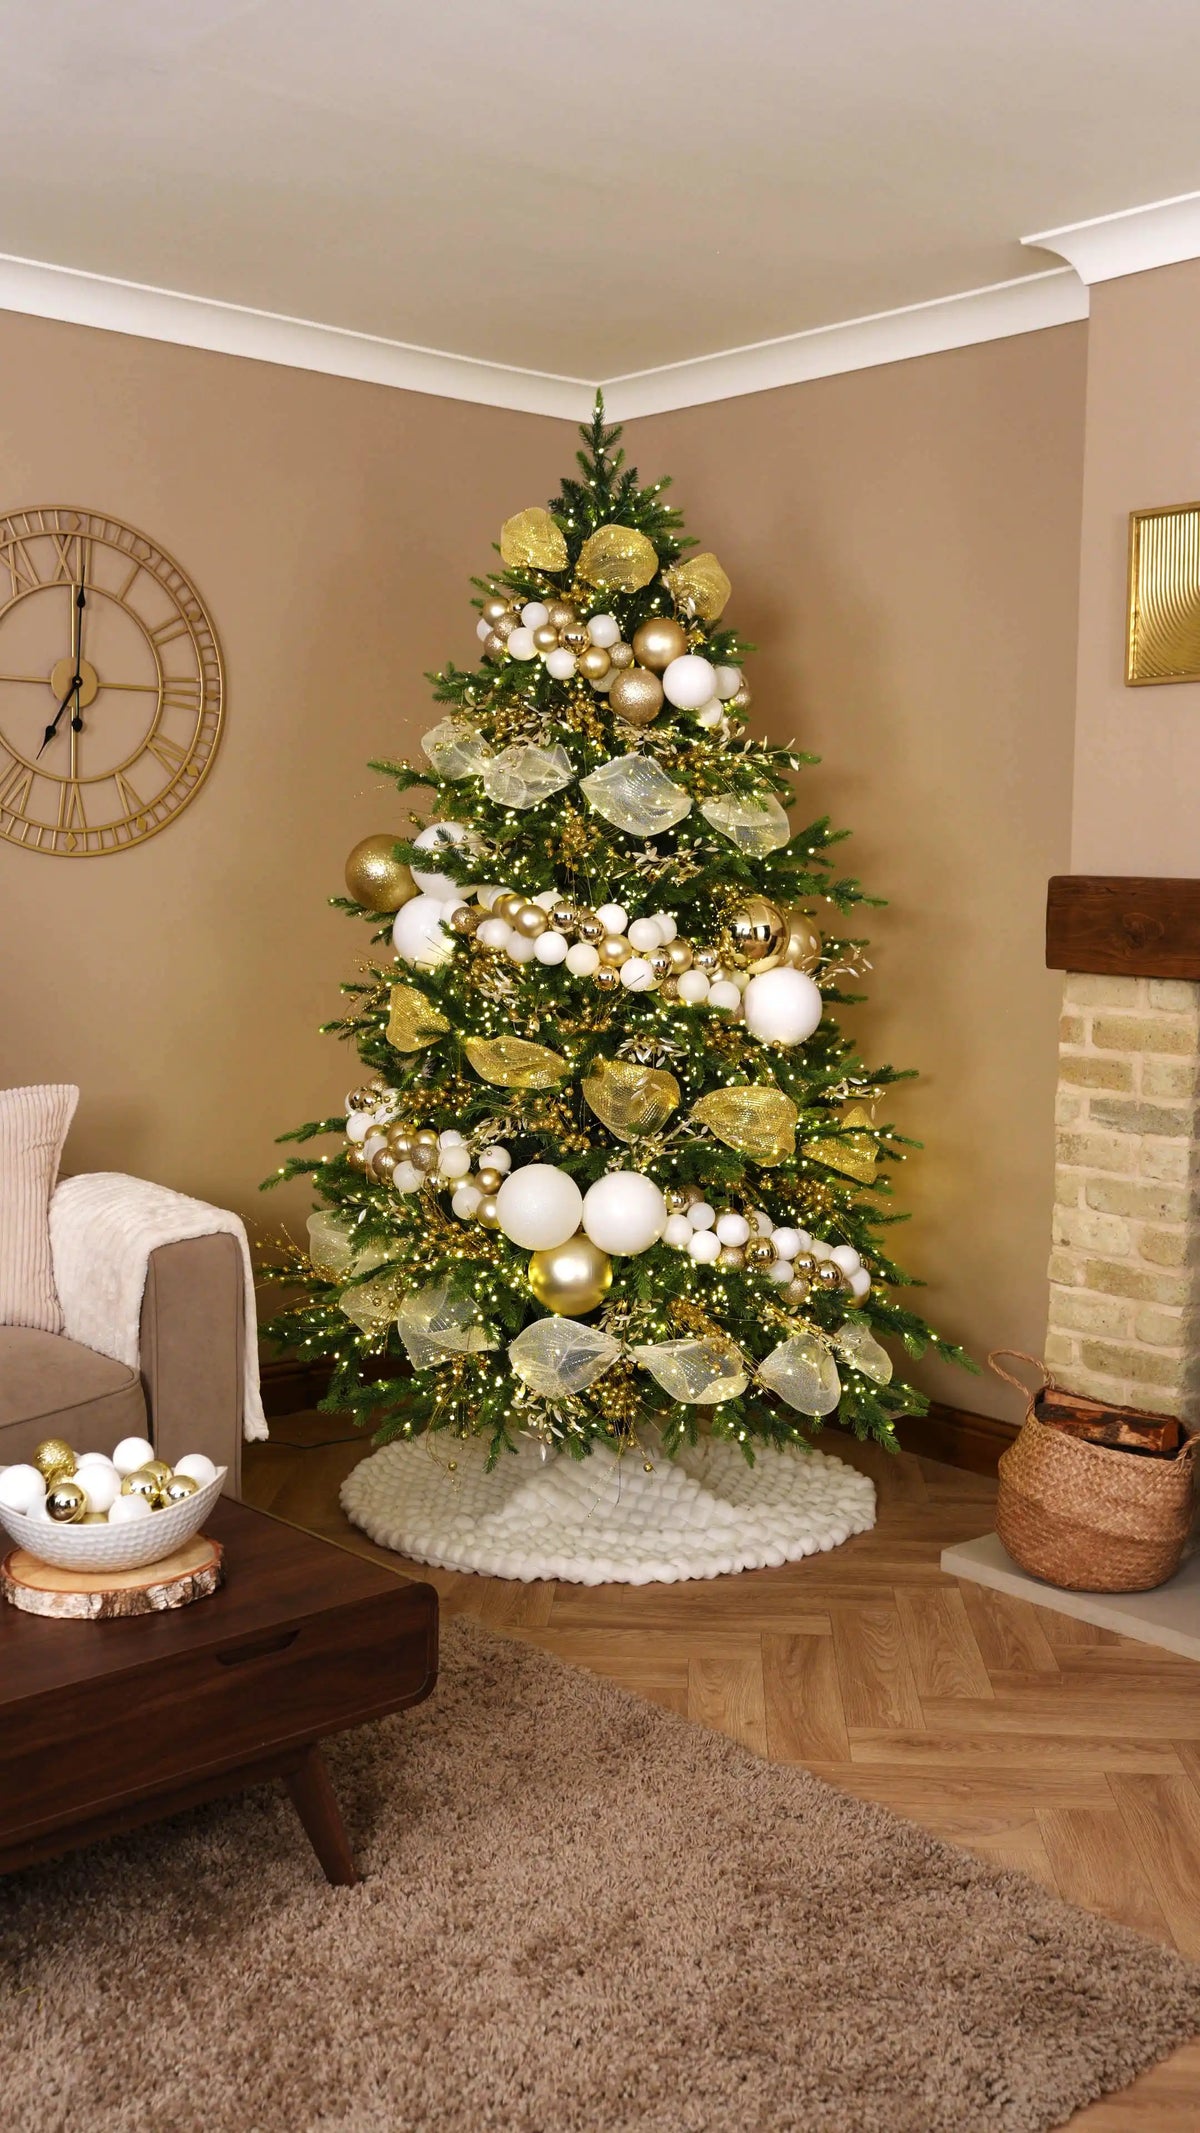
Take your Gold and White Glitter Firework Sprays and cut them into smaller individual sections before placing them throughout the tree.
Use these smaller sections generously between the baubles, around the mesh, between the garland layers and anywhere you can still see open greenery. Because they are smaller than the full sprays, they are ideal for filling the finer gaps and bringing the different elements of the design together.
Angle the sprays in different directions so they weave naturally through the branches rather than sitting in a repeated pattern.
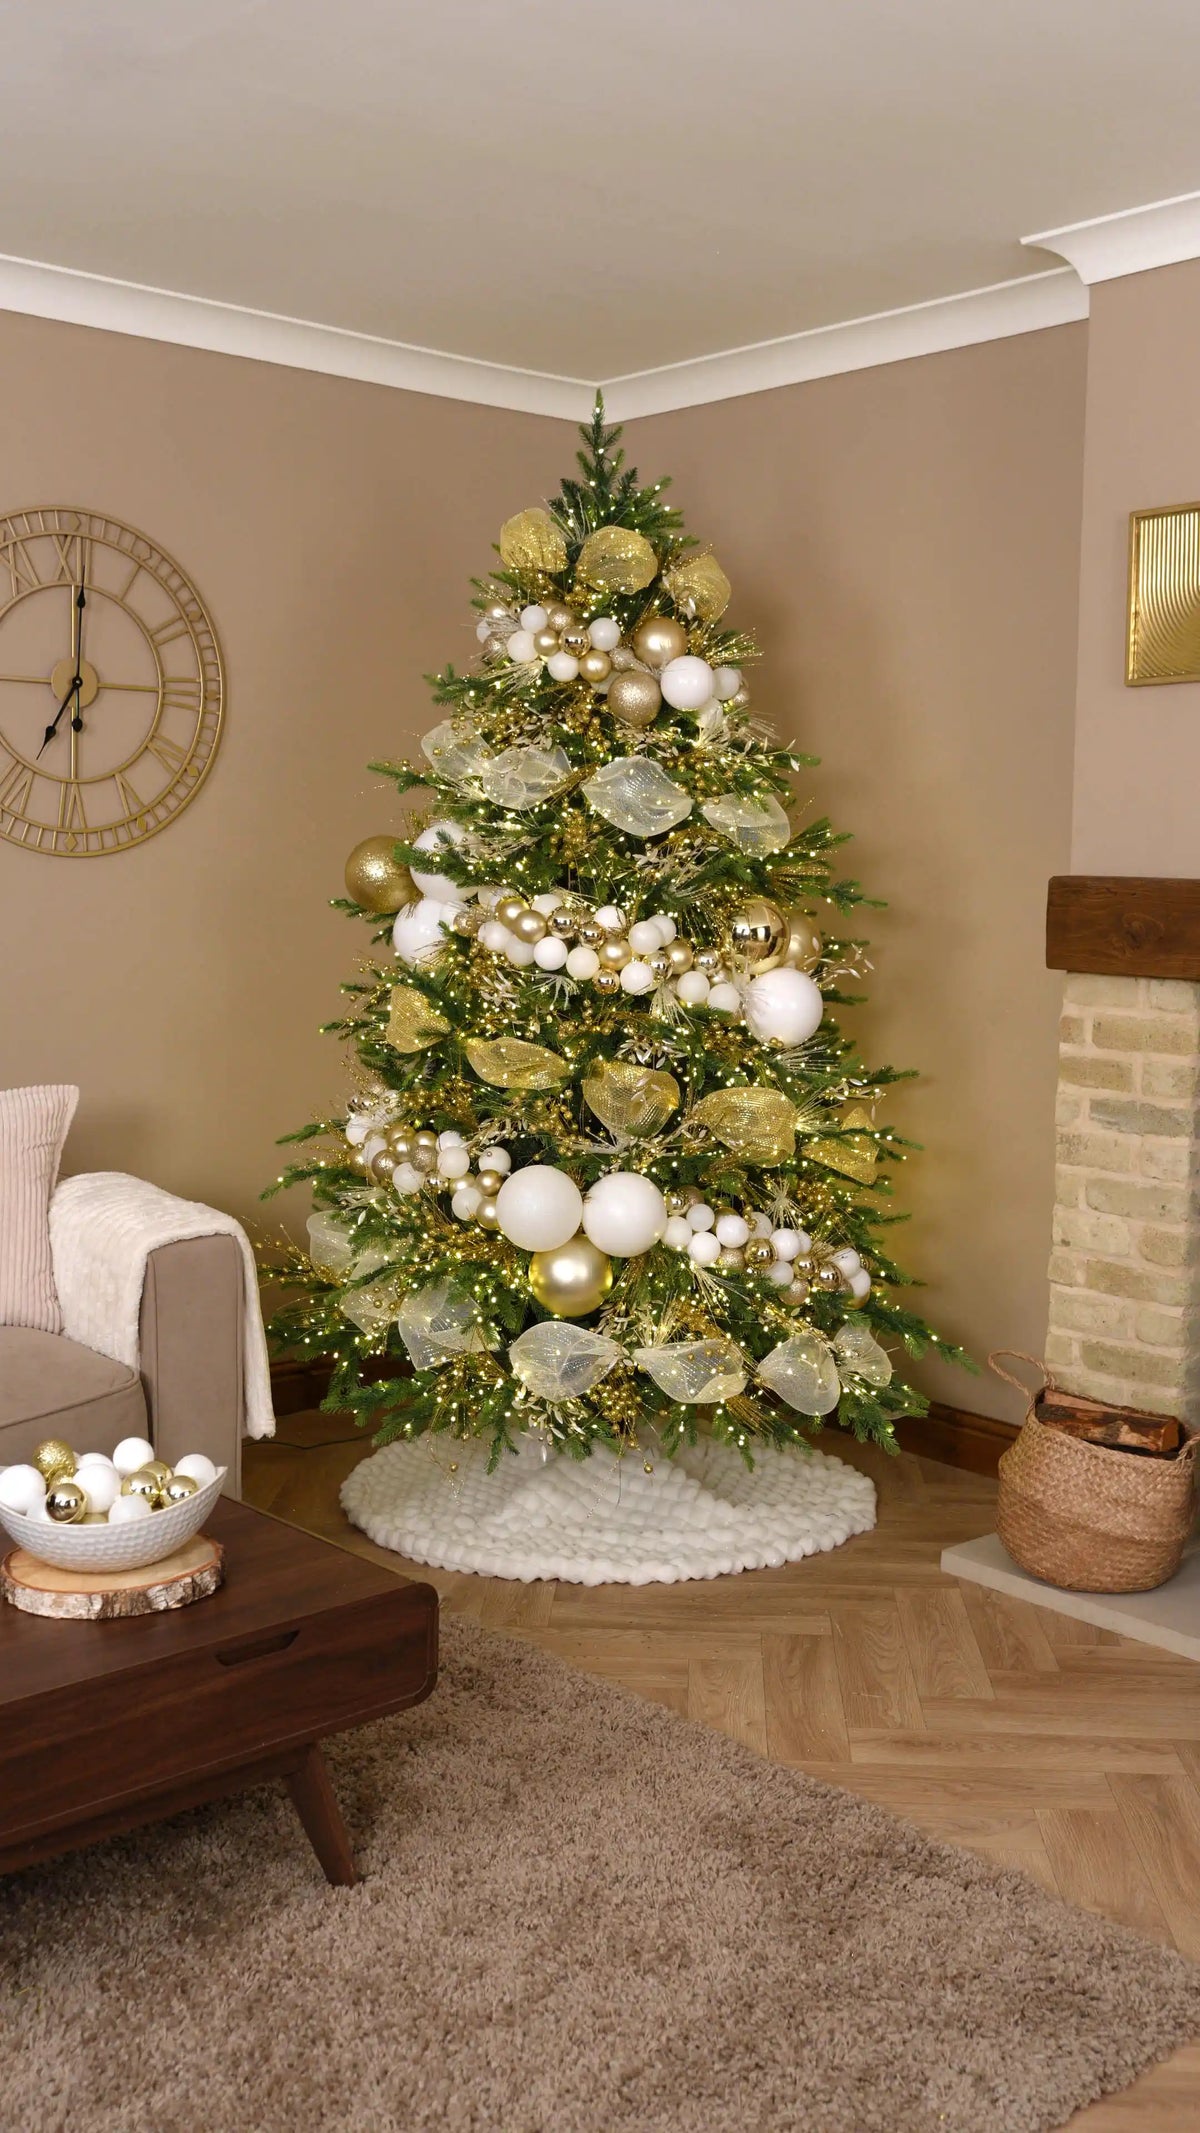
Finish the tree by creating a statement topper using Gold Glitter Berry Sprays and White Glitter Wispy Tree Sprays.
You can secure the sprays together with a cable tie first, positioning the white wispy sprays towards the back and the gold berry sprays towards the front. Alternatively, add them individually if you prefer to build the shape directly on the tree.
Guide the stems down through the centre of the top branch until the topper sits at your desired height. Once everything is in place, take time to fan out and shape the sprays.
Allow the white wispy sections to extend higher and wider behind the gold berries, then adjust the gold berry sprays through the front until the topper feels full, balanced and connected to the rest of the design.
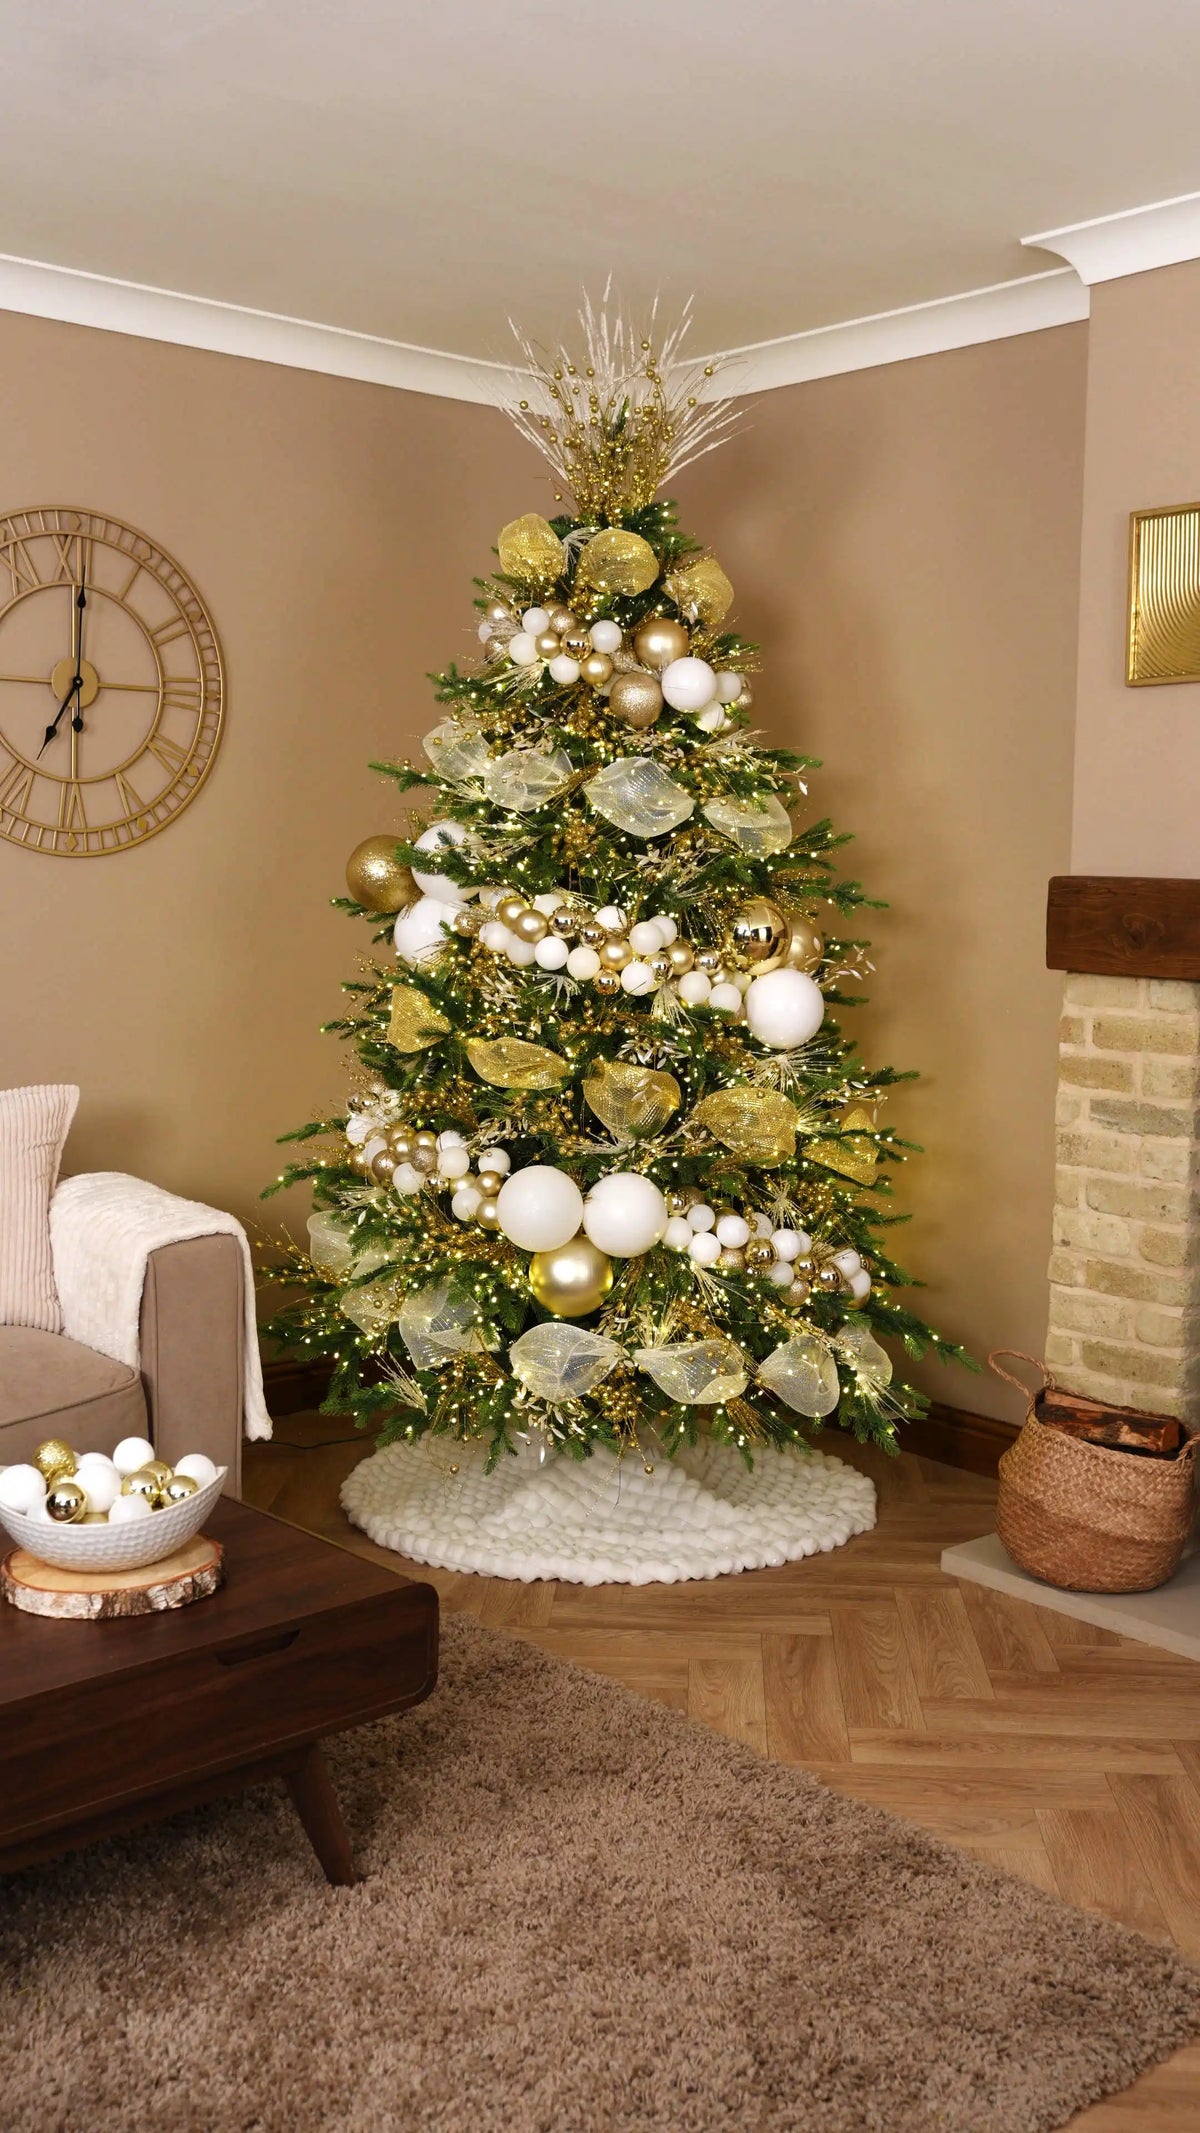
The Finished Look
This white and gold Christmas tree combines handmade bauble garlands, soft mesh, pearl picks, glitter sprays and a statement topper to create a luxurious and layered festive look with plenty of texture and sparkle.
The bauble garlands give the tree its flowing structure, while the gold and white mesh softens the spaces between each layer. The picks, sprays and metallic berries help fill the remaining greenery.
This white and gold Christmas tree theme brings a bright, polished finish to your home while still feeling soft, timeless and easy to recreate.
Shop the look highlights


Transparent Decorative Mesh Roll With Soft Gold Foil, 9 m


