

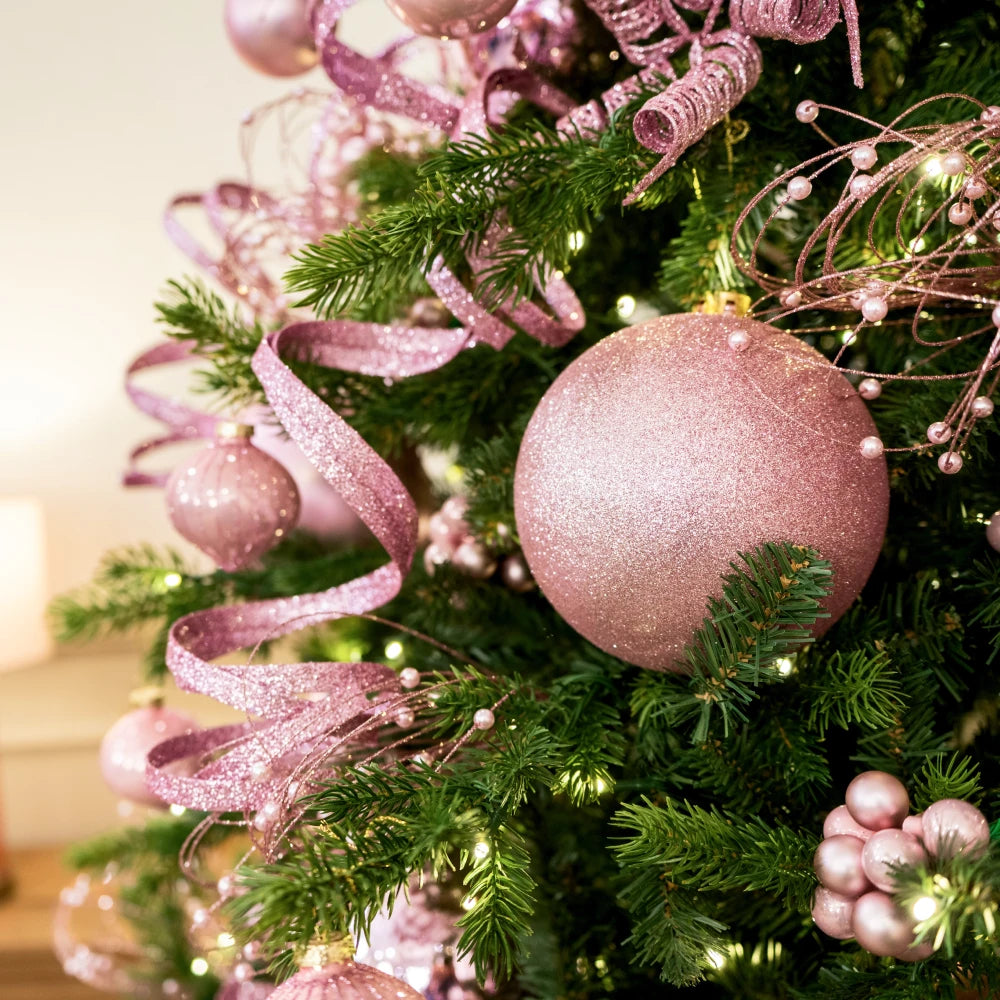
The Pink
Look
Look

Playful Festive Pink Styling
Follow our simple step-by-step guide to style the timeless look with foliage, baubles and texture. Watch the video below for the full look.
Watch The look
Come to life
Come to life
Watch our video to see how pink decorations create a playful Christmas look filled with glittering detail, texture and beautifully styled festive charm.

Step-by-step
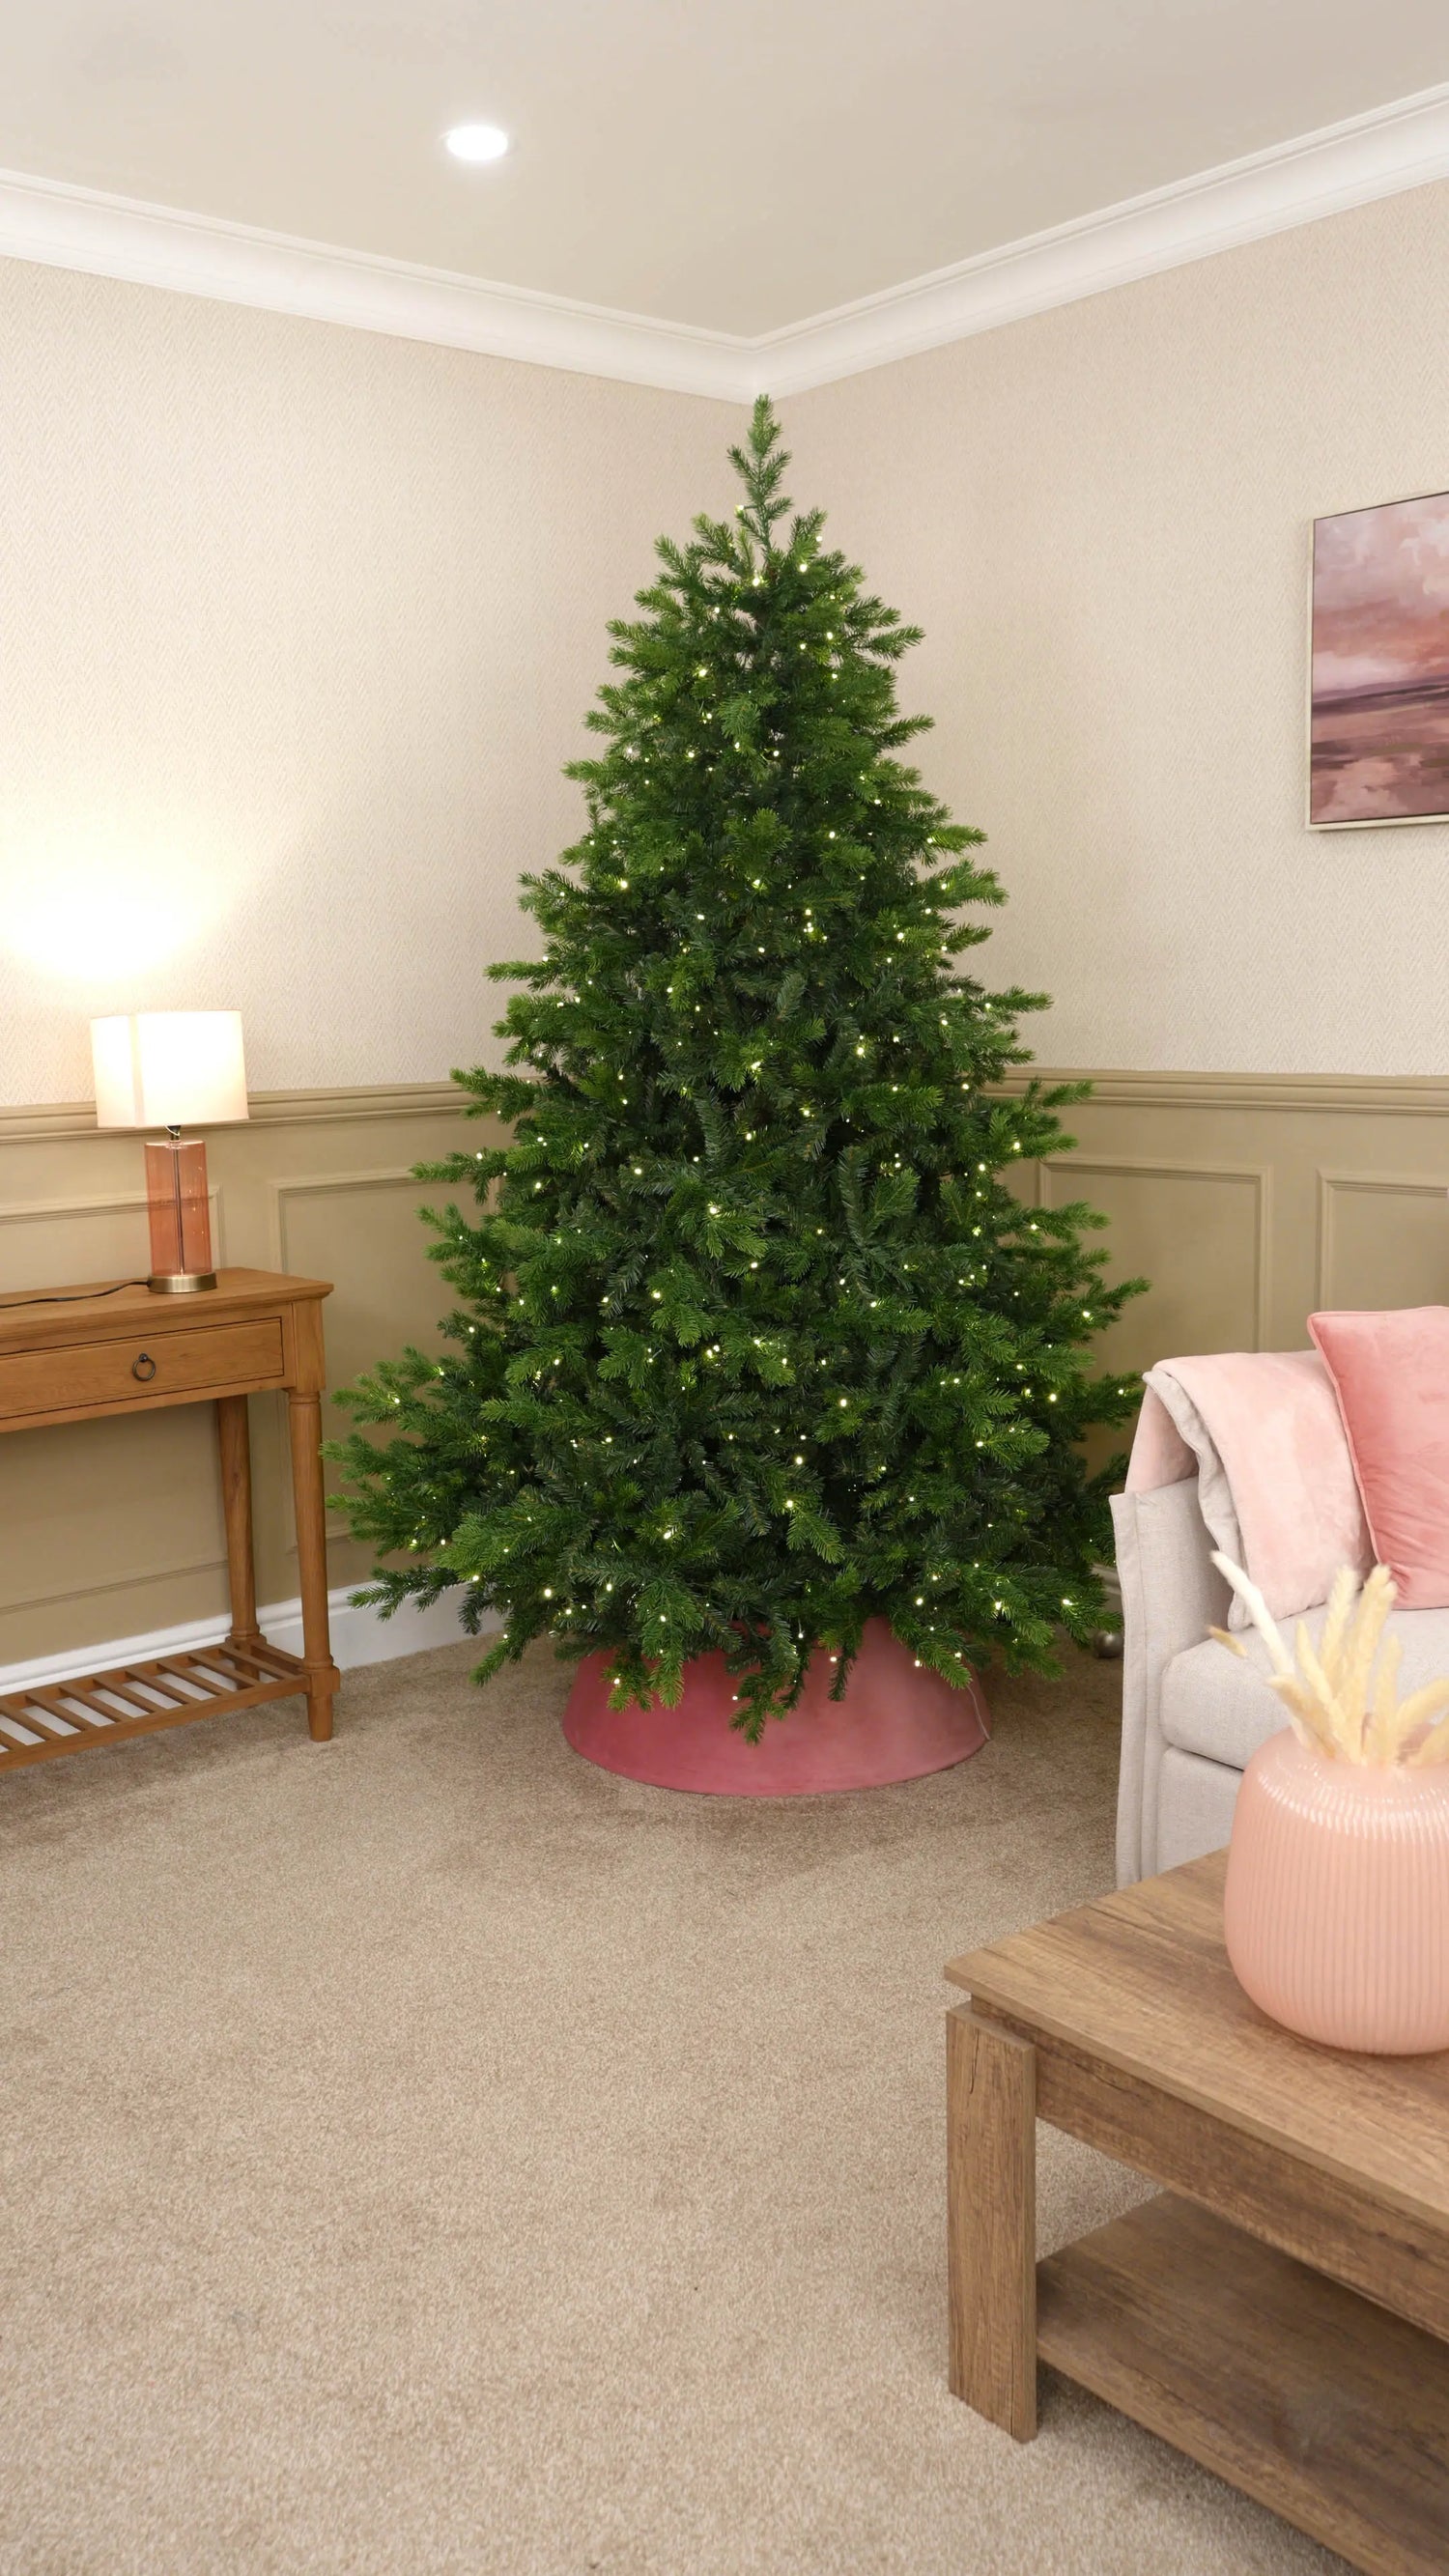
Make sure every branch has been carefully fluffed on the 7ft Balsam Fir Christmas Tree before you begin adding any decorations. Properly shaping your tree at the beginning creates a fuller silhouette and gives every bauble, pick and spray somewhere to sit naturally.
To help, you can stand back every few minutes while fluffing to check how the tree is looking from a distance. This makes it much easier to spot any uneven areas that remain.
Once you’re happy with the shape, position your Pink Velvet Tree collar around the base before the rest of the decorating. A tree collar gives the
display a soft, luxurious finish while concealing the stand and complementing the pink tones used throughout the design.
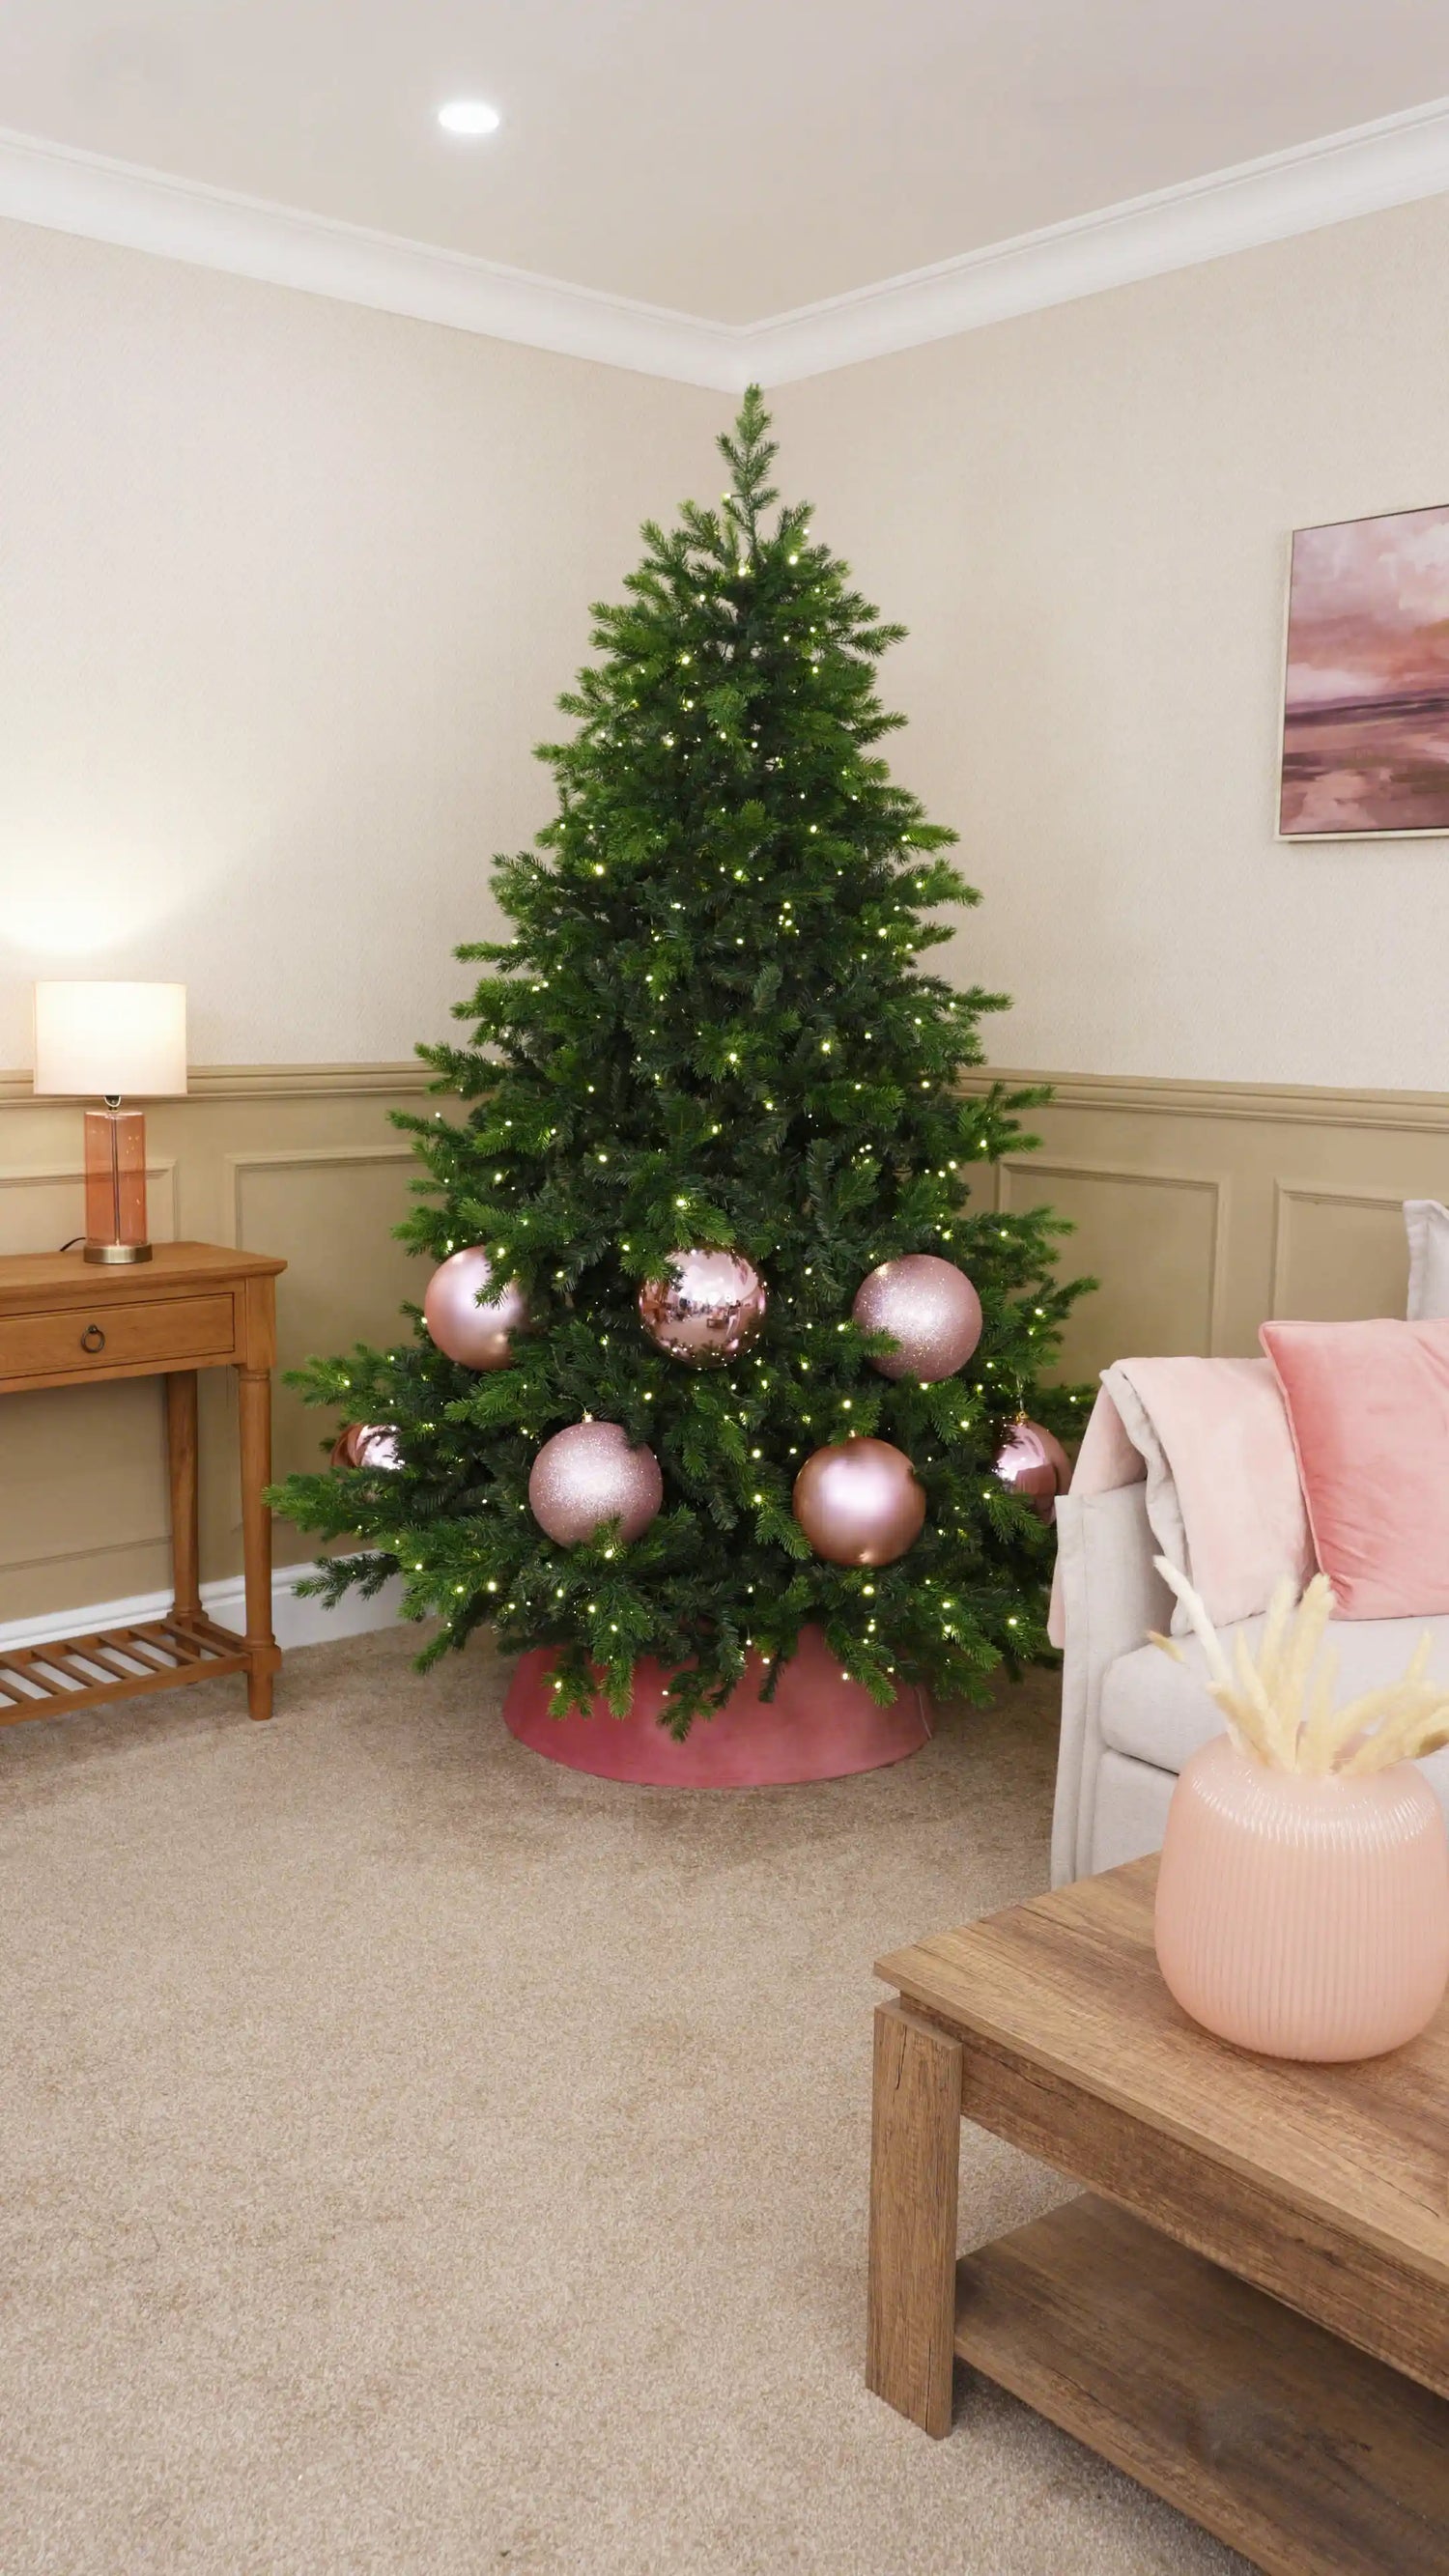
The largest decorations should usually be added to your tree first. So for this pink look, begin with your 20cm Oversized Pink Baubles in matt, shiny and glitter finishes.
Using baubles in all three finishes gives the tree more depth than using one finish alone. The matt baubles soften the overall look, the shiny baubles reflect the tree lights and the glitter baubles add sparkle throughout the design.
While adding the oversized baubles, space them evenly around the lower and middle sections of the tree. Starting with the largest decorations helps create clear focal points and gives the rest of the design a strong foundation.
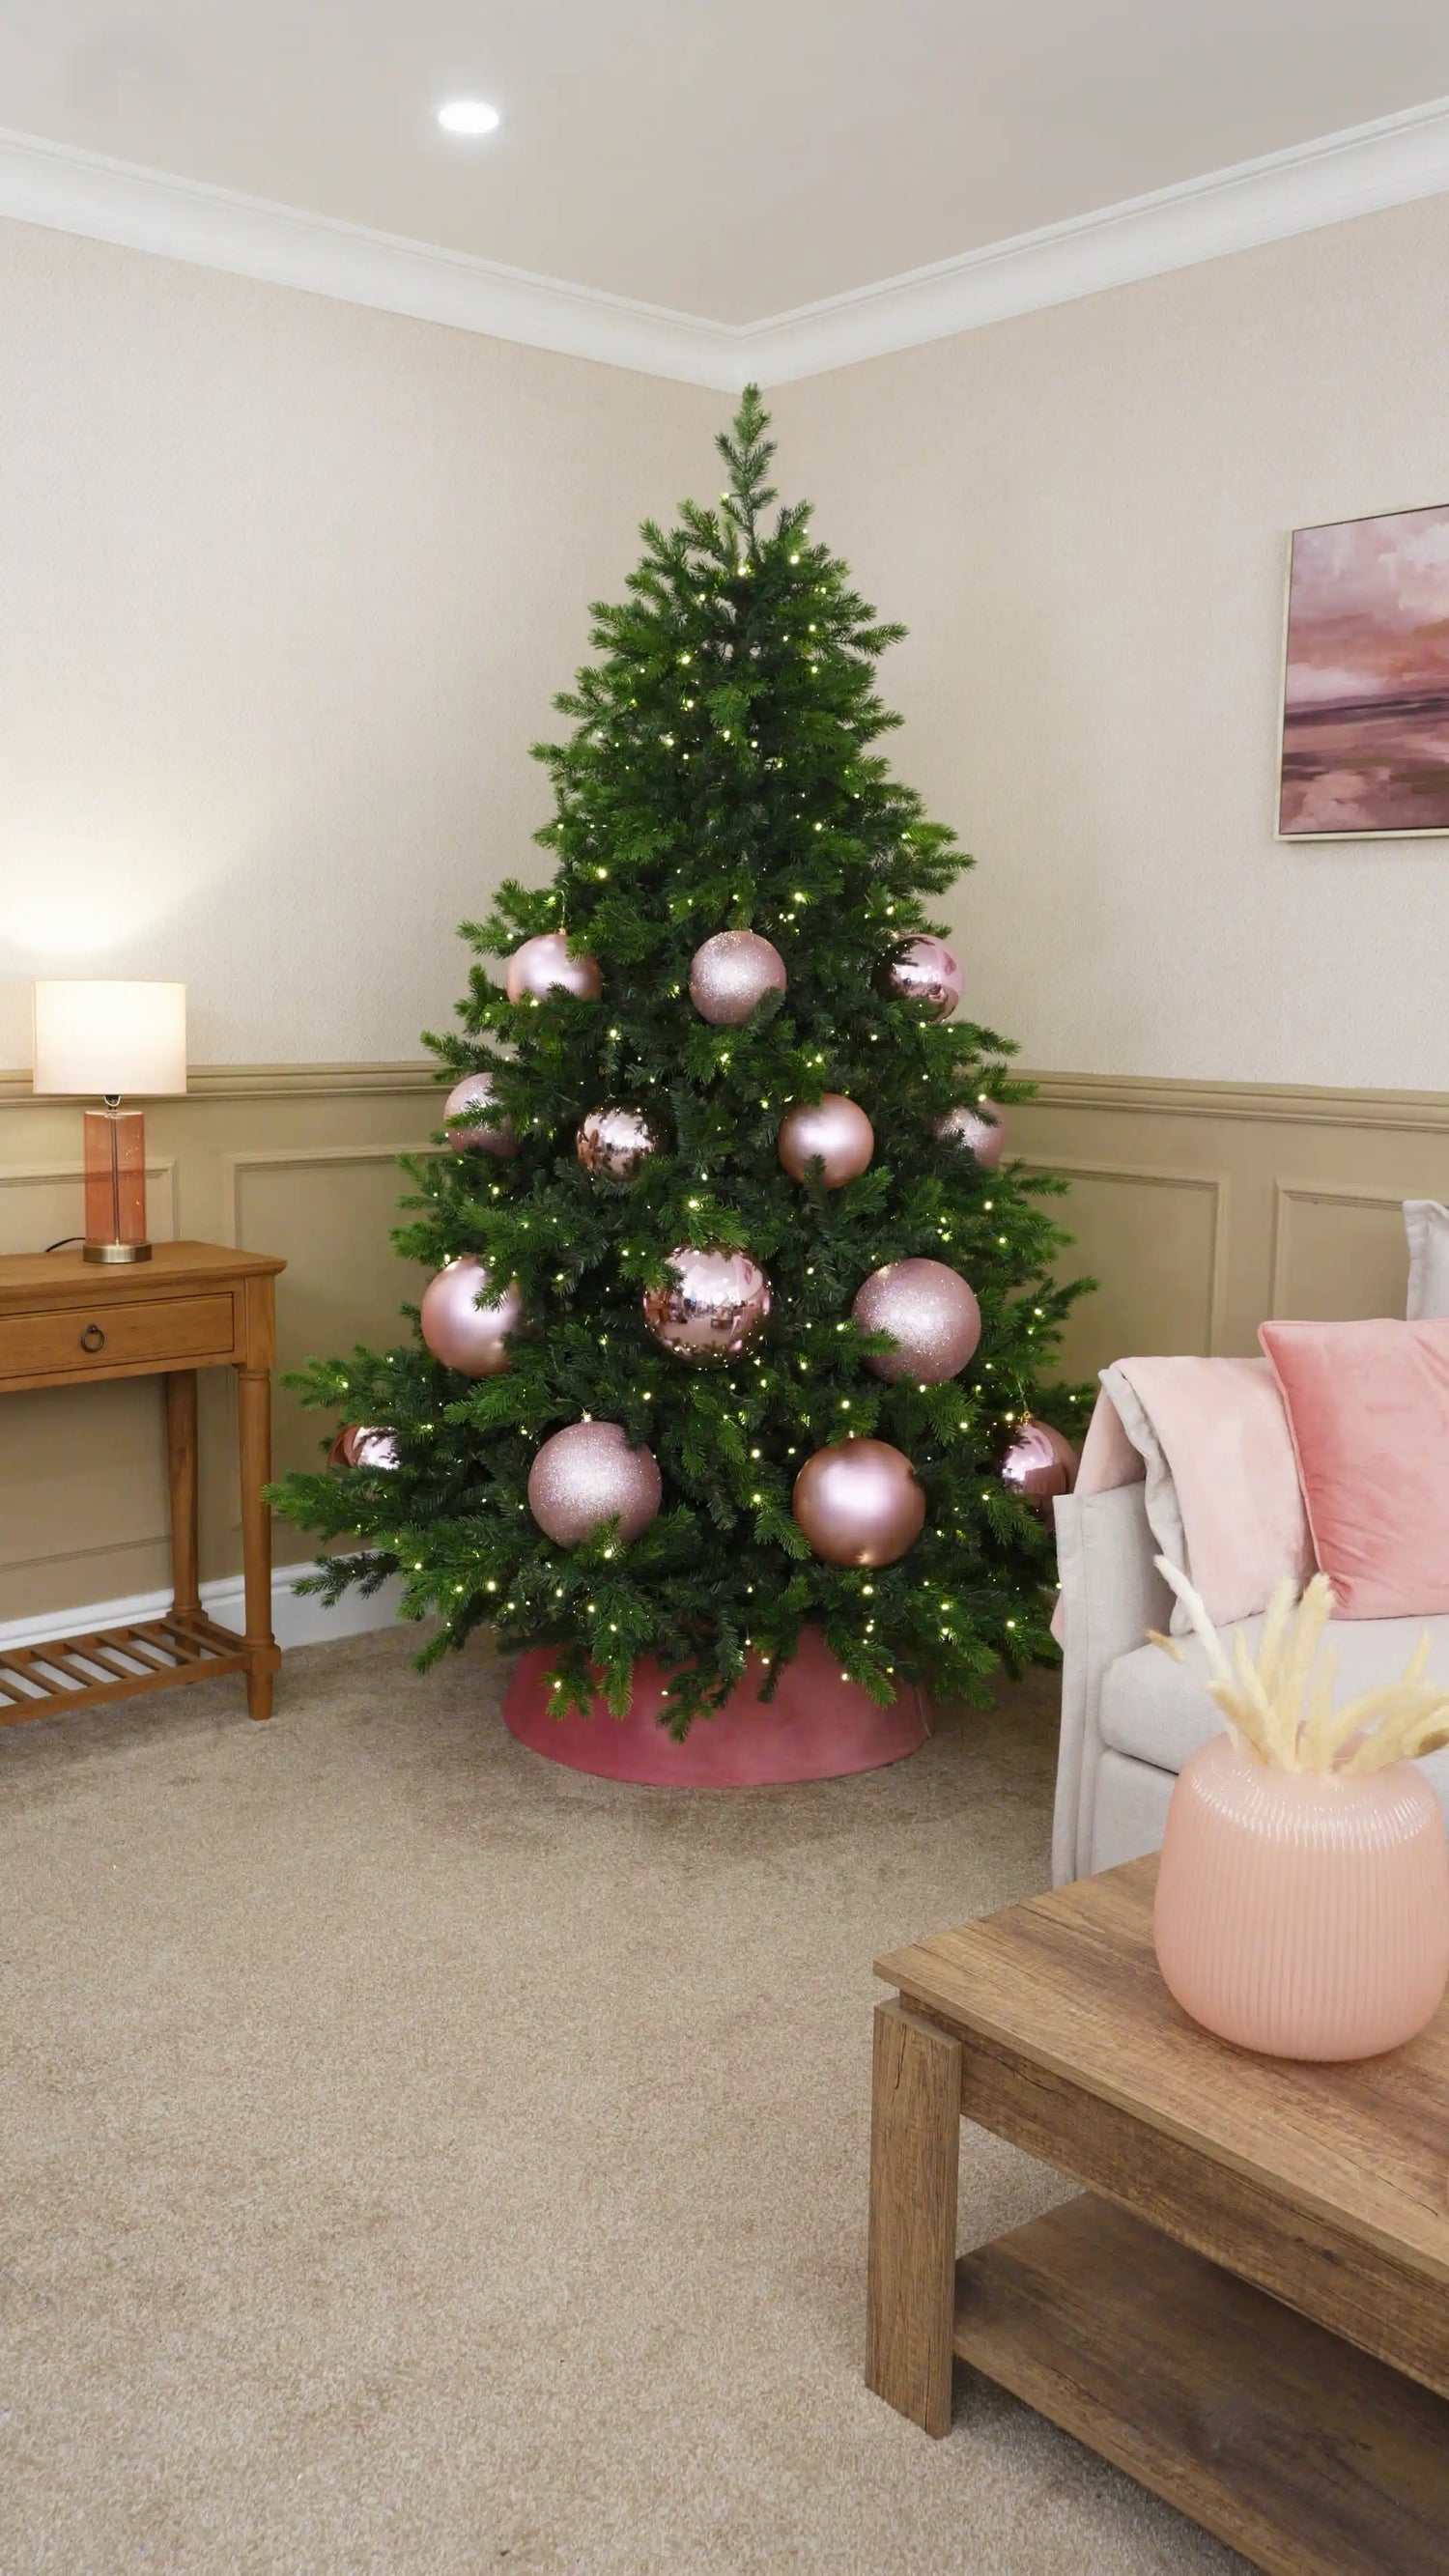
Now repeat the same process using your 15cm Oversized Pink Baubles, again mixing matt, shiny and glitter finishes throughout the tree.
Work gradually from the bottom towards the top, positioning the 15cm baubles between the larger decorations rather than placing them randomly. These baubles help connect the larger focal pieces together, creating a smoother flow of colour across the tree.
By the end of this stage, the tree should already feel fuller and more balanced, with the main pink colour palette carried through the branches before the smaller decorations are added.
Complete the main bauble layer by adding your 10cm Pink Baubles throughout the tree. Use these smaller baubles to fill the remaining spaces between the 15cm and 20cm decorations, with a little more focus on the upper half where smaller decorations sit more naturally.
The 10cm baubles help soften the spacing between the larger ornaments while carrying the pink colour palette all the way to the top of the tree.
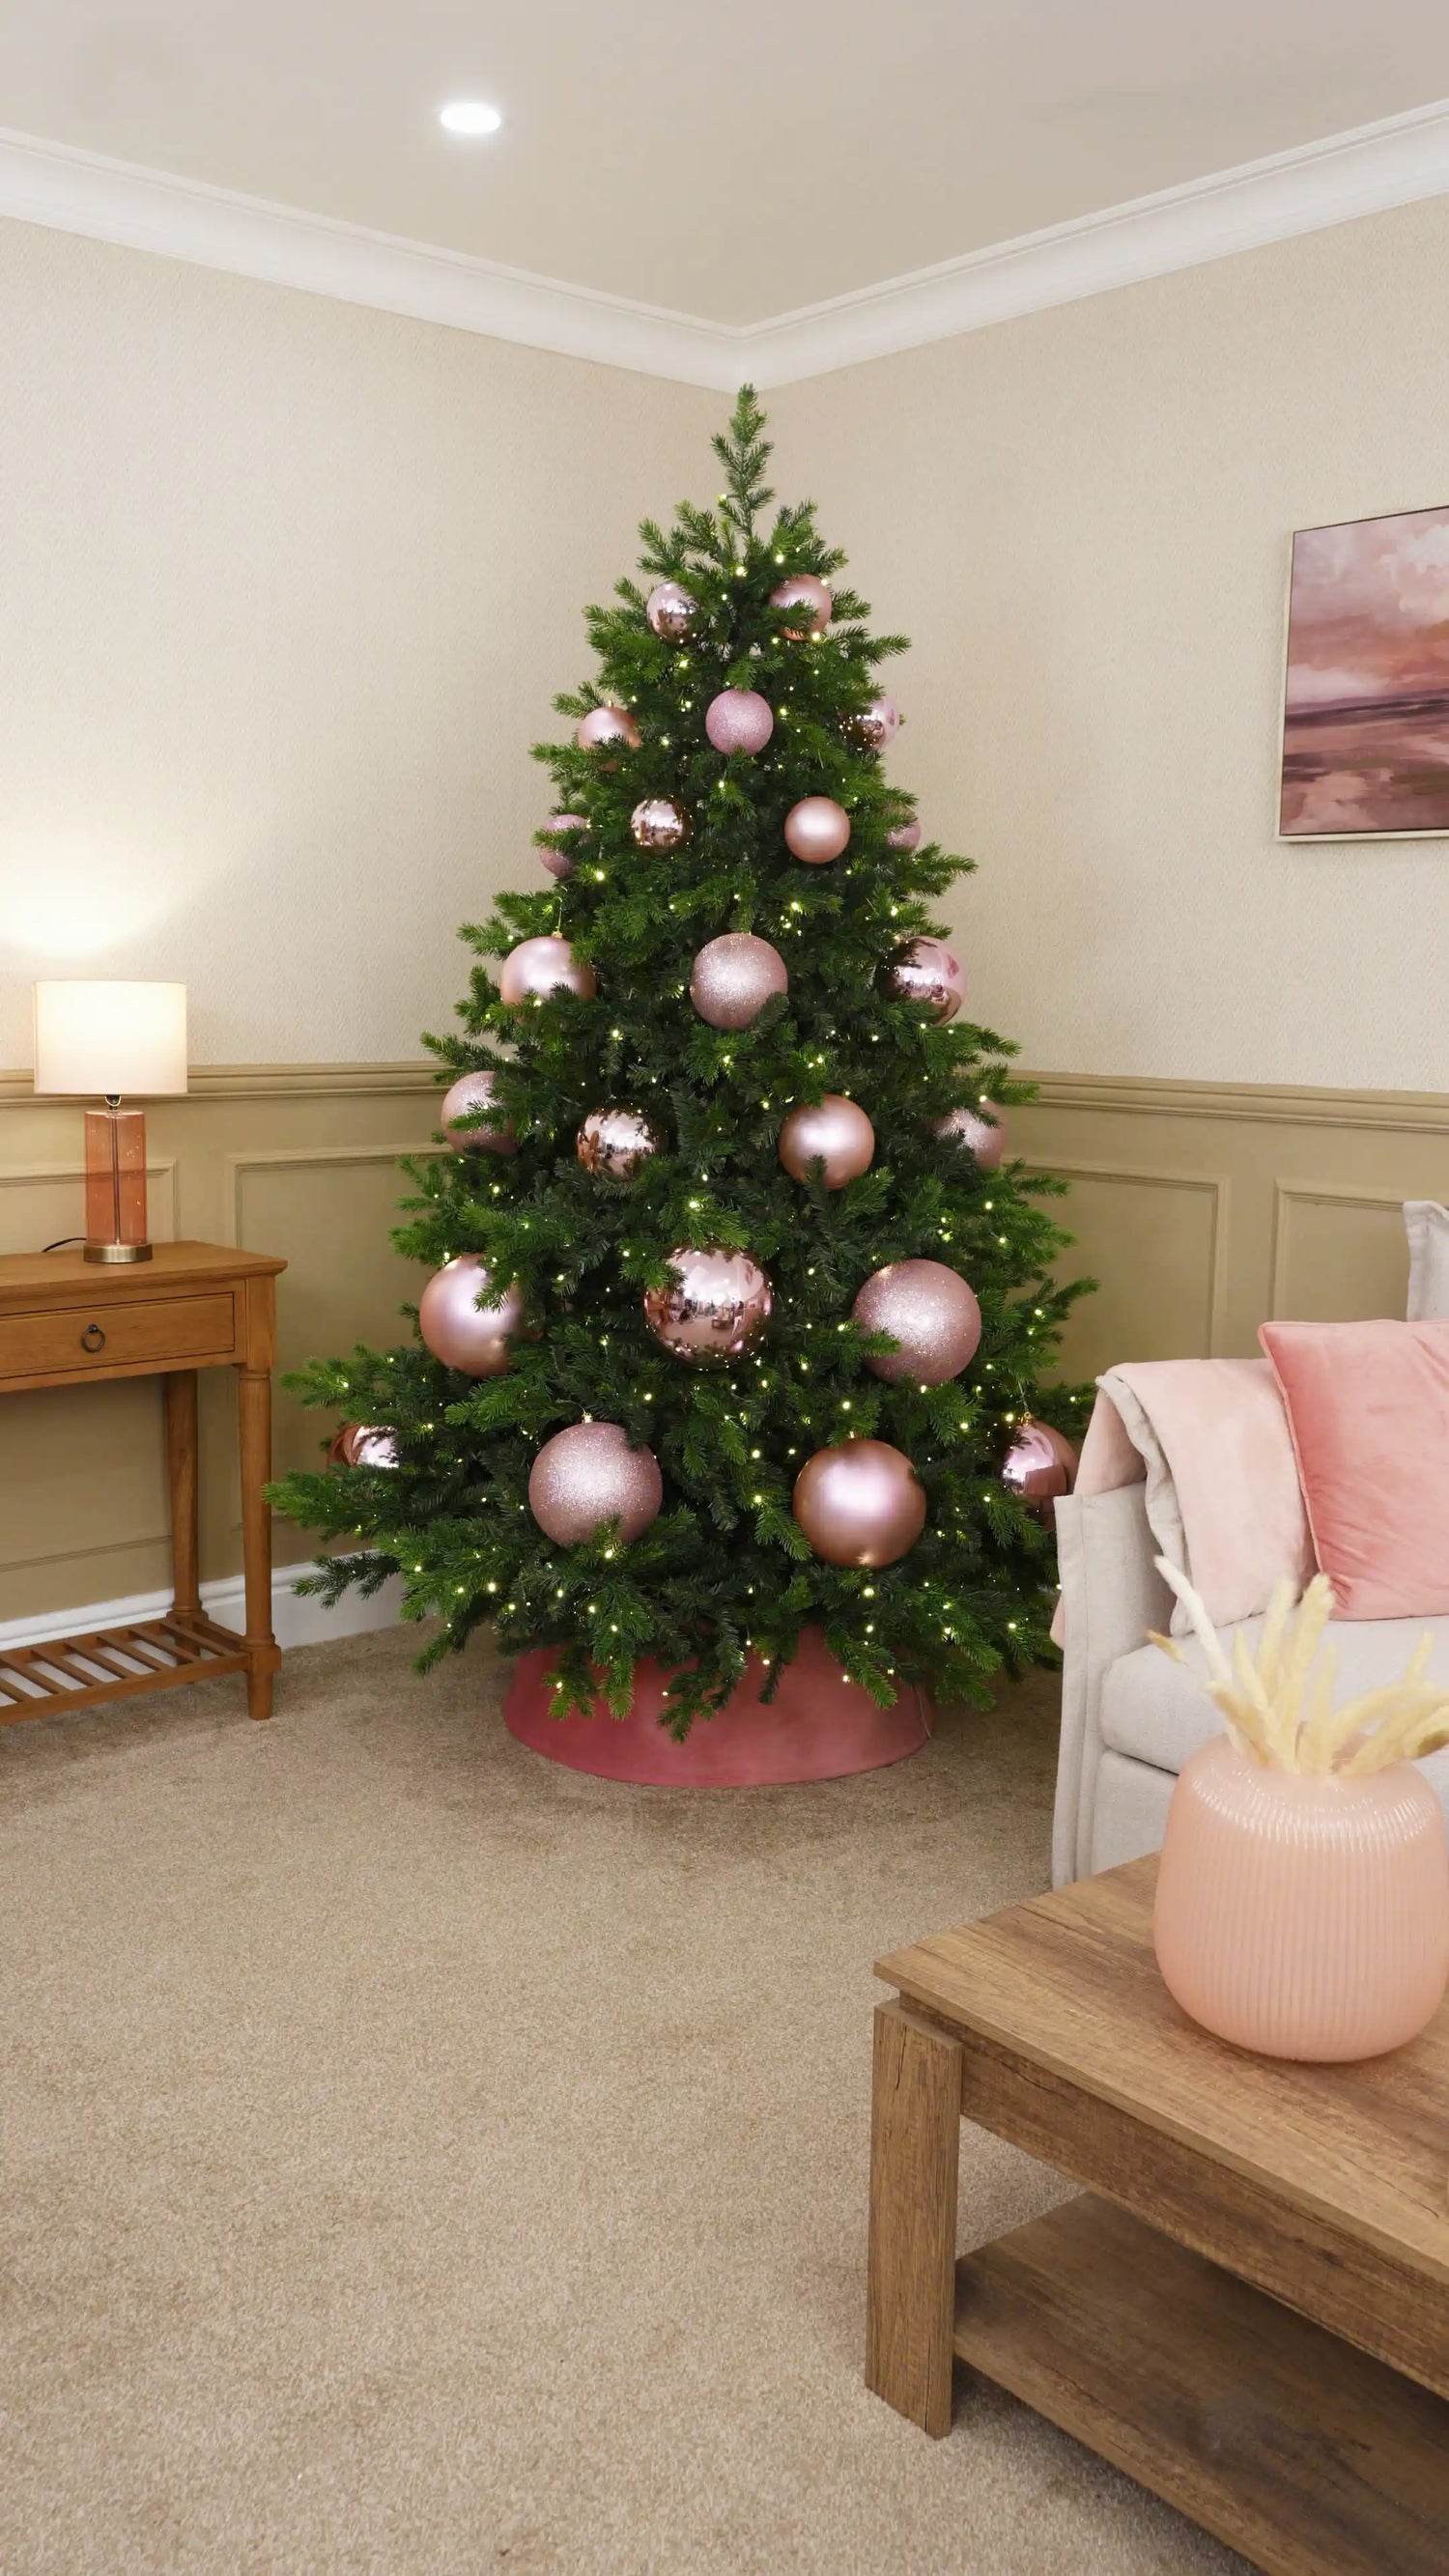
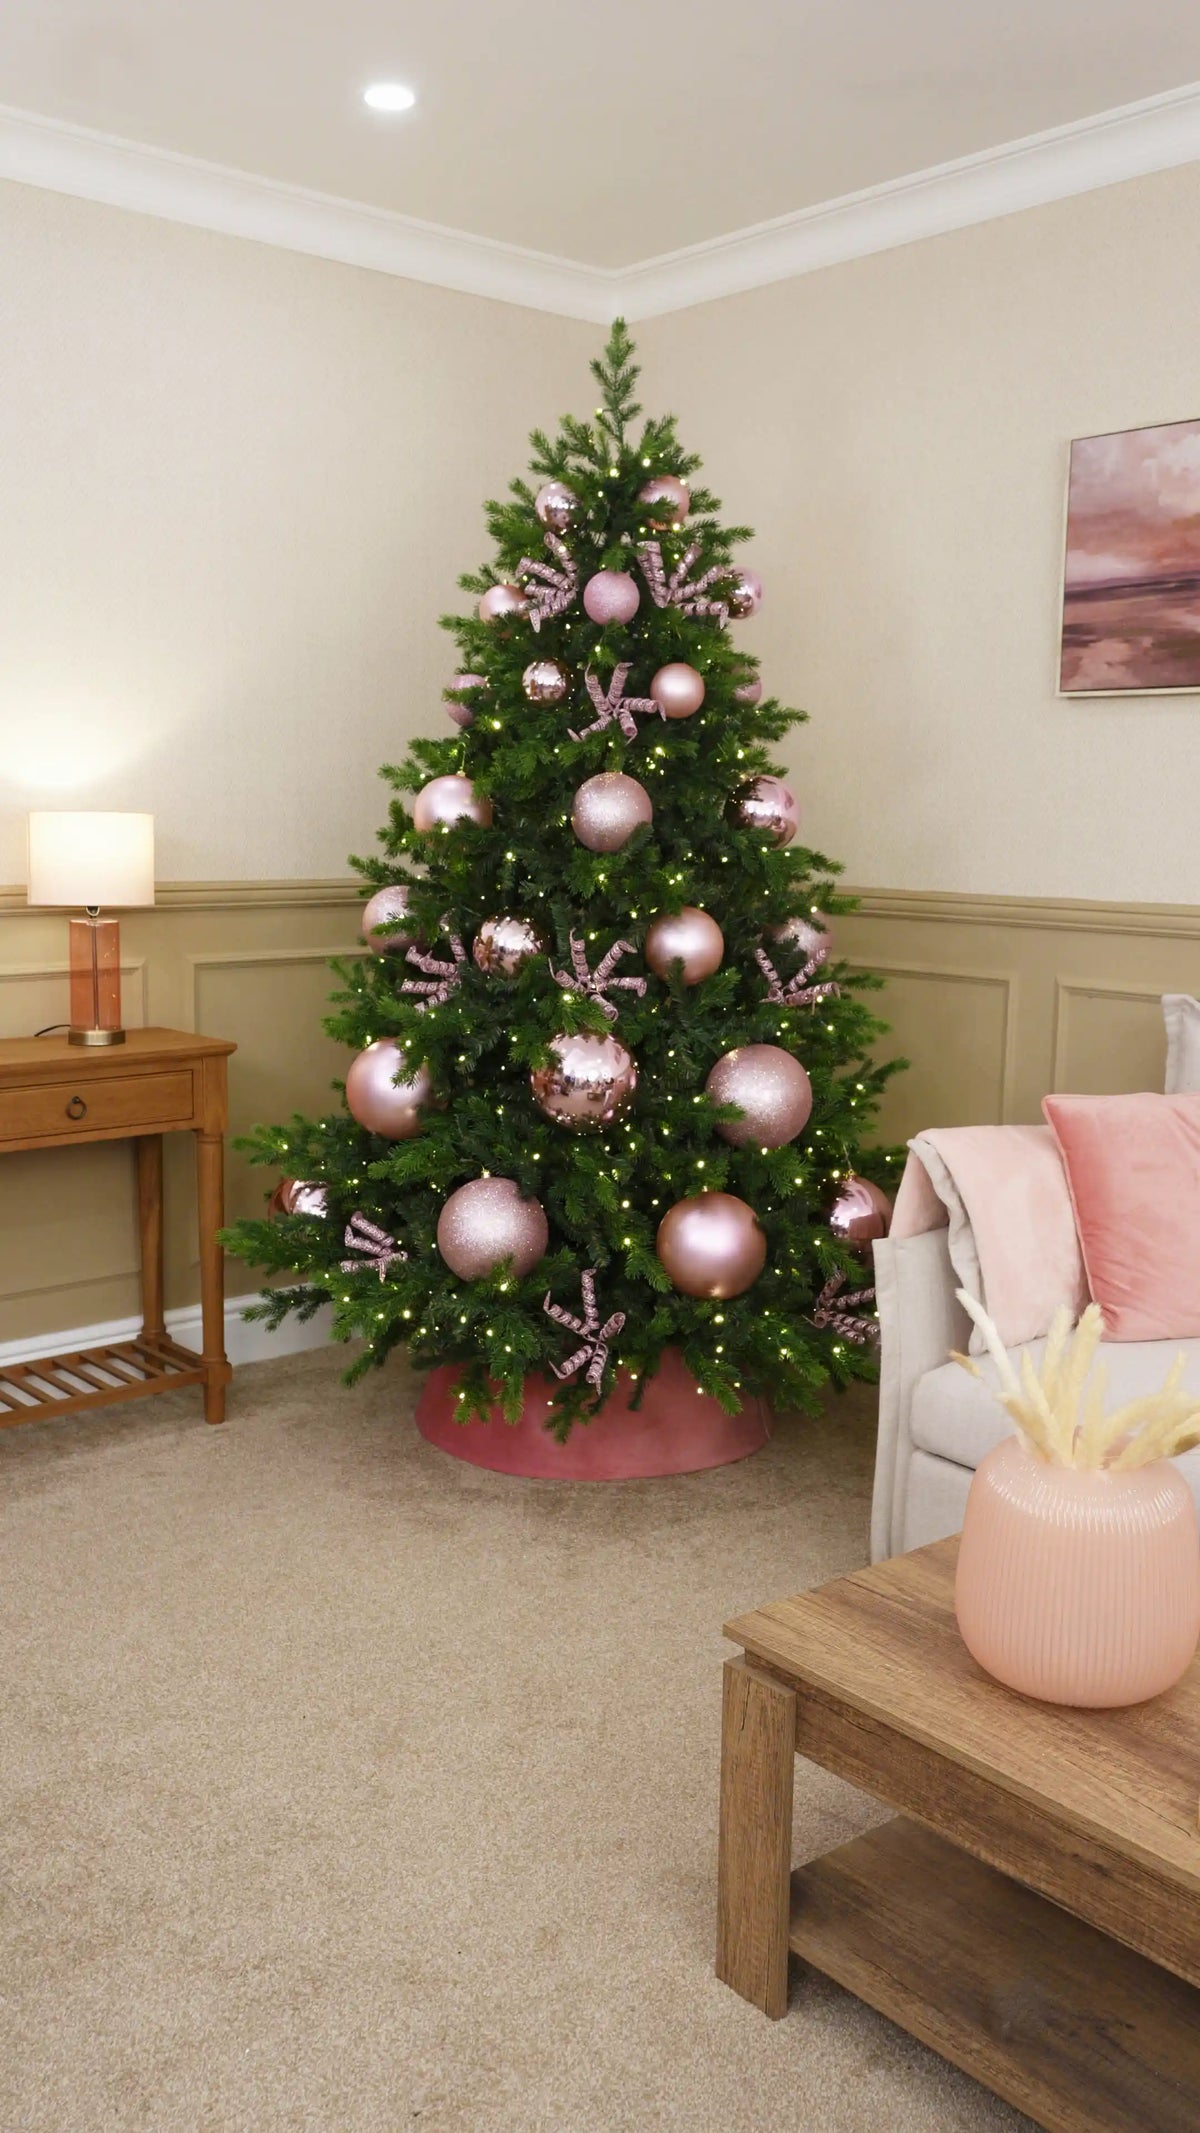
With the baubles in place, it’s time to introduce more texture and movement using Glitter Spiral Picks.
Position the picks evenly throughout the tree, placing them into the larger remaining gaps between the baubles. Angle each pick slightly outwards so the spiral shape extends naturally away from the branches rather than sitting flat against the tree.
The curled design helps break up the round shapes of the baubles, adding playful movement, sparkle and visual interest throughout the design.
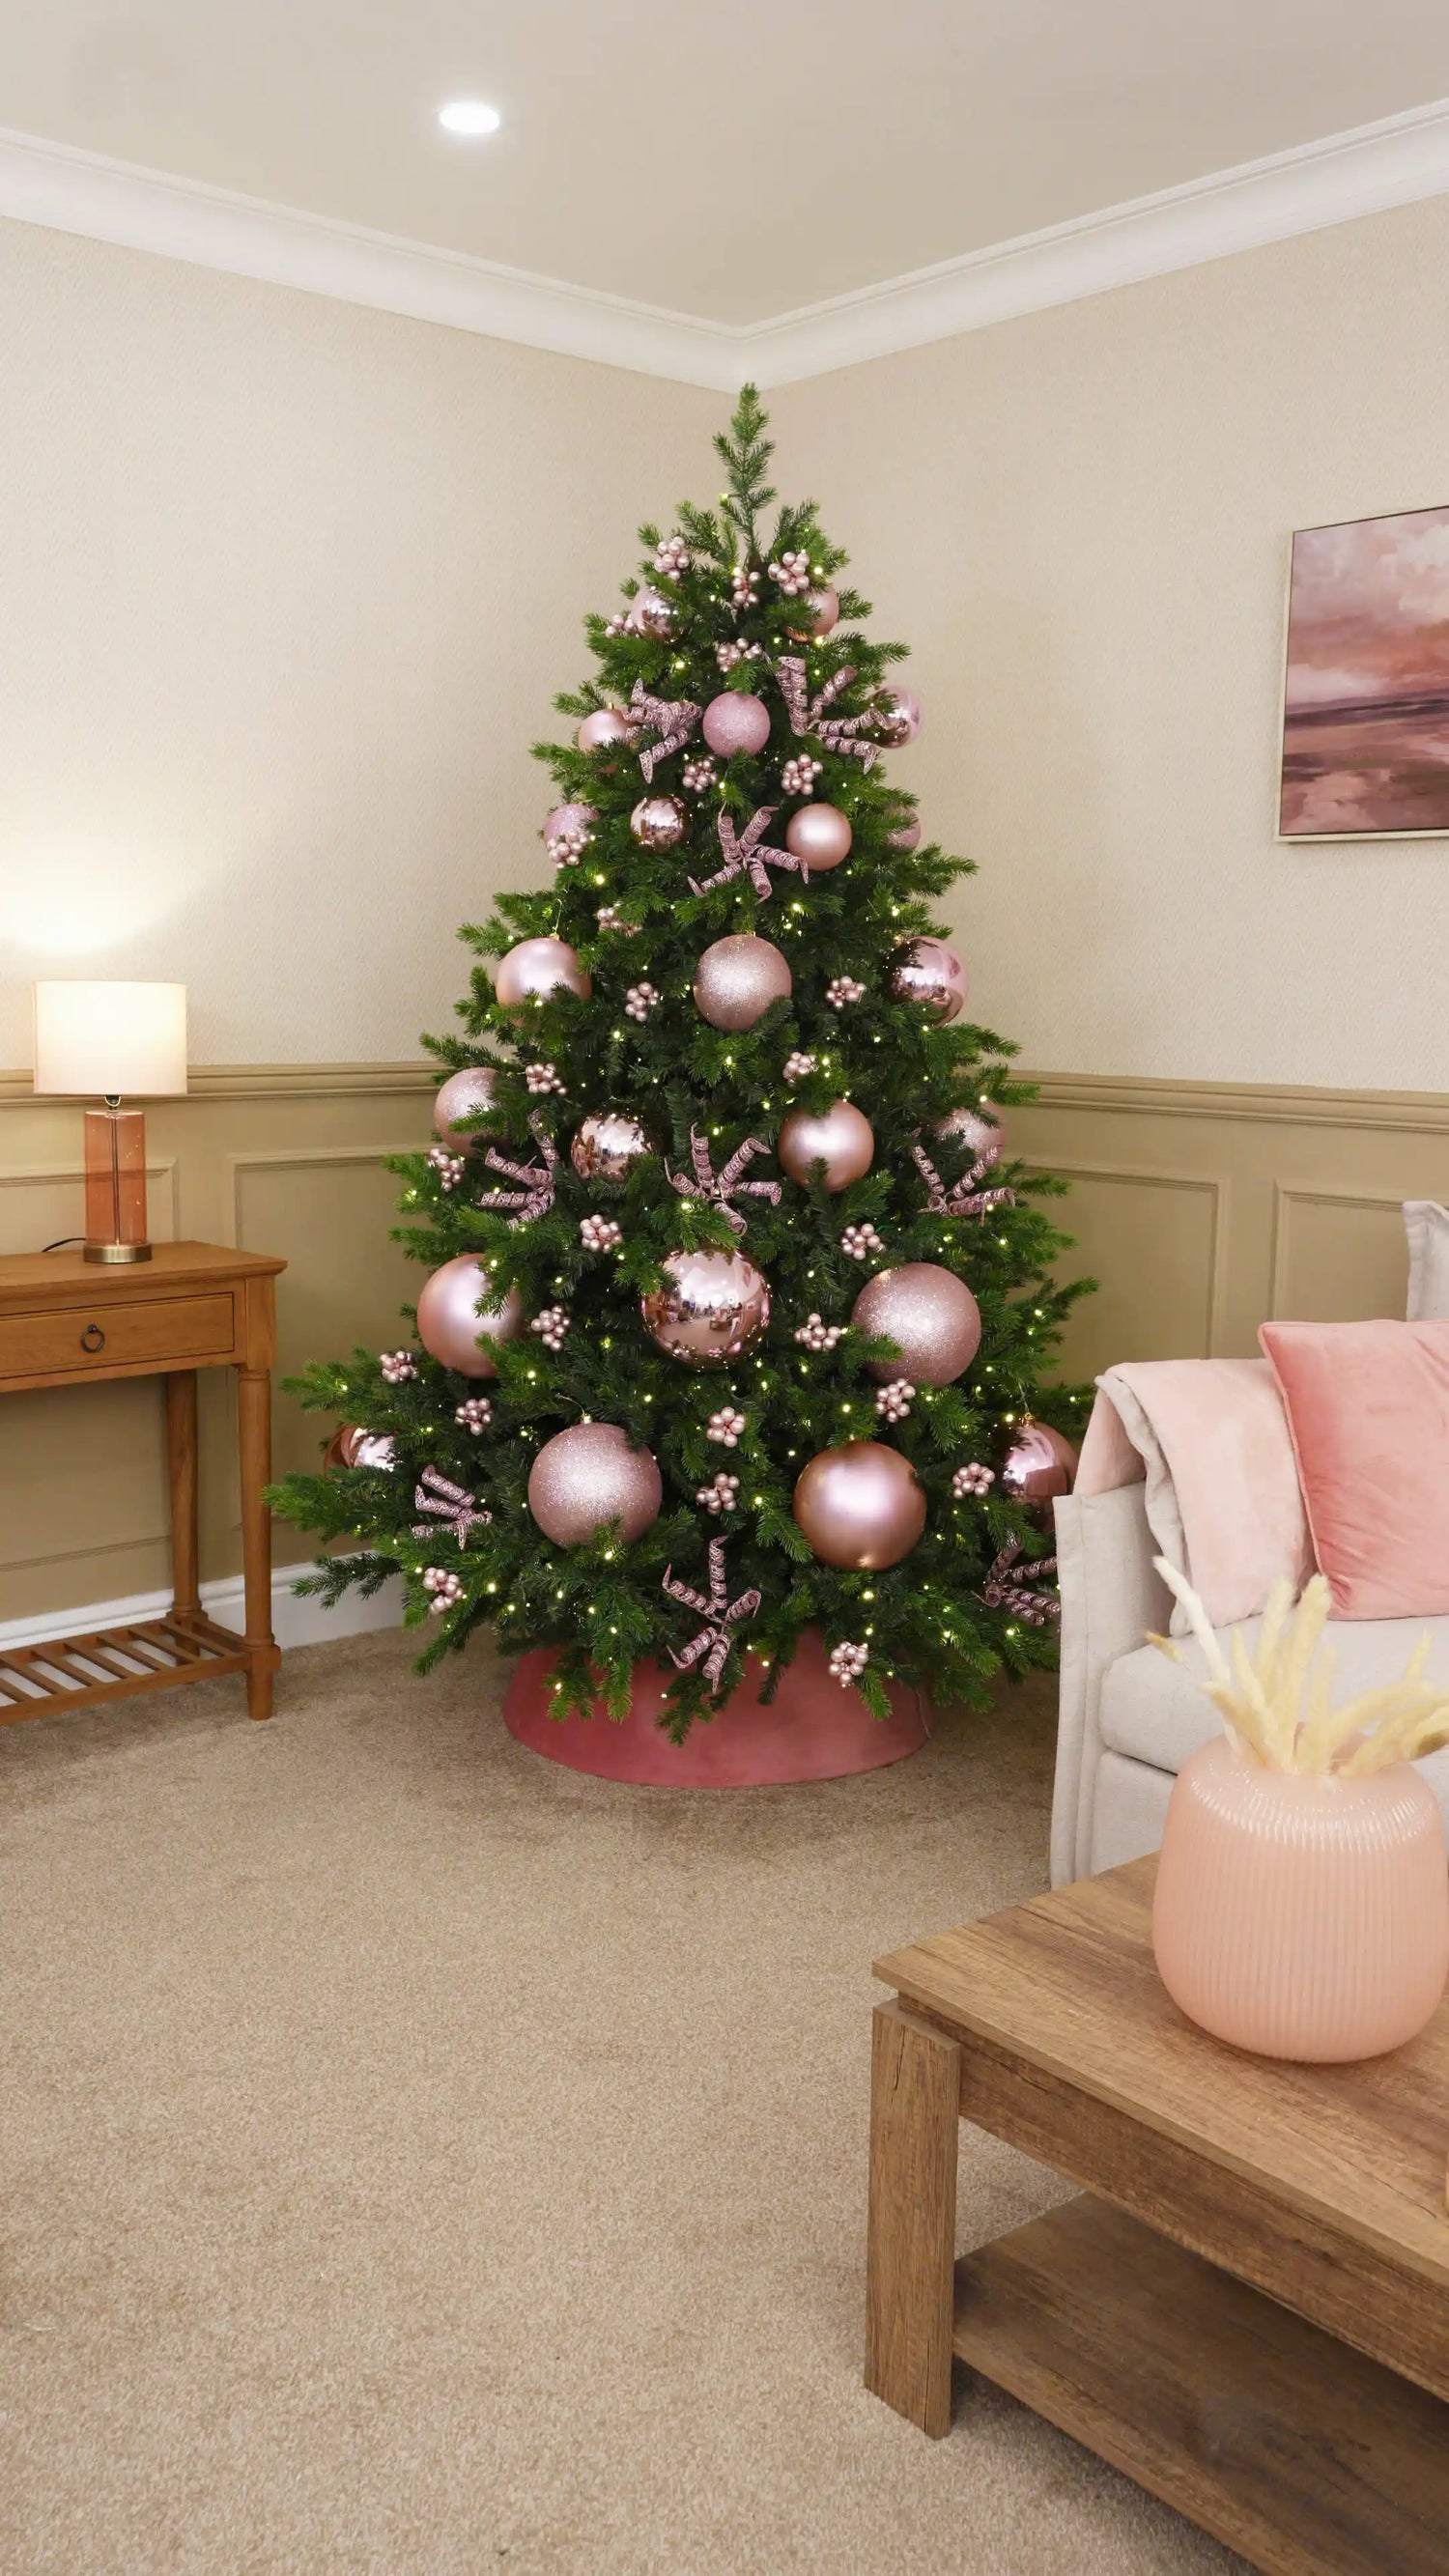
Next, tuck Glass Berry Clusters into the smaller spaces between the baubles and glitter spiral picks.
Because they are smaller and more delicate than the baubles, glass berry clusters are ideal for filling the tiny gaps that naturally appear once the main decorating is underway. Nestle them slightly into the branches so they feel woven into the design rather than sitting on the surface.
Their reflective glass finish catches the tree lights beautifully, adding another layer of sparkle while softening the
transitions between the larger decorations.
Once the glass berry clusters are in place, add Pink Glitter Nest Picks throughout the tree to introduce a softer, more sculptural layer.
Position each pick in the larger gaps between the baubles, glass berry clusters and glitter spiral picks. Allow the open, curved loops to extend slightly beyond the branches so they frame the surrounding decorations without overpowering them.
Vary the angle of each pick as you work around the tree. This helps the loops catch the light from different directions and stops the design from looking too uniform.
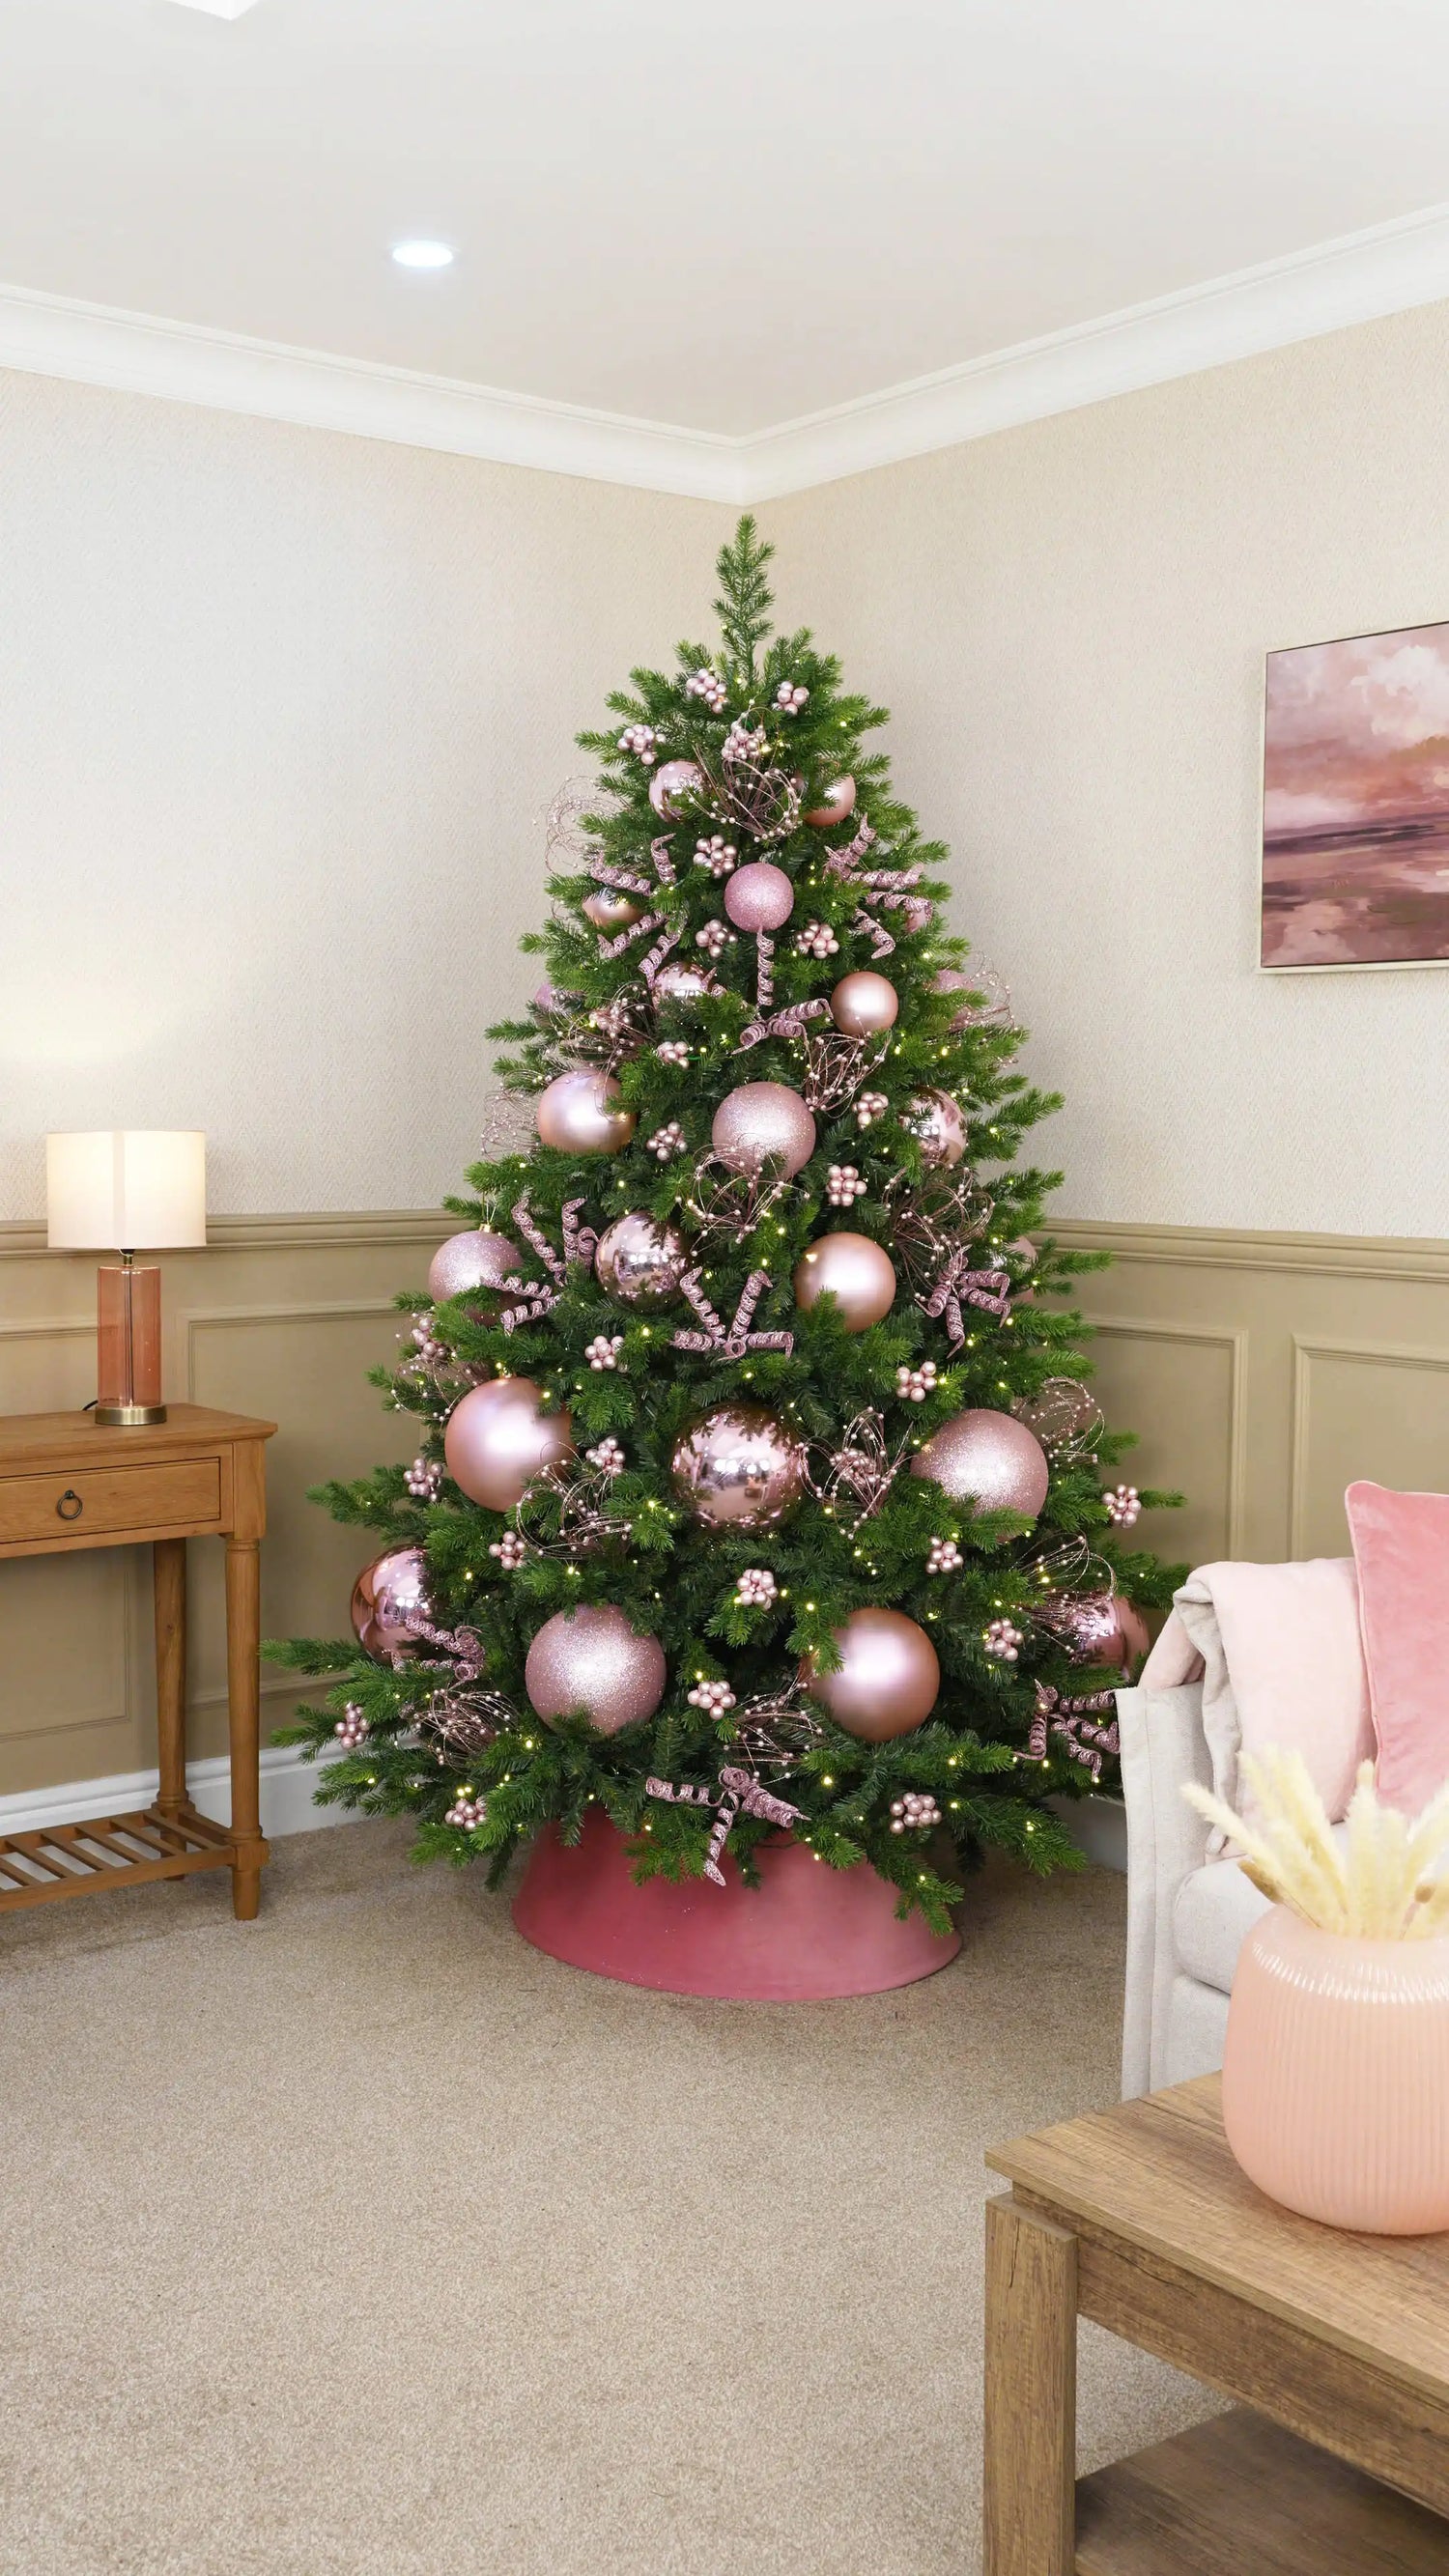
Now add Pink Glitter Spiral Swirl Picks throughout the tree to introduce height, movement and a playful finishing touch.
Work them between the baubles, glass berry clusters and other glitter picks, using them to fill any remaining larger spaces. Angle each pick so the glittered spiral extends naturally away from the branches.
Vary the direction of the curls, allowing some to sweep upwards and others to gently cascade downwards. Their graceful shape softens the overall design while adding another layer of sparkle, helping to tie the pink decorations together.
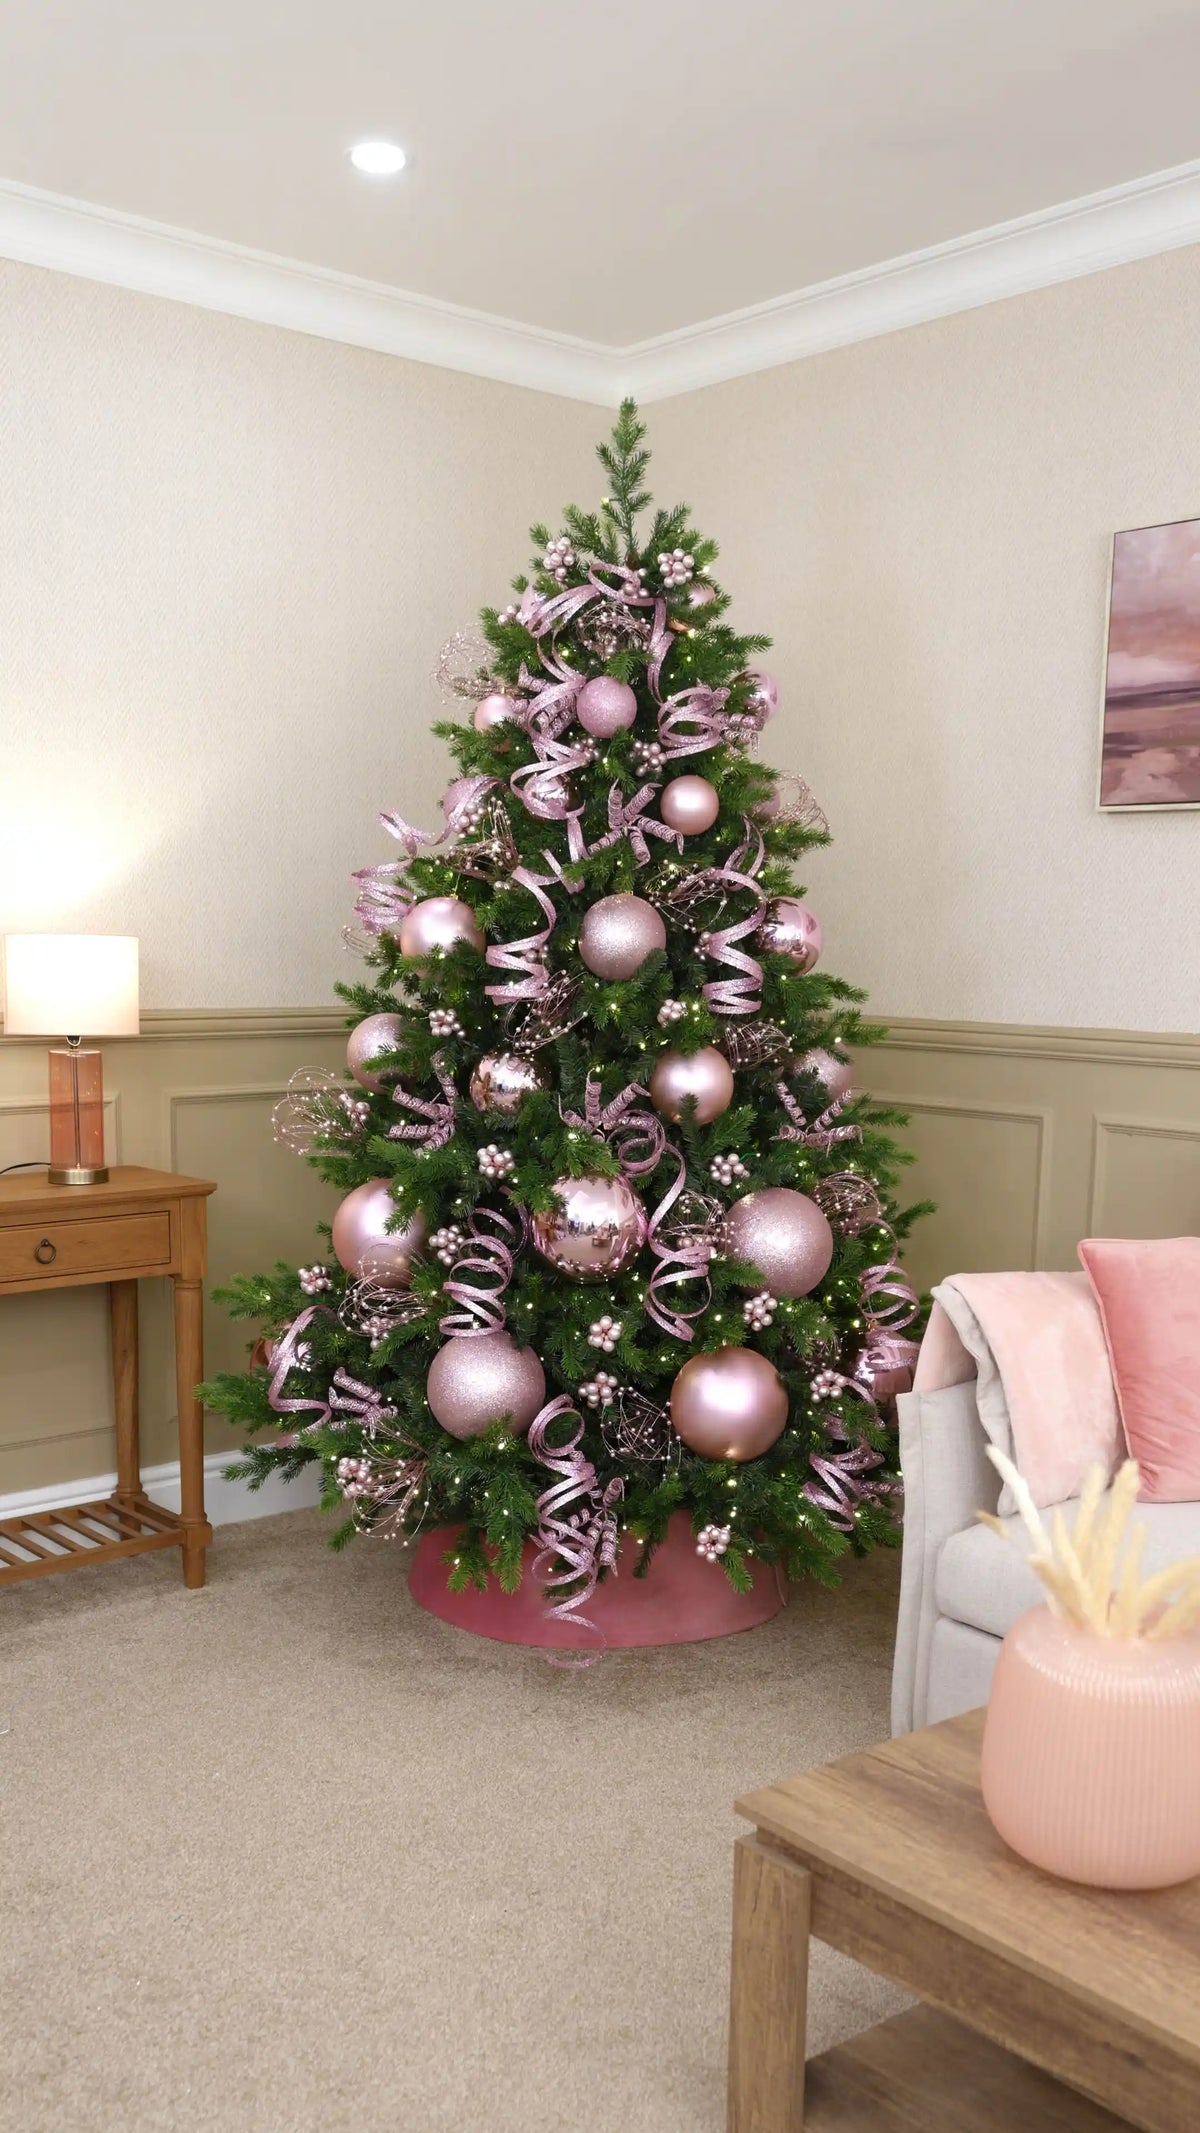
To help bring the whole look together, add Pink Glass Baubles throughout the remaining branch tips.
Rather than hanging them deep inside the tree, position them close to the outer tips. This simple technique gives the tree a fuller appearance, creates extra sparkle and adds another level of visual interest.
Use a mixture of shapes and finishes to fill the final gaps between the larger baubles, glitter picks and glass berry clusters. These smaller glass decorations act as the final detail, helping every layer feel connected.
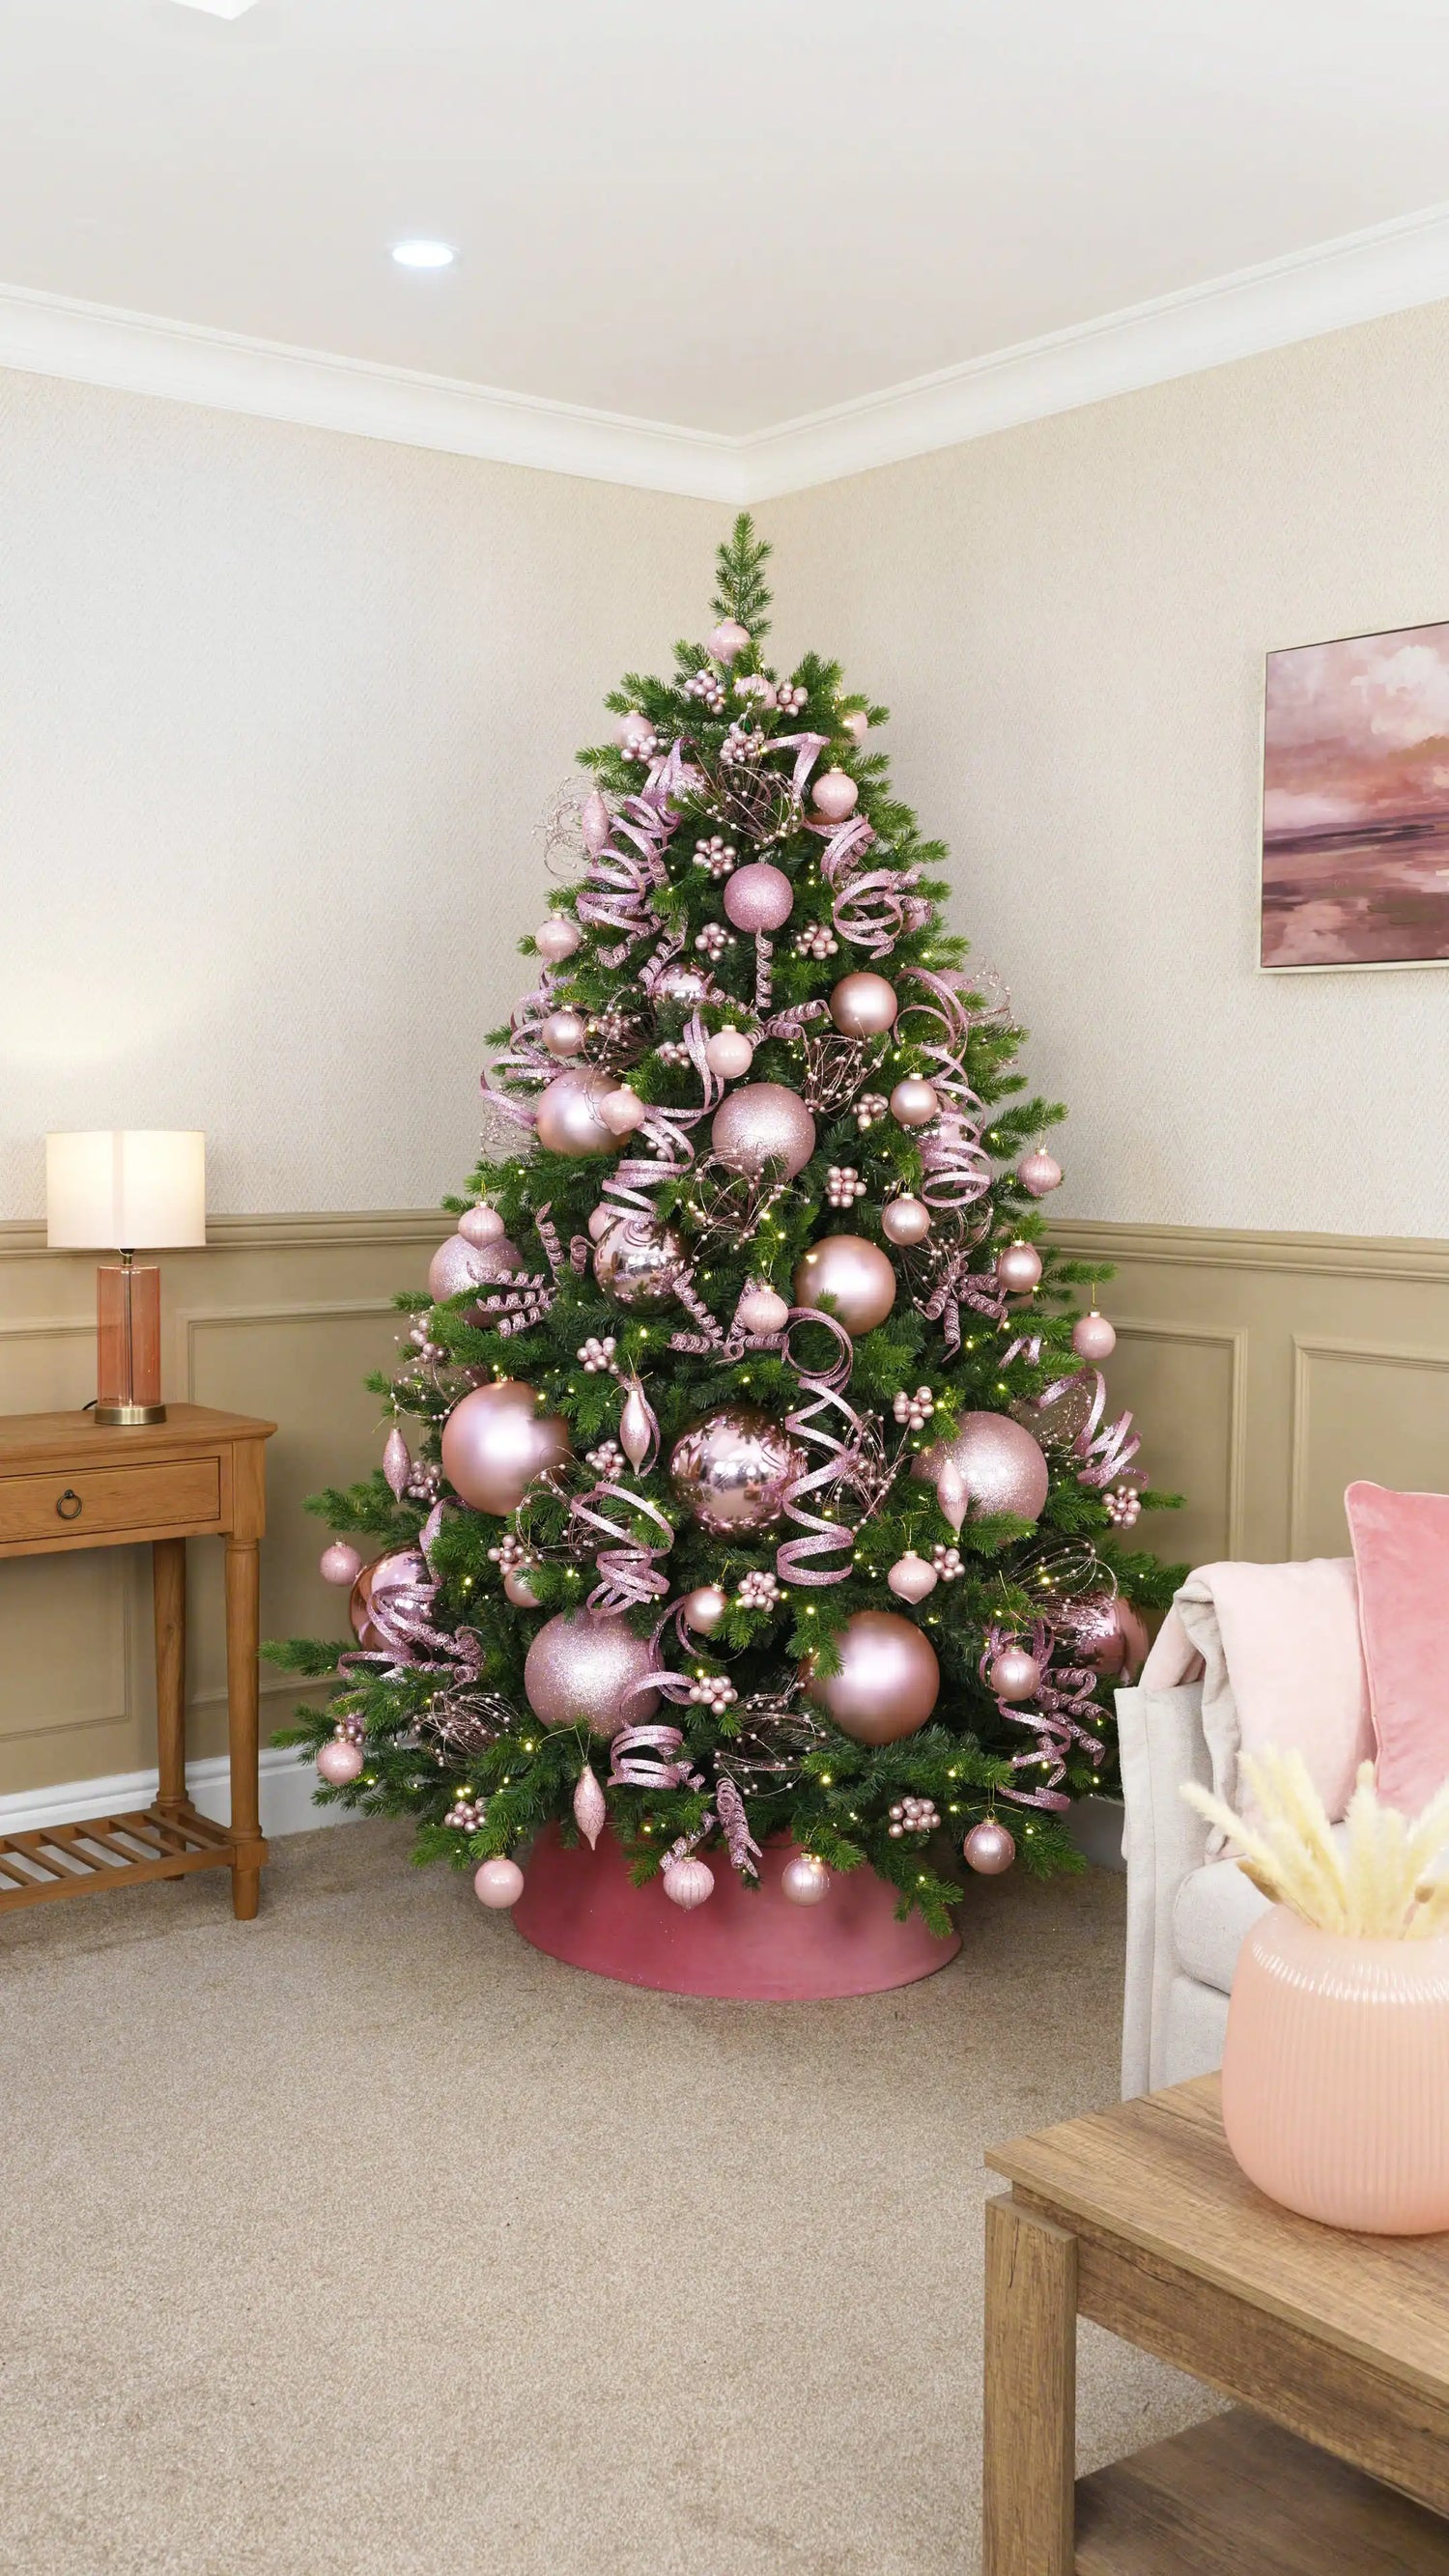
Finish the tree by creating an elegant topper using Pink Glitter Wispy Sprays and Pink Glitter Twig Sprays.
Start with the Pink Glitter Twig Sprays, placing them upright through the centre of the top branch to create height and structure. Then weave the Pink Glitter Wispy Sprays between them, allowing the finer stems to spread outwards in different directions.
Vary the angles and heights of each spray so the topper feels full and airy without looking too symmetrical. This draws the eye upwards and completes the tree with a light, sparkling finish that echoes the delicate textures used throughout the rest of the design.
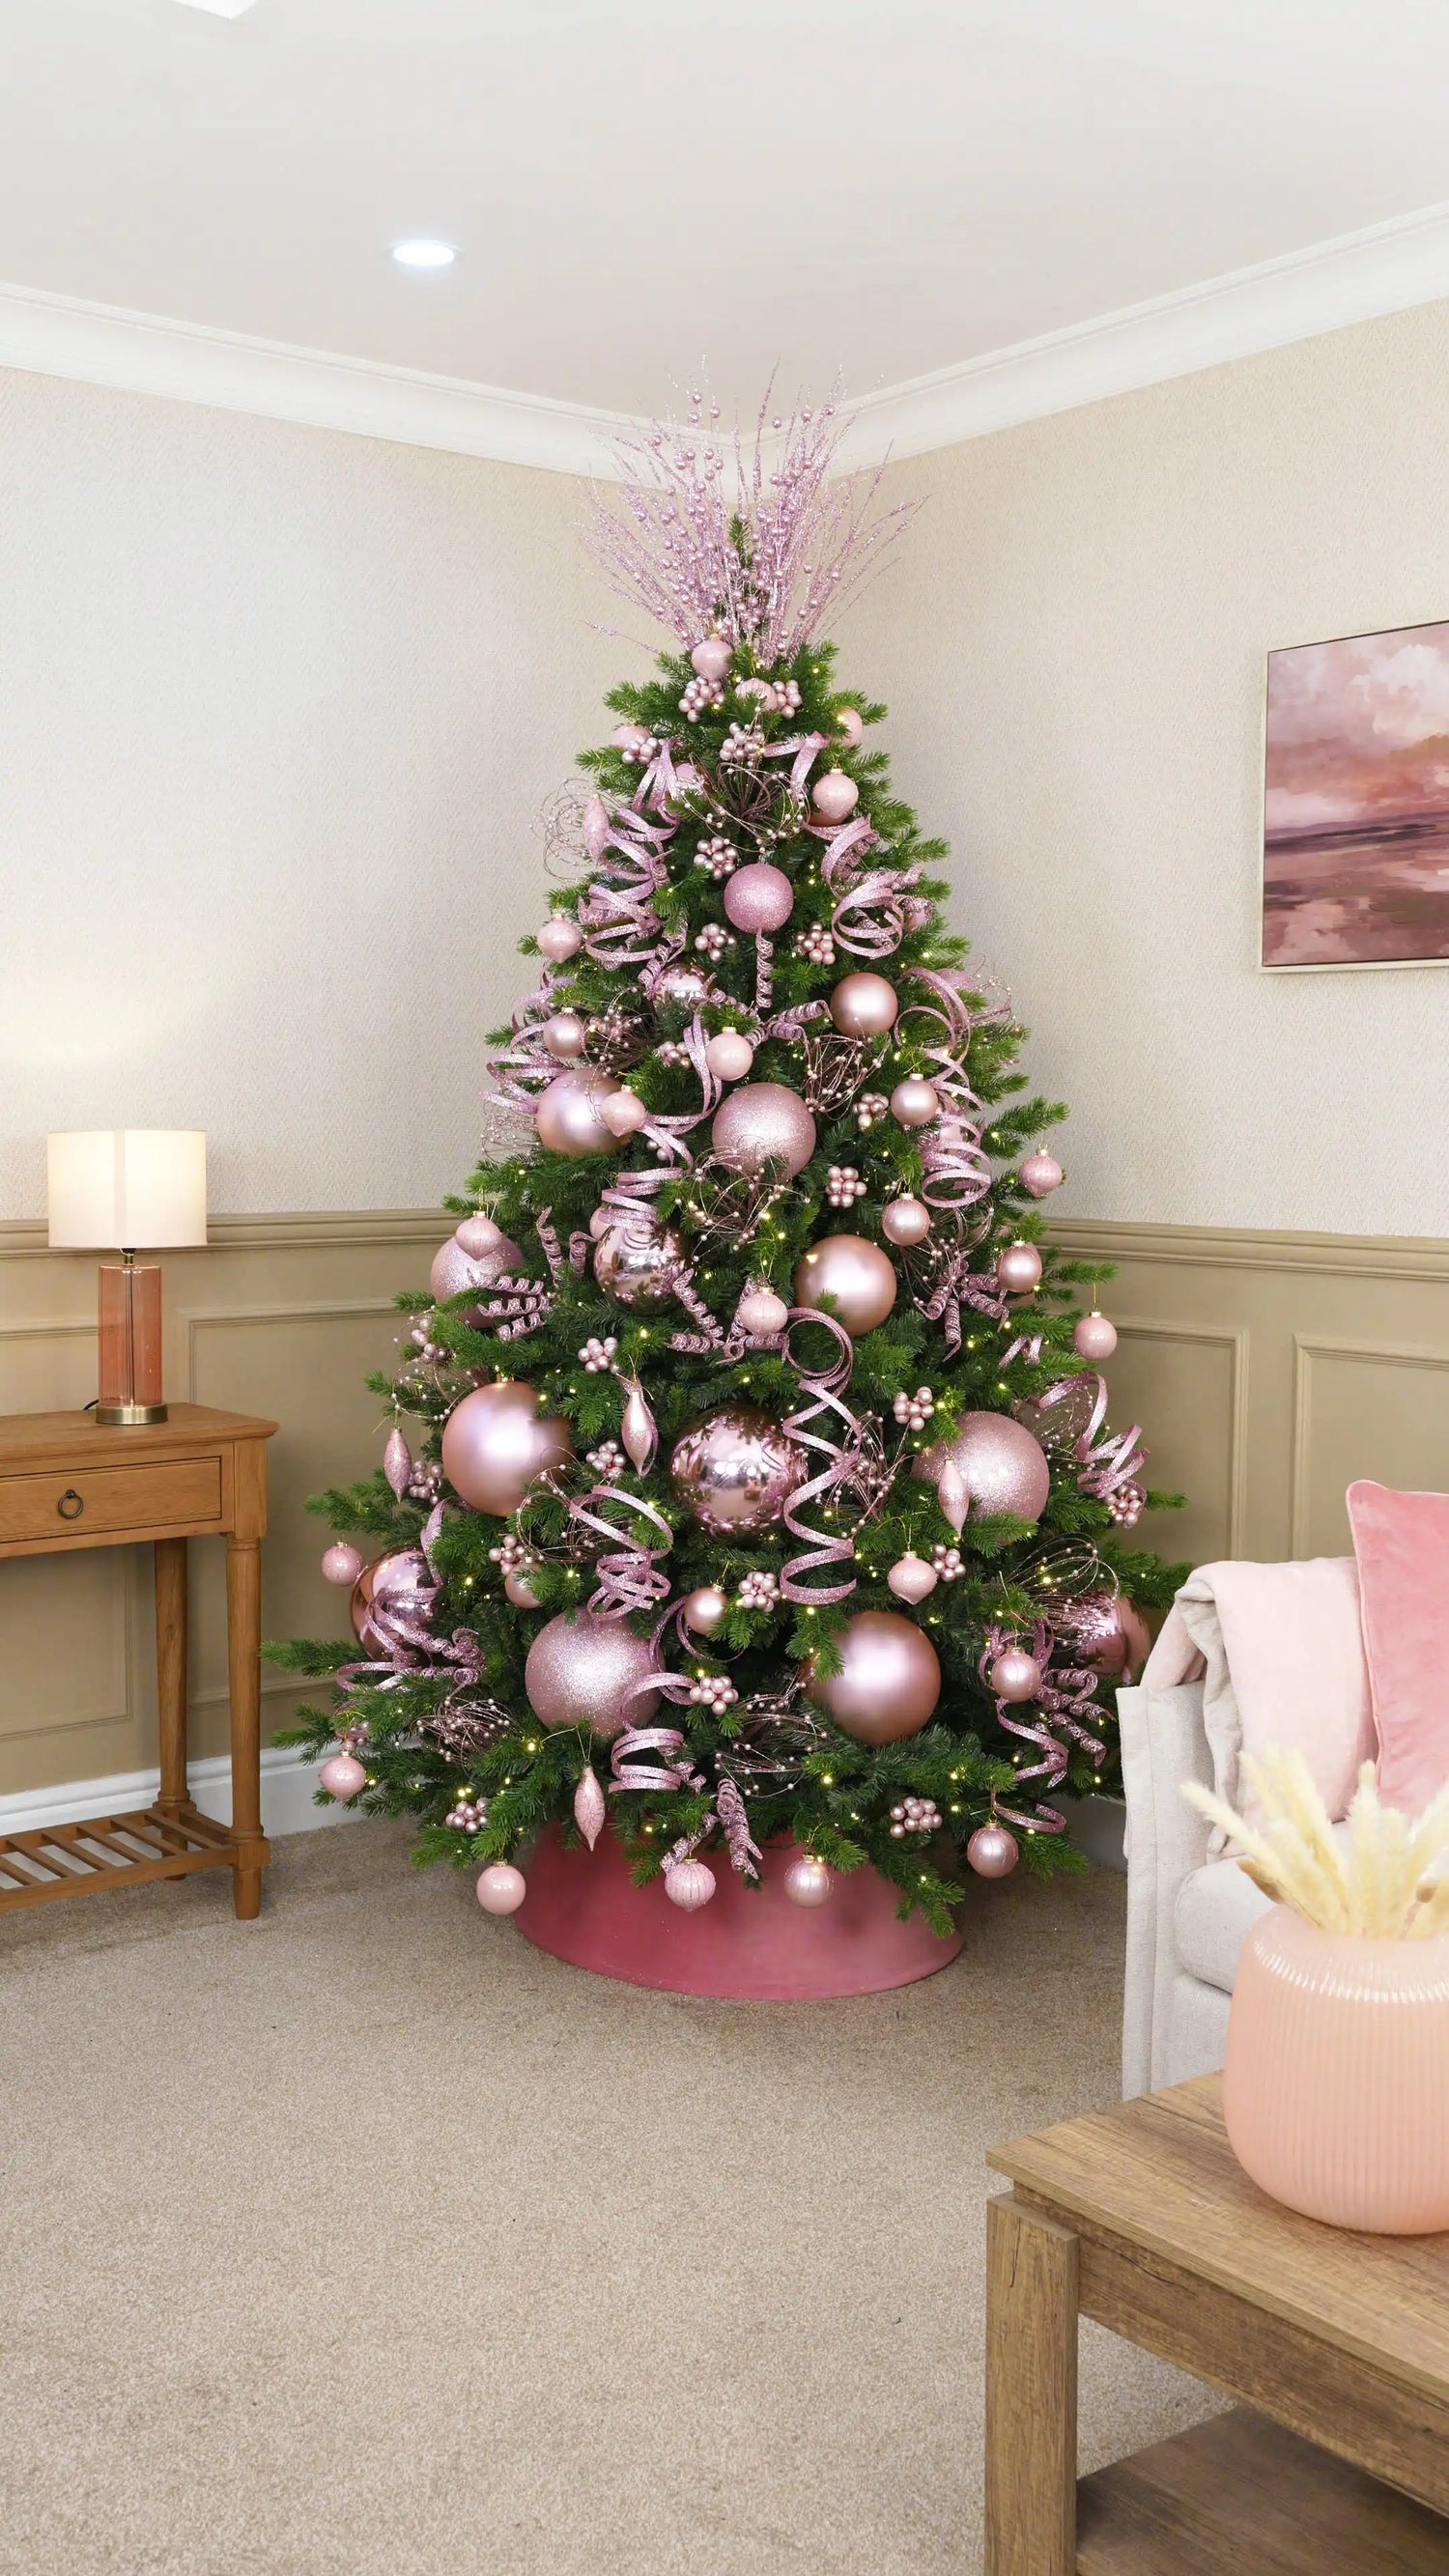
The Finished Look
This pink Christmas tree combines oversized baubles, glitter picks, glass berry clusters, pink glass decorations and a sparkling spray topper to create a playful yet elegant festive look.
Decorating in layers allows each element to build naturally, from the larger statement baubles through to the finer glitter details and finishing glass decorations. The mix of matt, shiny, glitter and glass finishes gives the tree depth, while the sculptural picks and sprays add movement from top to bottom.
Shop the look highlights


Choose your option


Choose your option


Choose your option


Choose your option


Choose your option


Choose your option


Choose your option


Choose your option


