

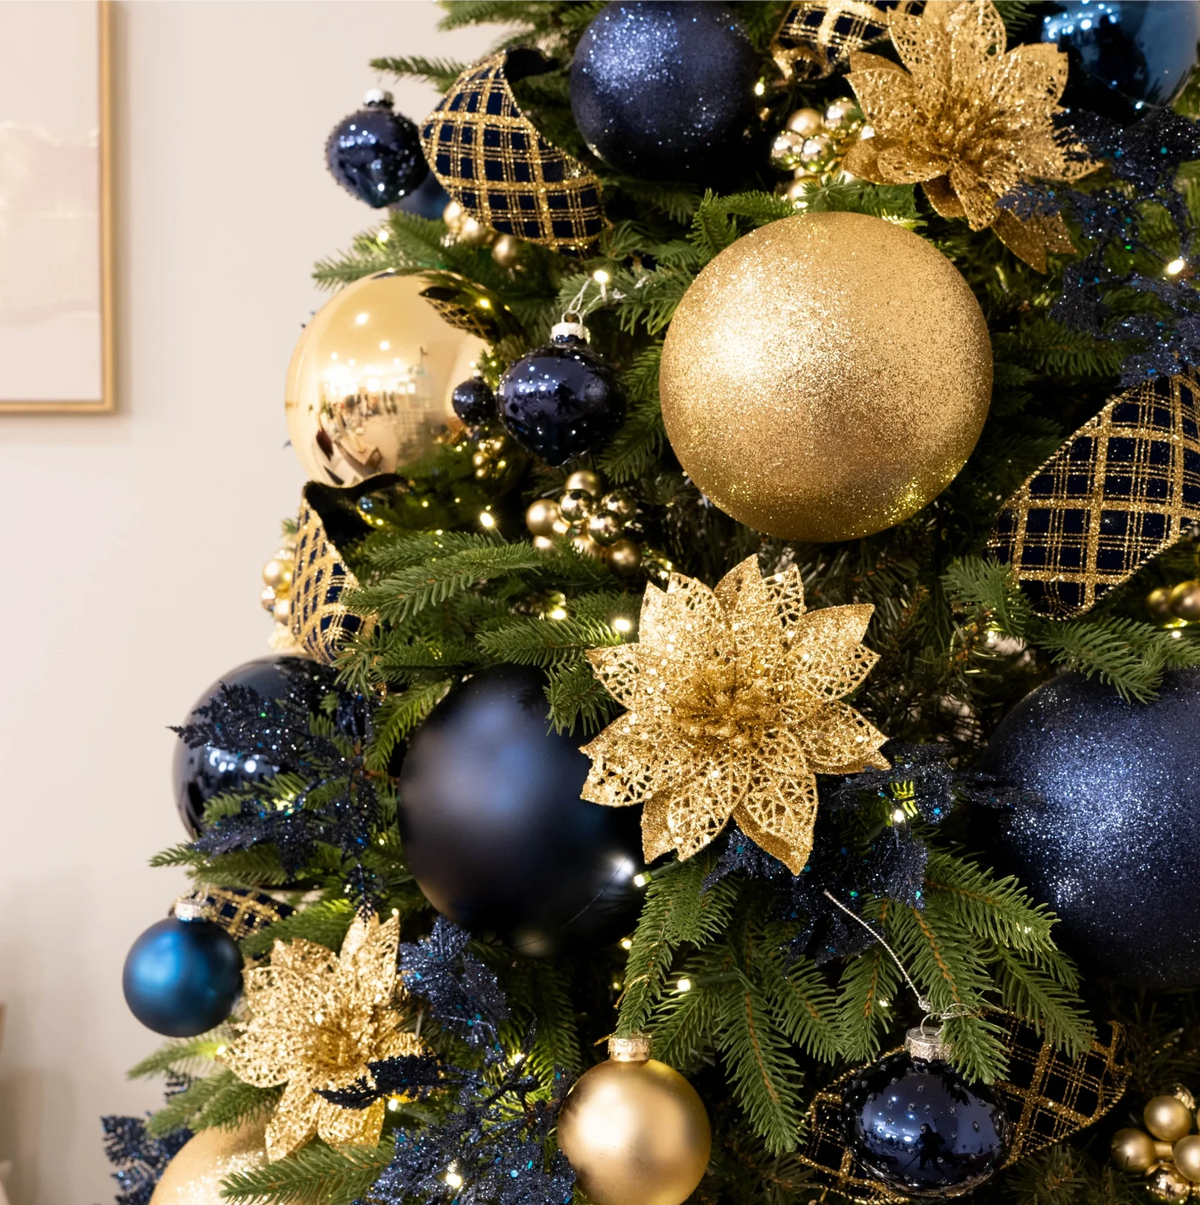
The Navy & Gold Look

Elegant Navy & Gold Styling
Follow our simple step-by-step guide to style the timeless look with foliage, baubles and texture. watch the video below for the full look.
Watch The look
Come to life
Come to life
Discover in our video how to style a Christmas tree with navy and gold decorations, creating a beautifully layered Christmas look with velvet texture, metallic detail and elegant festive depth.

Step-by-step
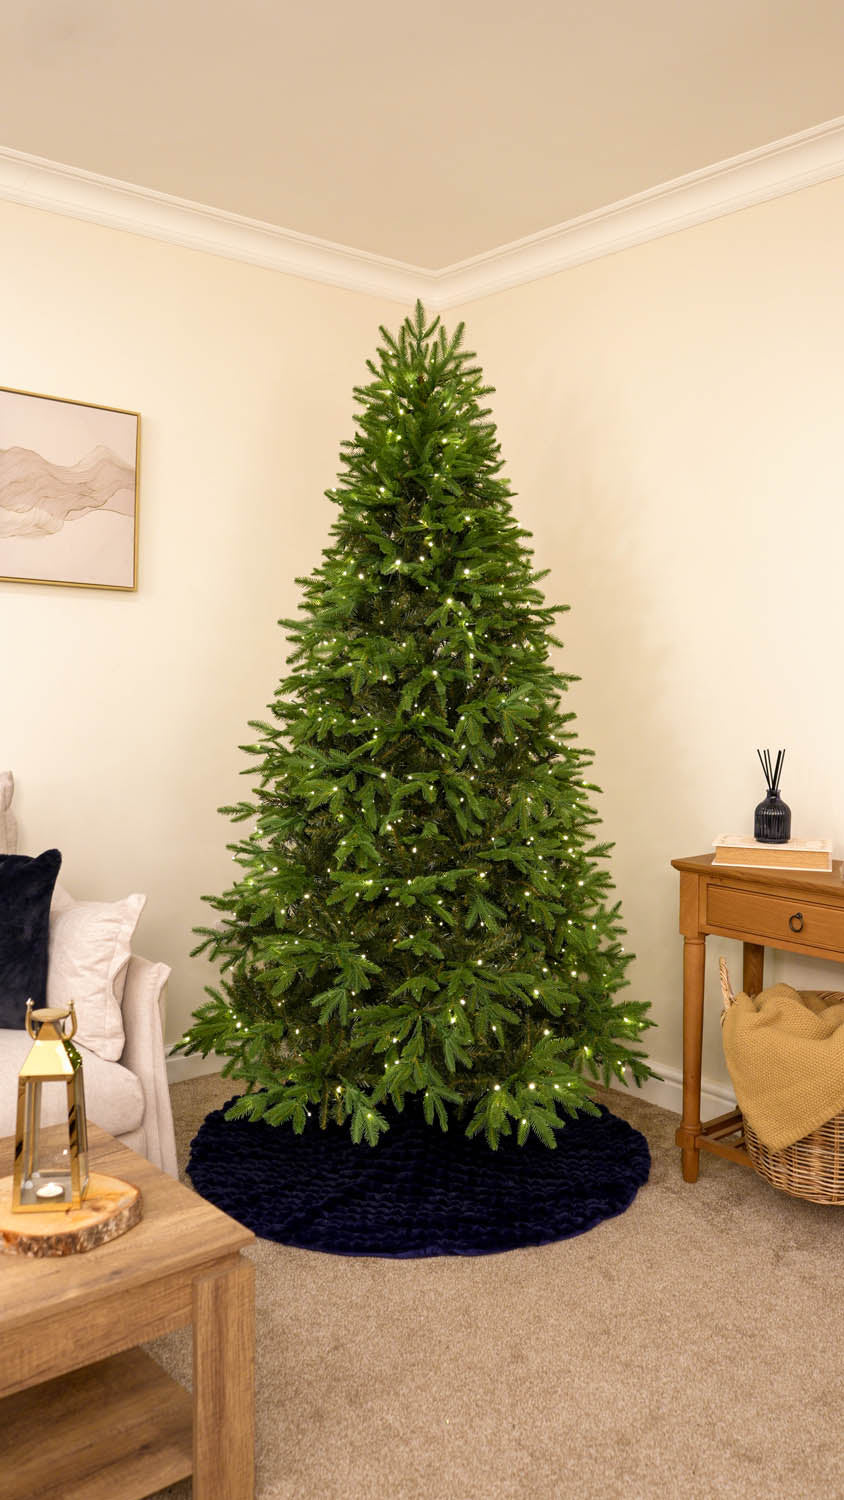
Make sure every branch of your 7 ft Royal Fir Christmas Tree has been carefully fluffed before you begin adding any decorations. Properly shaping your tree at the beginning creates a fuller silhouette and gives every bauble, flower, pick and ribbon bubble somewhere to sit naturally.
To help, you can stand back every few minutes while fluffing to check how the tree is looking from a distance. This makes it much easier to spot any uneven areas that remain.
Once you’re happy with the shape, position your Navy Faux Fur Diamond Tree Skirt around the base before the rest of the decorating. The soft texture and rich navy colour introduce the palette from the beginning, while creating a polished foundation for the decorations to come.
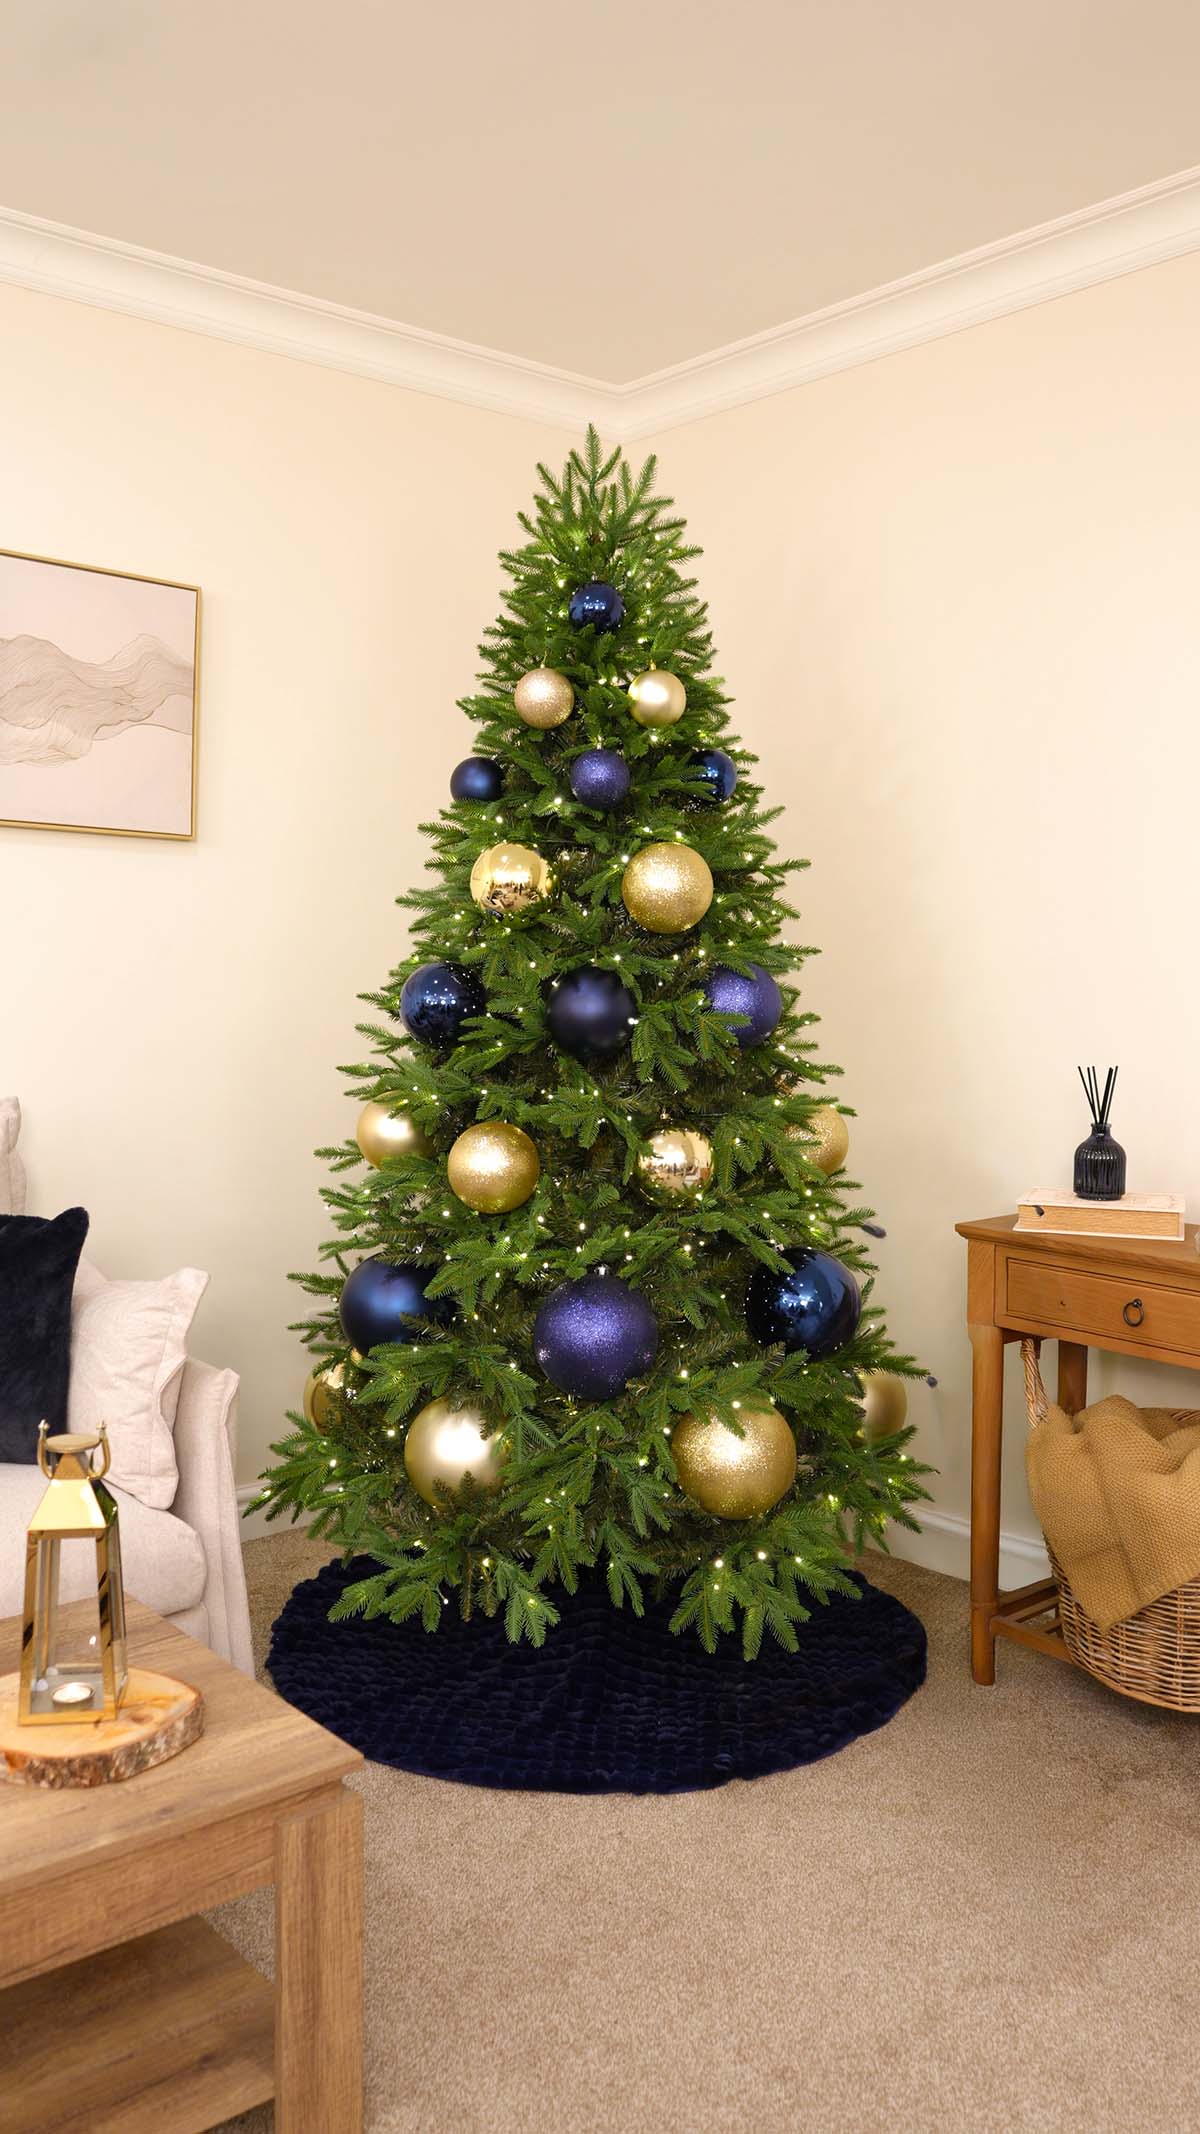
Start the main decoration layer by adding 20cm gold baubles across the lower section of the tree.
Use shiny, matt and glitter finishes within the layer, mixing them as you work so the gold section still has texture and variation. Position the baubles towards the front of the branches so they remain visible against the greenery.
Next, add a layer of 20cm navy baubles directly above the gold. Keep the colours in clear bands so the contrast between the warm gold and deep navy is easy to see, while still carrying each layer around the sides of the tree for a consistent finish.

Continue the same alternating colour pattern as you work up the tree, using 15cm gold and navy baubles next.
Create three more layers above the navy section already in place: gold, then navy, then gold. Mix shiny, matt and glitter finishes within each colour band to add texture while keeping the overall pattern clearly defined.
As you reach the narrower branches towards the top, switch to 10cm baubles and continue the alternating pattern, starting with navy above the last gold layer. Gradually reducing the bauble size keeps the decorations in proportion with the tree while maintaining the distinct navy and gold bands.
Step back regularly to check that each layer is clearly visible, adjusting any baubles that are sitting too deeply in the greenery.
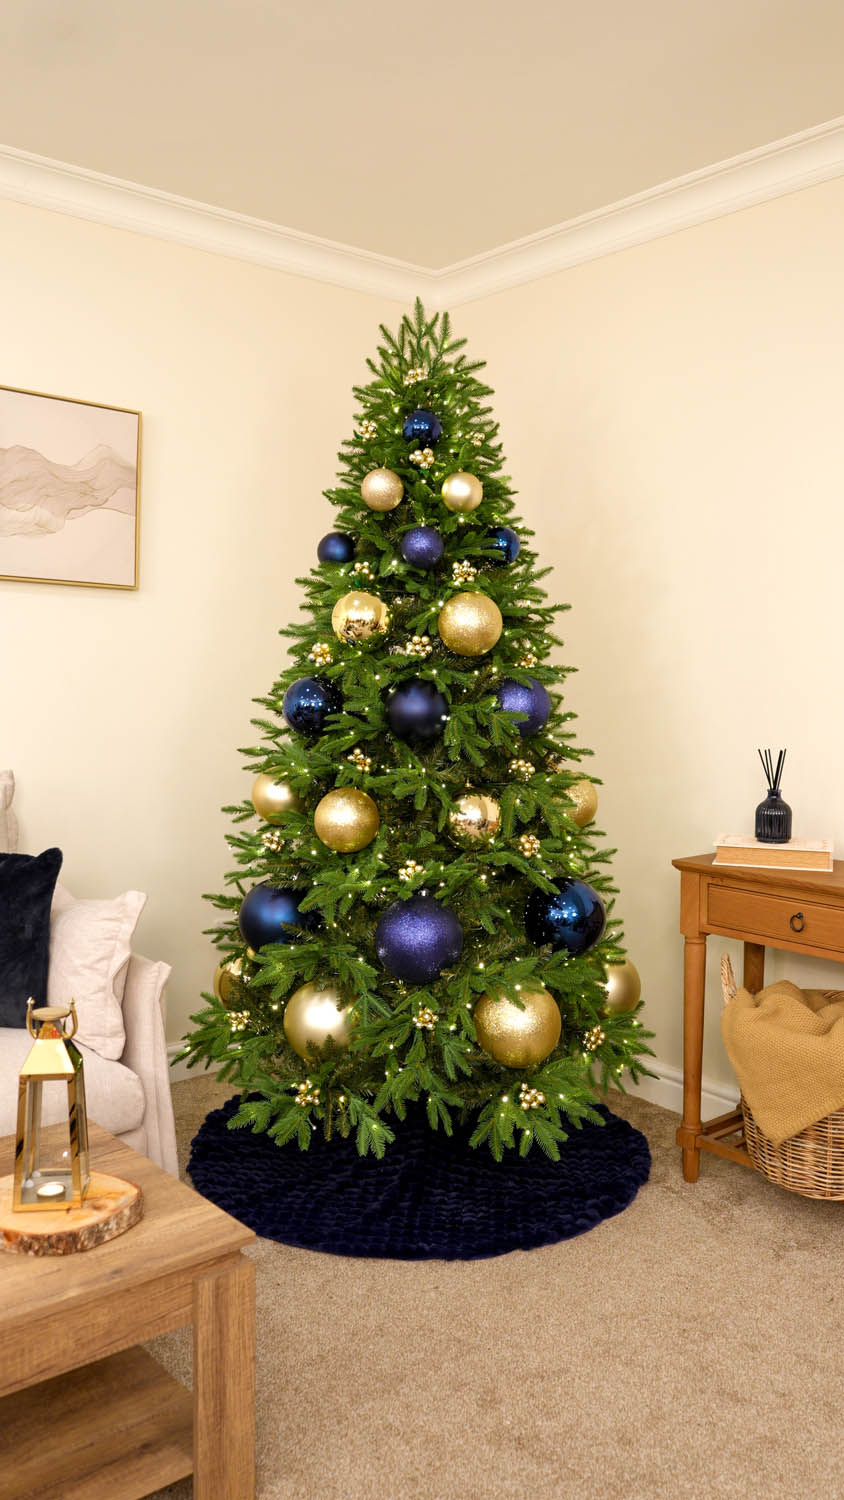
Once the main bauble layers are in place, add Gold Glass Berry Clusters throughout the remaining greenery gaps.
Tuck them between the baubles, spreading the berries so the clusters remain visible and help fill the spaces around each colour band. Work across the front and sides of the tree, from the lower branches up towards the top.
The glass berries catch the lights beautifully and add a finer layer of gold detail alongside the larger baubles. Keep the navy and gold bands visible as you work, allowing the berry clusters to bring the layered design together without hiding the colour pattern.
Next, add Navy Glitter Leaf Cluster Picks throughout the tree, focusing on the spaces between the baubles and gold glass berry clusters.
Slide the stems into the branches, then gently spread the leaves so their shape and glitter finish remain visible. Distribute the picks across the front and sides, adding a finer layer of navy detail around the coloured bauble layers.

Next, add Gold Glitter Poinsettia Flowers throughout the tree between the baubles, berry clusters and navy leaf picks.
Stagger their placement across the lower, middle and upper branches, carrying the flowers around the sides for an even finish. Position each poinsettia so the petals face slightly outwards and remain visible against the greenery.
Their floral shape adds another layer of detail alongside the rounded baubles, while the gold glitter catches the tree lights. Work them into gaps within the coloured layers, bringing touches of gold into the navy sections while keeping the bands of colour clearly defined.
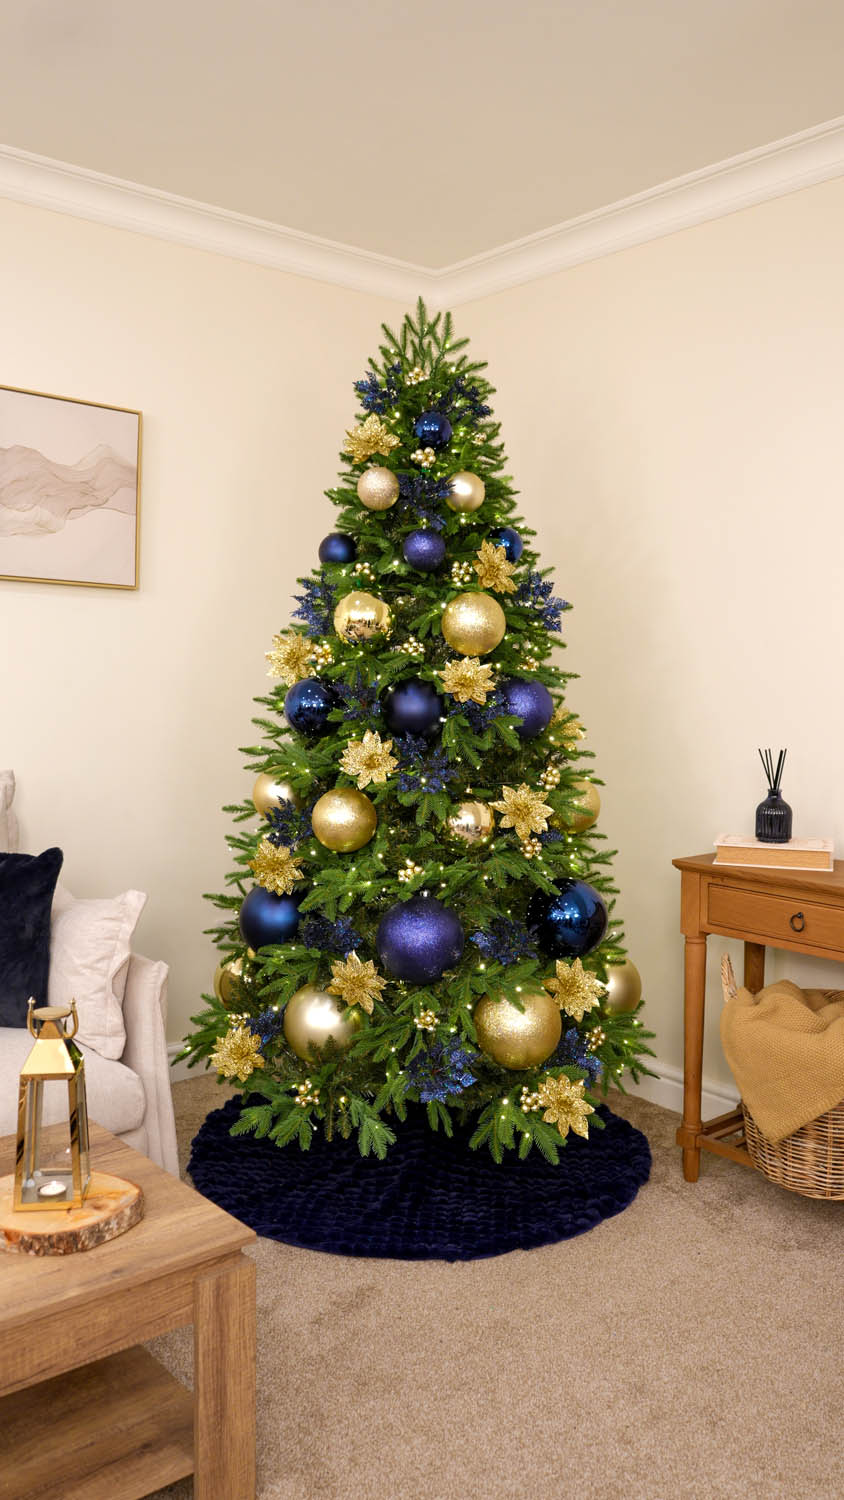
Take your Navy Glitter Diamond Velvet Wire Edge Ribbon and cut it into short strips to create individual ribbon bubbles.
Curve each strip into a single bubble, then tuck both ends into the greenery and secure them by twisting a branch around them. Gently shape the wired edges so each bubble holds a soft, rounded curve.
Place the individual ribbon bubbles between the baubles, flowers and picks, spreading them across the front and sides at different heights. These soft folds of navy add velvety texture throughout the tree while allowing the coloured bauble layers to remain visible.
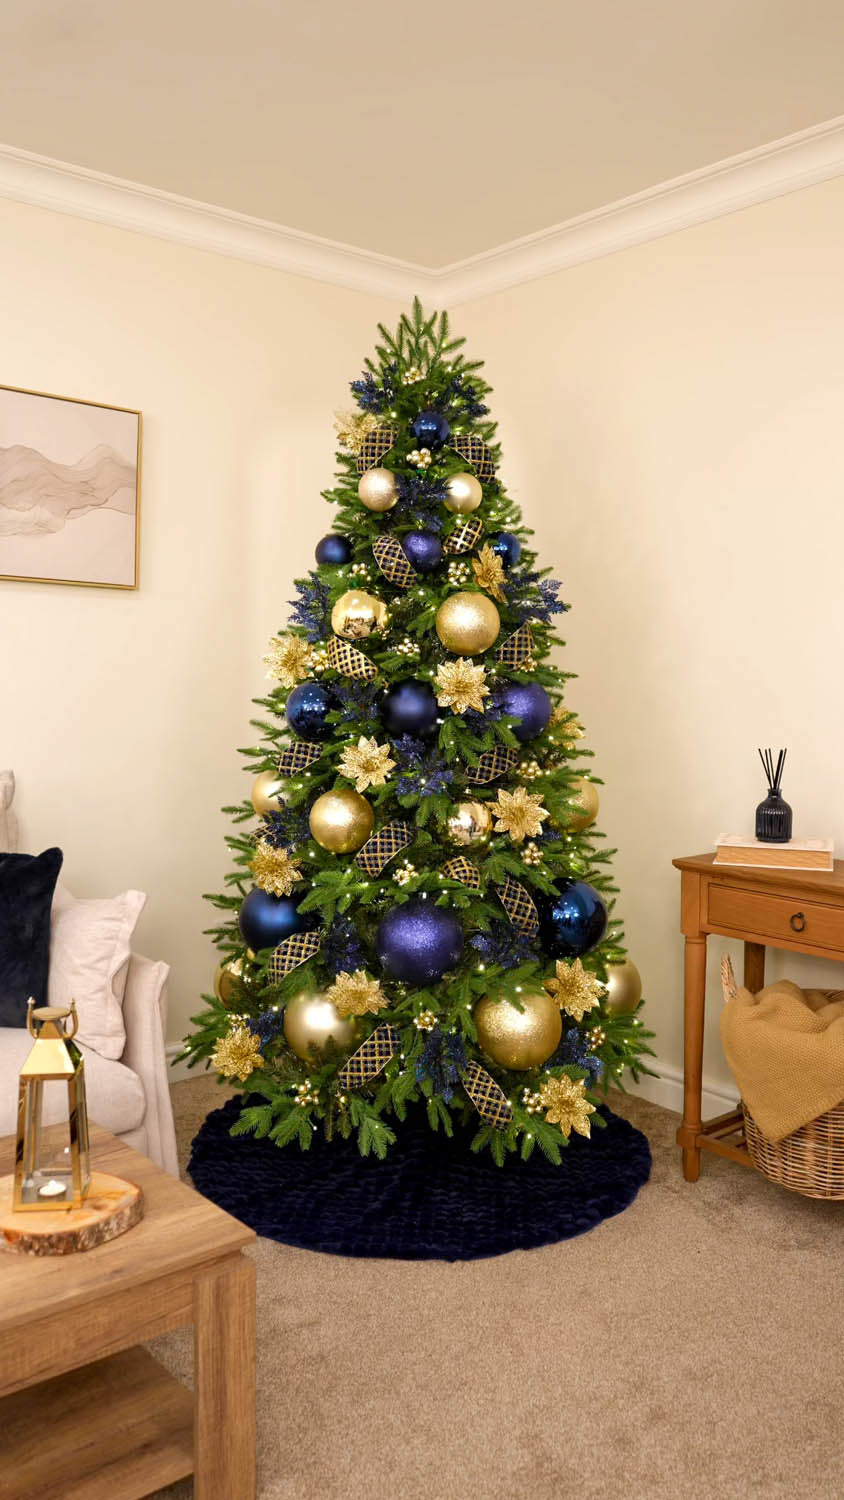
Once the larger decorations, ribbon bubbles and floral details are in place, add Navy and Gold Glass Baubles throughout the tree.
Follow the colour layers already created, adding navy glass baubles to the navy sections and gold glass baubles to the gold sections. Vary their placement slightly, with some sitting deeper in the branches and others closer to the front.
The glass finish catches the tree lights and introduces another texture alongside the matt, shiny and glitter decorations. Use these final baubles to fill any remaining smaller gaps before adding the topper.
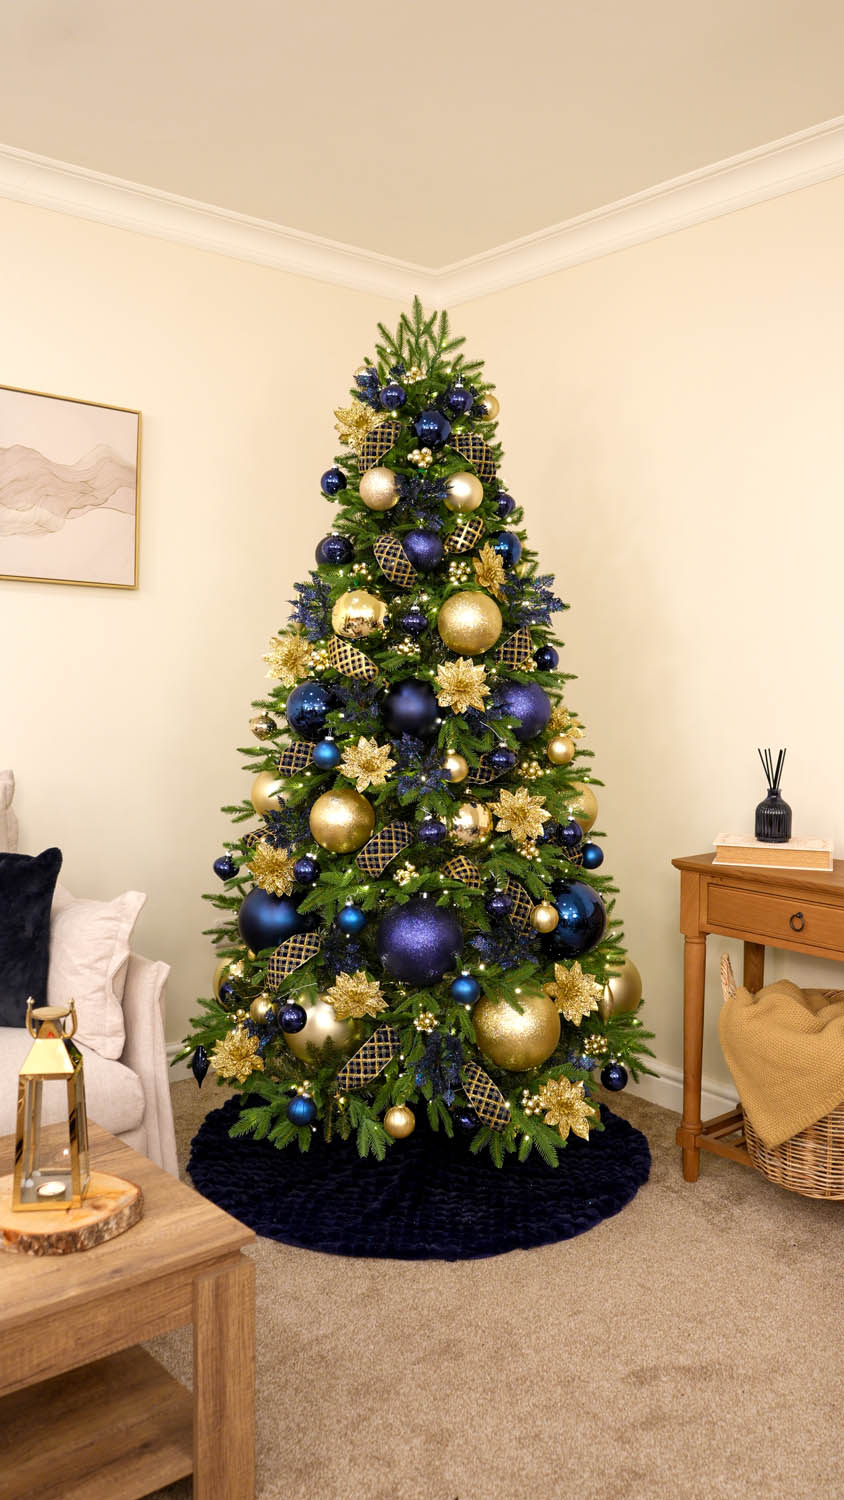
Finish the tree by creating a coordinating topper using the same Navy Glitter Diamond Velvet Wire Edge Ribbon.
Create several rounded ribbon loops, securing them together at the centre before attaching the topper to the uppermost branches. Gently open out each loop and shape the wired edges, spreading the bubbles in different directions to create a full, balanced finish.
Position the velvet and glitter diamond pattern facing outwards so the detail remains visible from the front and sides. The topper carries the navy ribbon texture through to the top of the tree and connects back to the individual ribbon bubbles used throughout the design.
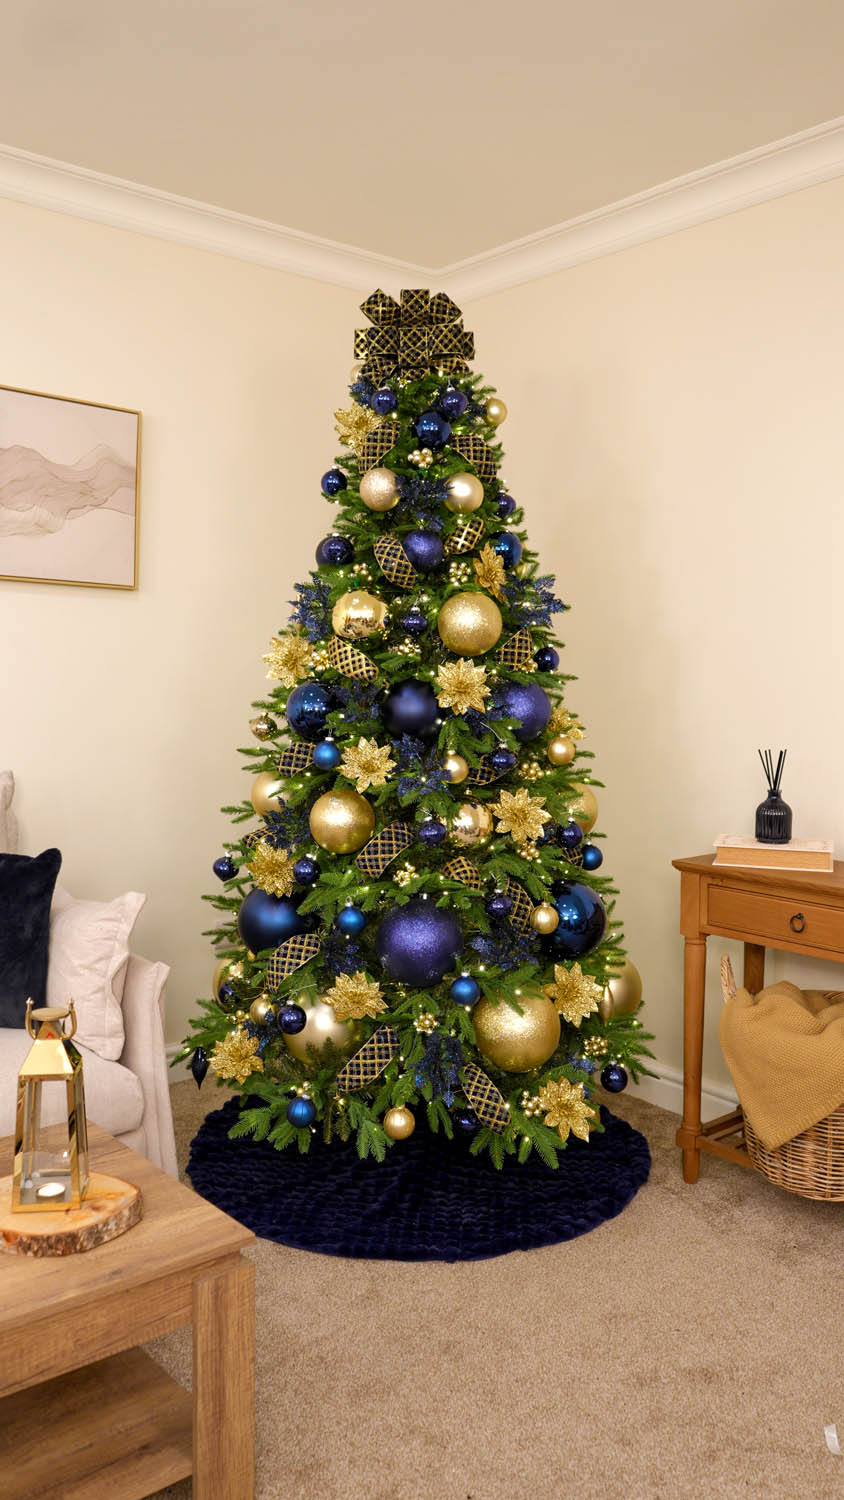
The Finished Look
This navy and gold Christmas tree combines layered baubles, glass berry clusters, glitter poinsettias, navy ribbon bubbles and glass decorations to create a rich, elegant festive look.
The alternating navy and gold bauble bands give the tree its main structure, while the glass berry clusters, leaf picks and glitter poinsettias add texture and detail between each layer. Navy ribbon bubbles soften the design with velvet folds, while the glass baubles catch the warm lights and complete the colour pattern from bottom to top.
Paired with the Navy Faux Fur Diamond Tree Skirt and the natural green foliage of the Royal Fir, this navy and gold Christmas tree theme creates a luxurious festive centrepiece that feels full, polished and beautifully seasonal.
Shop the look highlights


